TasteVN
  • Home
  • Main Dishes
    • Beef Dishes
    • Braised Food
    • Fried Food
    • Steamed Food
    • Stir-fried Dishes
    • Soup
    • Grilled Food
    • Hot Pot
    • Liquid Dishes
    • Chicken Dishes
    • Dried and Fermented Dishes
    • Vegetarian Dishes
    • Porridge
  • Desserts
    • Cake
    • Ice Cream
    • Sweet Soup
    • Desserts
  • Beverages
    • Beverages
    • Juices
    • Milk Tea
    • Smoothies
  • Snacks
    • Rolls and Salads
    • Salad
    • Snacks
  • Tips & Holidays
    • Festivals & Holidays
    • Kitchen Tips
No Result
View All Result
TasteVN
No Result
View All Result
Home Kitchen Tips

How to Make Lotus Flowers with Oishi Candy for a Prosperous Tet Celebration

by TasteT
3 months ago
in Kitchen Tips
468 25
0
how to make oishi rice paper lotus flowers beautiful for tet hung loc 07974
740
SHARES
3.5k
VIEWS
Share on FacebookShare on Twitter

A beautiful lotus flower to display on holidays and decorate your home more brightly that you made yourself would be wonderful, right? With just some familiar Oishi candies and a few basic tools, you can create a stunning lotus flower! Let’s dive into the Cooking Tips section of TasteVN and show off your skills right away!

Quick view hide
1 1 Ingredients and Tools
2 2 Steps to Follow
2.1 Shaping the candy into lotus petals
2.2 Making the stamens of the lotus flower
2.3 Making the lotus petals
2.4 Making a base for the lotus flower
3 3 Finished product

1 Ingredients and Tools

Ingredients: 3 packs of red Oishi candy, 1 pack of yellow Oishi candy, 1 pack of green Oishi candy

Tools needed: Double-sided tape, clear tape, scissors, candle glue (or a glue gun), plastic bowl, plastic plate, candles,…
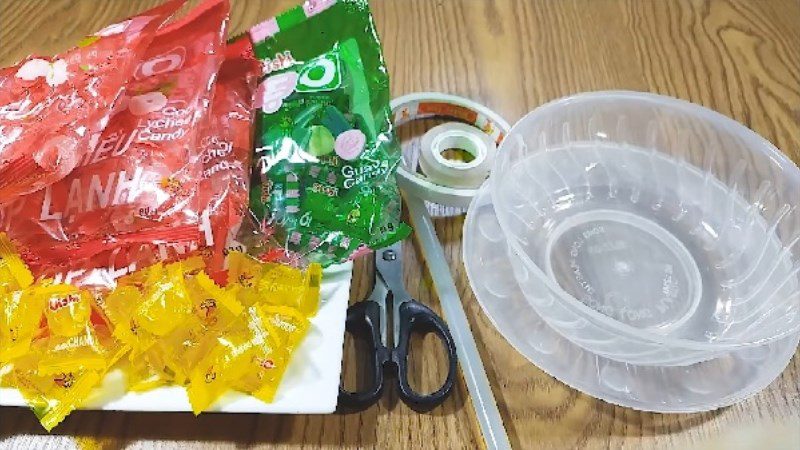
Ingredients and Tools

2 Steps to Follow

Shaping the candy into lotus petals

Method 1: Using double-sided tape

First, stick double-sided tape to the back of the candy and then peel off the backing paper.
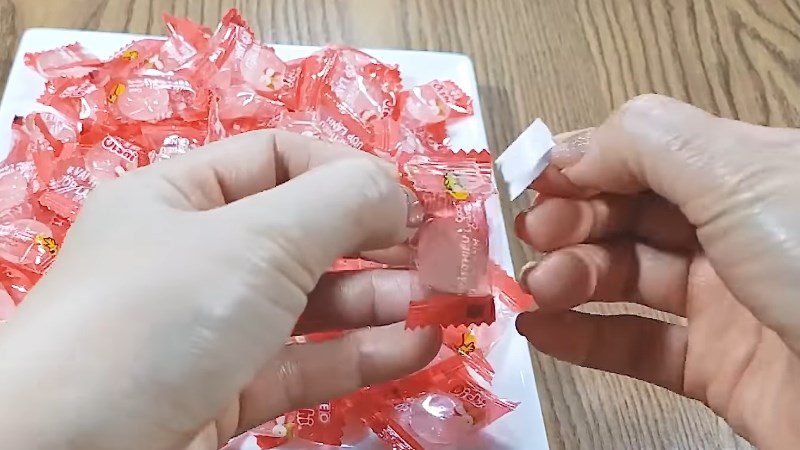
Using double-sided tape

Then, fold the two edges of the candy so that the two outer serrated edges of the candy wrapper are parallel, with the “Oshi candy” label clearly visible on the front, forming a beautiful isosceles triangle.

Similarly, continue to perform these steps until you finish all the candies you have prepared.
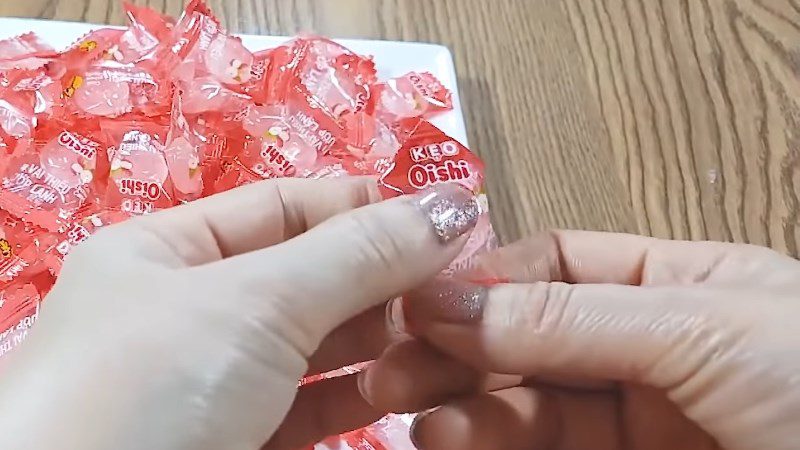
Using double-sided tape

Note: The adhesive strength of double-sided tape can only last for a few days, depending on your needs, you might consider using candle glue to keep the candy wrappers stuck for longer.

Method 2: Using candle glue

To use candle glue, first light a candle and place it securely in a bowl. Then, flip the back of the oshi candy over, and hold the candle glue over the flame for about 3 seconds to let it melt.
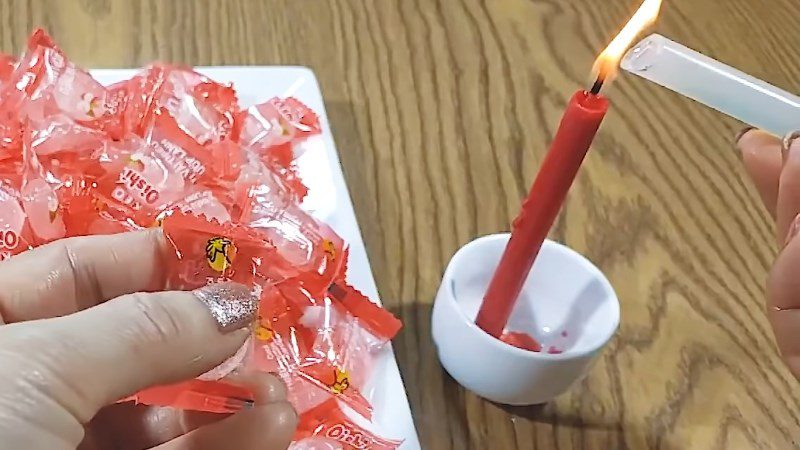
Method 2: Using candle glue

Next, dip the melted candle glue onto the two edges of the candy wrapper.
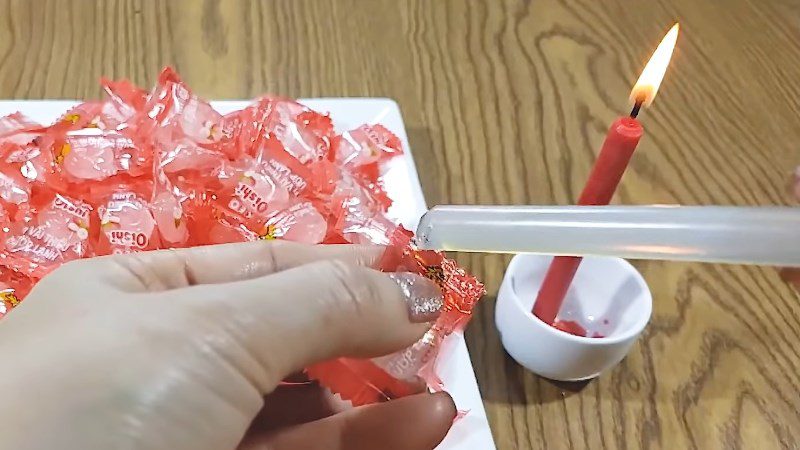
Method 2: Using candle glue

Finally, fold those two edges together so that the two edges of the candy wrapper are parallel, forming a beautiful isosceles triangle, with the word oshi clearly visible on the front of the wrapper, completing one lotus petal.
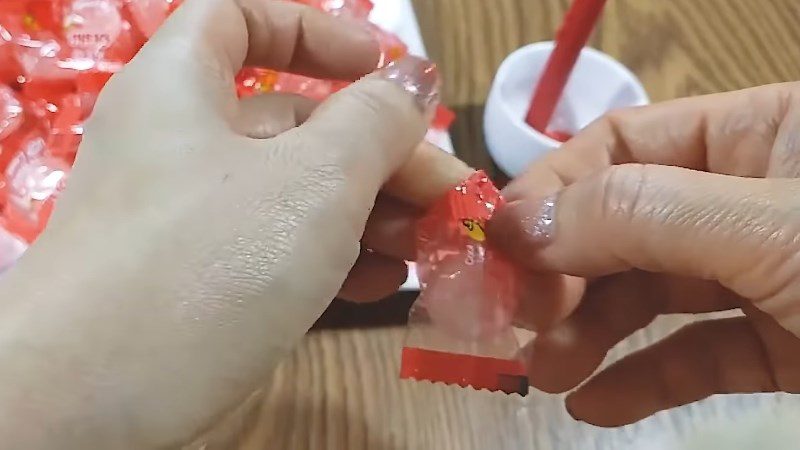
Method 2: Using candle glue

Similarly, you can do this until you have used up all the candies prepared.
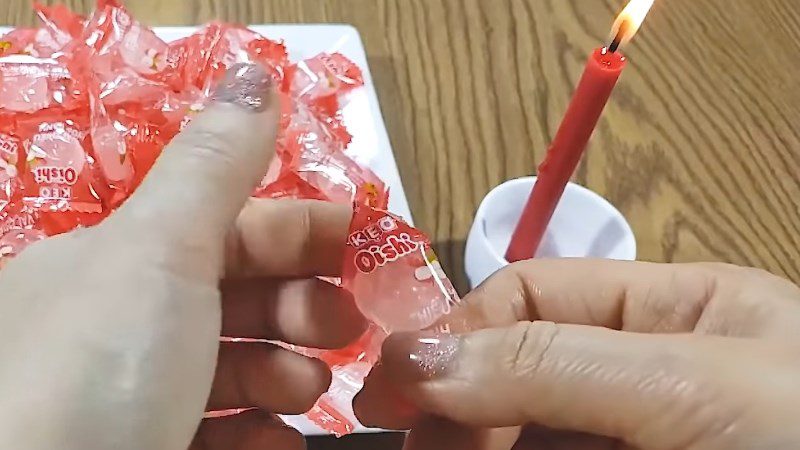
Method 2: Using candle glue

Tip: To prevent the candy wrapper from tearing when dipping into the candle glue, you should apply the glue to the thick plastic edge of the candy wrapper.

Making the stamens of the lotus flower

First, melt the candle wax using a candle, then dip the wax onto 3 symmetrical points at the edge of the plastic bowl.
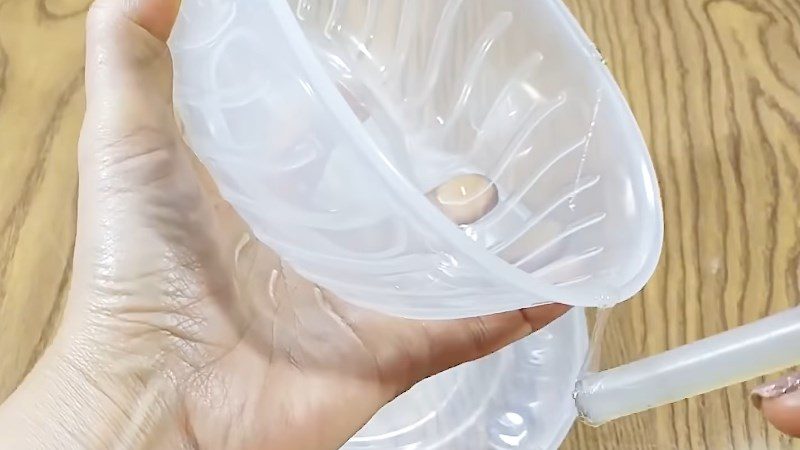
Making the stamens of the lotus flower

Then, stick the upside-down plastic bowl onto the prepared plastic plate. Hold the plastic bowl tightly for 3 seconds to secure it firmly onto the plate.
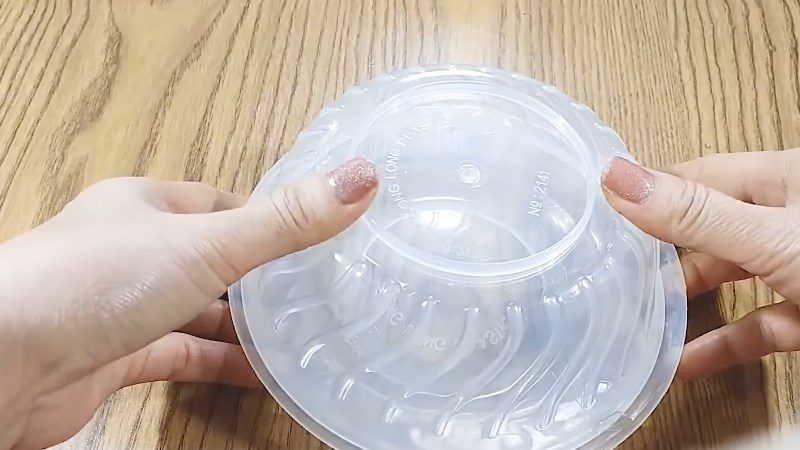
Making the stamens of the lotus flower

After the plastic bowl is securely attached to the plastic plate, use the melted candle wax to dab a circle in the center of the bottom of the bowl.

Then take 4 pieces of yellow candy shaped like petals and stick them onto the bottom of the bowl where you have applied the wax, ensuring that the triangular part of the candy is facing upward as shown below.
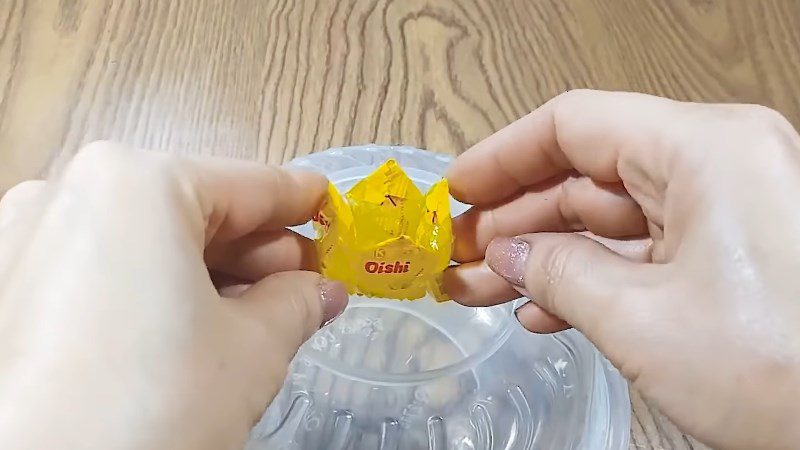
Making the stamens of the lotus flower

Next, use double-sided tape to stick around those 4 candies and then arrange more yellow candy shaped like petals in a circular pattern.

Then, use clear tape to secure that circle.
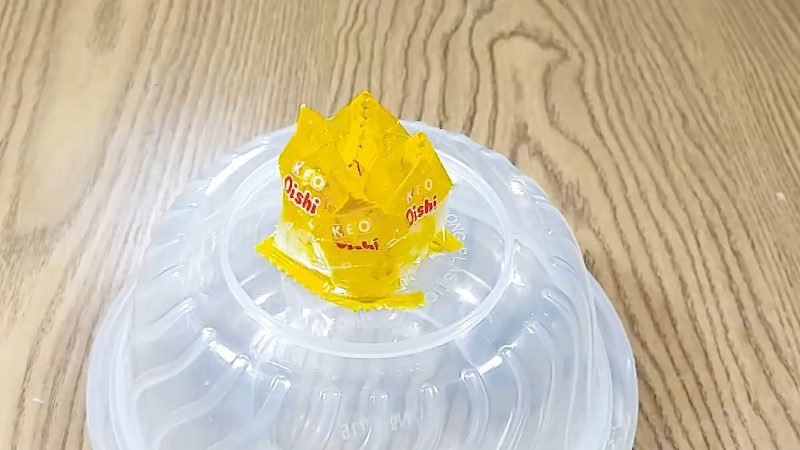
Making the stamens of the lotus flower

Continue to apply double-sided tape and add 2 more circles of yellow oshi candy, then secure them with clear tape.
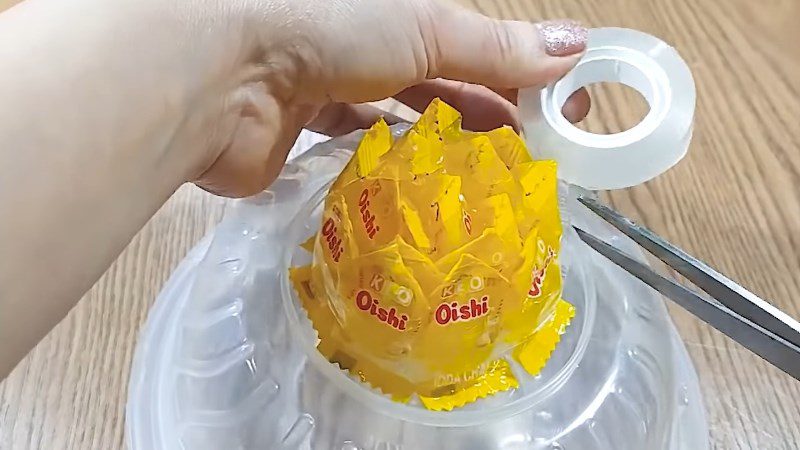
Making the stamens of the lotus flower

For the final circle of stamens, use red oshi candy to create a circle and also secure it with clear tape for added aesthetics.
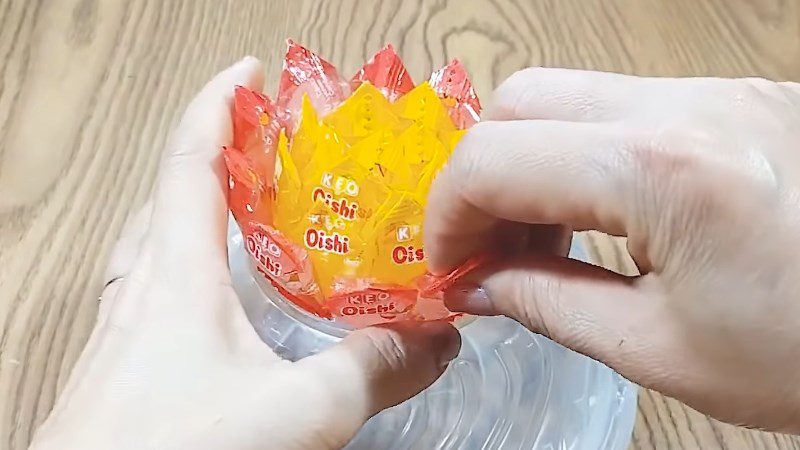
Making the stamens of the lotus flower

Making the lotus petals

Use double-sided tape to stick around the stamens you just made, then attach each red oshi candy so that the red candies are staggered relative to the yellow candies of the stamens.
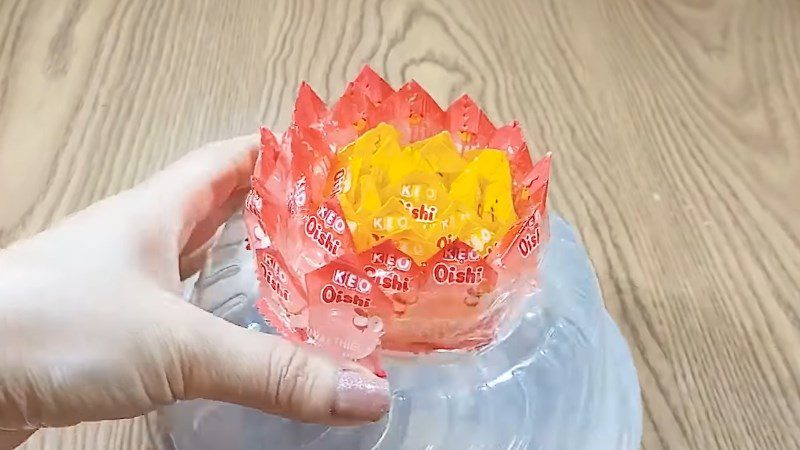
Making lotus petals

Then, secure it with clear tape and another layer of double-sided tape.
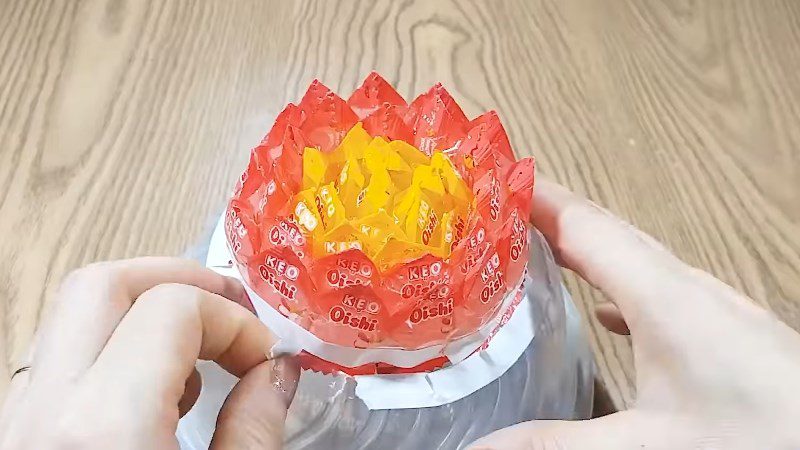
Making lotus petals

Do the same until all the red oshi candy has been shaped into lotus petals, and stop when there is just enough space for a row of green candy next.
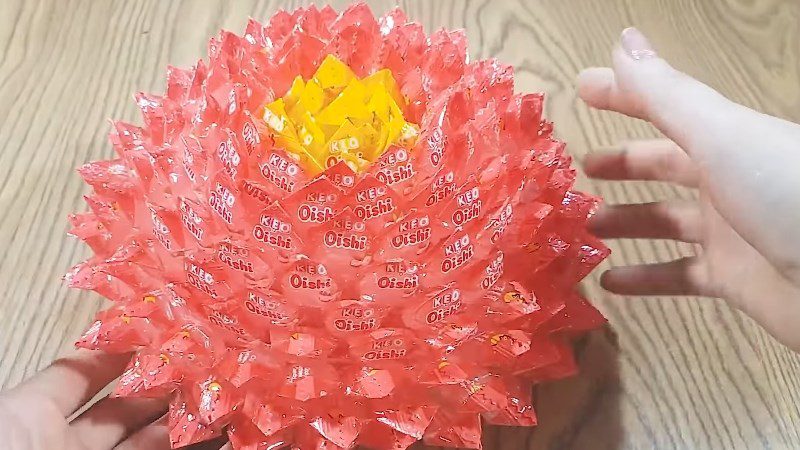
Making lotus petals

Note:
  • Each time you finish a circle of candy, use clear tape to secure the flower shape.
  • To make the layers of petals stick together more beautifully, you should add another layer of double-sided tape.
  • To look more aesthetically pleasing, you should stick the layers of red oshi candy in a staggered manner.

Making a base for the lotus flower

You also use double-sided tape to stick around the petals, then arrange the green oshi candies shaped like lotus petals alternately with the red oshi candies to complete.
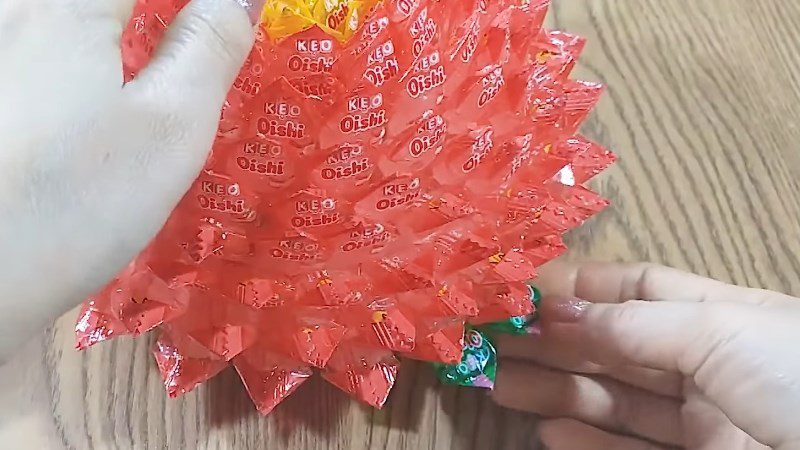
Making a base for the lotus flower

3 Finished product

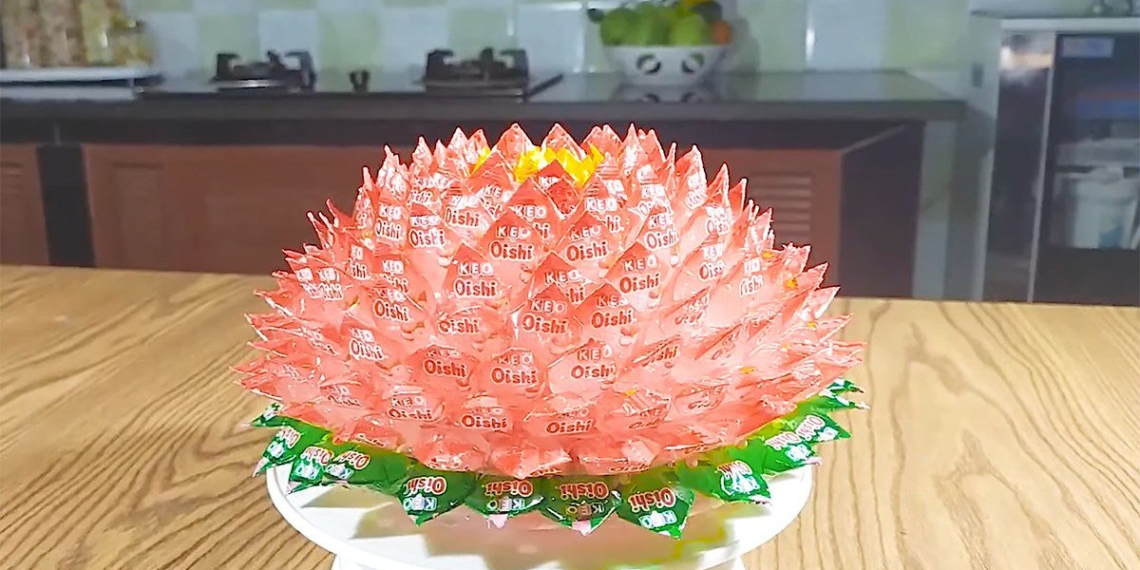
The lotus flower made from oshi candies will have a very beautiful shape once completed. The red, green, and yellow colors are meticulously connected, harmoniously combined to create the appearance of a beautiful lotus flower.

This oshi candy lotus flower promises to make your ancestral altar even more vibrant during this Tet holiday, helping you attract fortune to your home!
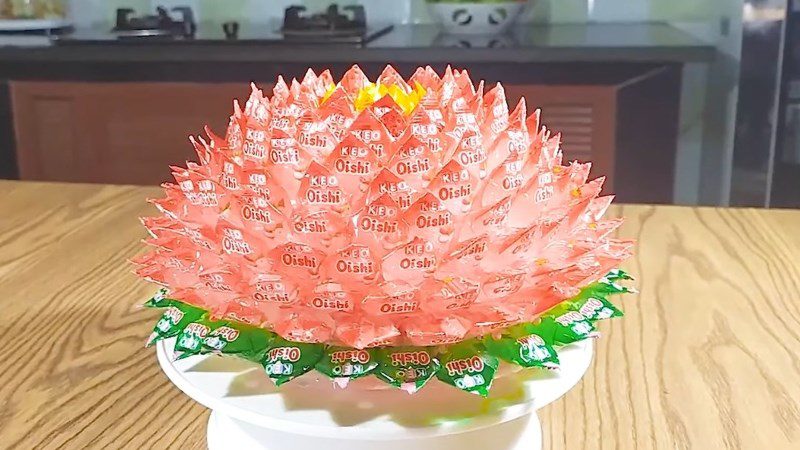
Finished product

See more

  • How to make a lotus flower using Oishi candy for the Tet altar
  • Simple pomelo carving into lotus flower shape for the ancestral altar on Tet
  • How to make crispy fried lotus petal snacks, very simple and delicious

Hope that with the how to make a lotus flower using oishi candy that TasteVN just shared, you can successfully create a beautiful, unique lotus flower to bring fortune home this Tet! Wishing you much luck.
Tags: guide to making a lotus flower with Oishi candyhow to make a lotus flower with Oishi candylotus flower made from Oishi candymake a lotus flower with Oishi candy
Previous Post

How to make delicious and easy-to-make sticky rice cake, a specialty of Ha Giang, for Tet

Next Post

What to Eat Before Drinking Alcohol to Avoid Getting Drunk? 26 Foods to Prevent Intoxication

TasteT

TasteT

I am a food writer specializing in Vietnamese cuisine, sharing traditional recipes, cooking tips, and the culture behind every dish. My goal is to bring the authentic flavors of Vietnam to your kitchen.

Related Posts

No Content Available
Next Post
What to Eat Before Drinking Alcohol to Avoid Getting Drunk? 26 Foods to Prevent Intoxication

What to Eat Before Drinking Alcohol to Avoid Getting Drunk? 26 Foods to Prevent Intoxication

Leave a Reply Cancel reply

Your email address will not be published. Required fields are marked *

Navigate

  • About
  • Privacy Policy
  • Contact

Recent Recipes

3 Simple and Delicious Ways to Grill Eel (Trạch)

3 Simple and Delicious Ways to Grill Eel (Trạch)

3 Ways to Make Delicious Bone-Out Chicken Feet Salad, Easy to Prepare for Snacking

3 Ways to Make Delicious Bone-Out Chicken Feet Salad, Easy to Prepare for Snacking

Browse by Category

  • Beef Dishes
  • Beverages
  • Braised Food
  • Cake
  • Chicken Dishes
  • Desserts
  • Dried and Fermented Dishes
  • Festivals & Holidays
  • Fried Food
  • Grilled Food
  • Hot Pot
  • Ice Cream
  • Juices
  • Kitchen Tips
  • Liquid Dishes
  • Milk Tea
  • Porridge
  • Rolls and Salads
  • Salad
  • Smoothies
  • Snacks
  • Soup
  • Steamed Food
  • Stir-fried Dishes
  • Sweet Soup
  • Vegetarian Dishes

Browse by Ingredients

beef beef stew braised fish cake dish dessert fried dish grilled dishes how to cook porridge how to make cake how to make ice cream into the kitchen mixed salad dish noodle soup snacks soup dish sponge cake steamed dish stir-fried dish stir-fried noodles vegetarian dish

© 2024 TasteVN - The ultimate Vietnam food destination for cooking tips, recipes, and more.

Welcome Back!

Login to your account below

Forgotten Password?

Retrieve your password

Please enter your username or email address to reset your password.

Log In
No Result
View All Result
  • Home
  • Main Dishes
    • Beef Dishes
    • Braised Food
    • Fried Food
    • Steamed Food
    • Stir-fried Dishes
    • Soup
    • Grilled Food
    • Hot Pot
    • Liquid Dishes
    • Chicken Dishes
    • Dried and Fermented Dishes
    • Vegetarian Dishes
    • Porridge
  • Desserts
    • Cake
    • Ice Cream
    • Sweet Soup
    • Desserts
  • Beverages
    • Beverages
    • Juices
    • Milk Tea
    • Smoothies
  • Snacks
    • Rolls and Salads
    • Salad
    • Snacks
  • Tips & Holidays
    • Festivals & Holidays
    • Kitchen Tips

© 2024 TasteVN - The ultimate Vietnam food destination for cooking tips, recipes, and more.