TasteVN
  • Home
  • Main Dishes
    • Beef Dishes
    • Braised Food
    • Fried Food
    • Steamed Food
    • Stir-fried Dishes
    • Soup
    • Grilled Food
    • Hot Pot
    • Liquid Dishes
    • Chicken Dishes
    • Dried and Fermented Dishes
    • Vegetarian Dishes
    • Porridge
  • Desserts
    • Cake
    • Ice Cream
    • Sweet Soup
    • Desserts
  • Beverages
    • Beverages
    • Juices
    • Milk Tea
    • Smoothies
  • Snacks
    • Rolls and Salads
    • Salad
    • Snacks
  • Tips & Holidays
    • Festivals & Holidays
    • Kitchen Tips
No Result
View All Result
TasteVN
No Result
View All Result
Home Cake

How to Make Delicious and Simple Sticky Rice Cakes with Taro Filling and Cassava

by TasteT
5 months ago
in Cake
463 30
0
how to make sweet potato cake with taro and fragrant sweet potato dough 08520
739
SHARES
3.5k
VIEWS
Share on FacebookShare on Twitter
  • Preparation

    30 minutes

  • Cooking

    1 hour

  • Difficulty

    Easy

Soft and fragrant cassava sticky rice cake with taro filling, rich and fatty, deeply rooted in folk culture is a cake dish that is very easy to make. Let’s cook with TasteVN right away for the whole family to enjoy!

Quick view hide
1 Prepare the ingredients
2 Prepare the taro and coconut filling
3 Mixing the dough
4 Wrapping the cake
5 Boiling the cake
6 Final product
7 How to store sticky rice cake

Ingredients for Cassava Sticky Rice Cake with Taro Filling For 4 people

Sticky rice 600 gr Taro 450 gr Cassava 450 gr Pandan leaf water 500 ml Dried coconut 30 gr Coconut flour 60 gr Sugar 130 gr Salt A little

How to choose fresh ingredients

How to choose delicious, chewy cassava (manioc) roots with less fiber

  • When choosing cassava, you should pay attention to select the hill cassava type, because this type will be very fluffy and fragrant when eaten.
  • To choose good cassava roots, you should select fresh, plump, straight roots with thin skin, as they will have less fiber, be soft, and sweet.
  • Try using your fingernail to lightly scrape the thin outer skin of the cassava, if the inner skin is light pink, choose that one; if it’s white, you should skip it, because the pink skin will have fewer toxins than the white skin.
  • Cassava (manioc) roots should not be kept too long, as this will make the roots become hard, dry, and no longer delicious. Cassava is similar to bamboo shoots; although tasty, you need to carefully preprocess it to remove the toxins inside the cassava root before cooking.
  • It’s best to preprocess the cassava one day before making steamed cassava cake!

How to choose delicious, chewy taro

  • Size: Choose roots that are medium-sized, not too large and not too small.
  • Shape: Choose roots that are evenly round, egg-shaped, with rough skin, many roots, and dirt clinging to the skin.
  • Color: Choose taro with an outer skin that has many eyes, and the inner flesh with many purple streaks; this indicates that the taro will be chewy and delicious. If the outer skin is smooth, the taro will often be hard.
See details: How to choose delicious, chewy taro without being hard

Ingredients for the dish of steamed cassava cake with taro filling

How to prepare Cassava Cake with Taro Filling

  • Prepare the ingredients

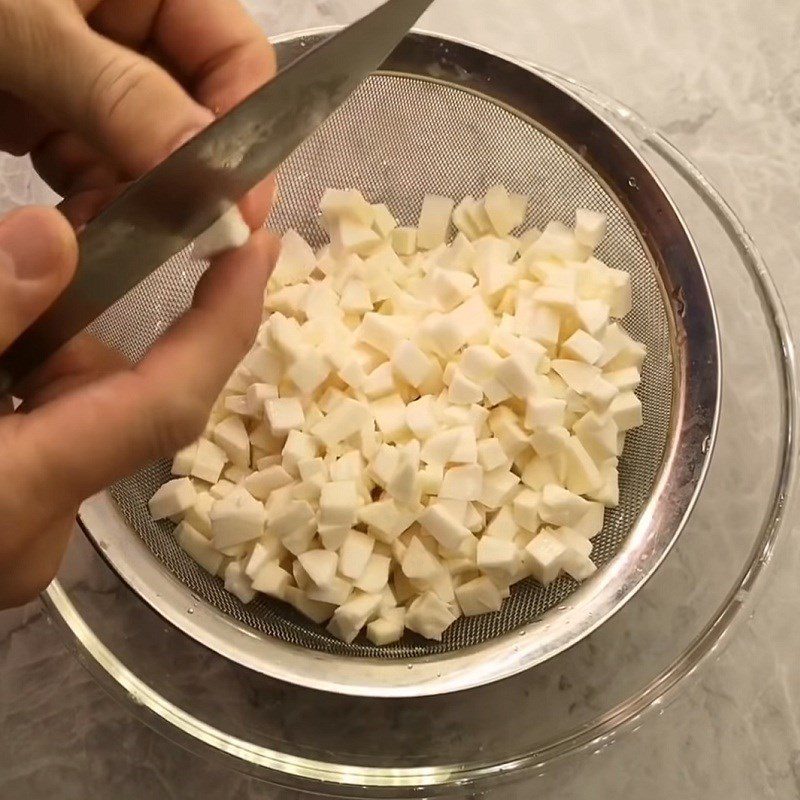
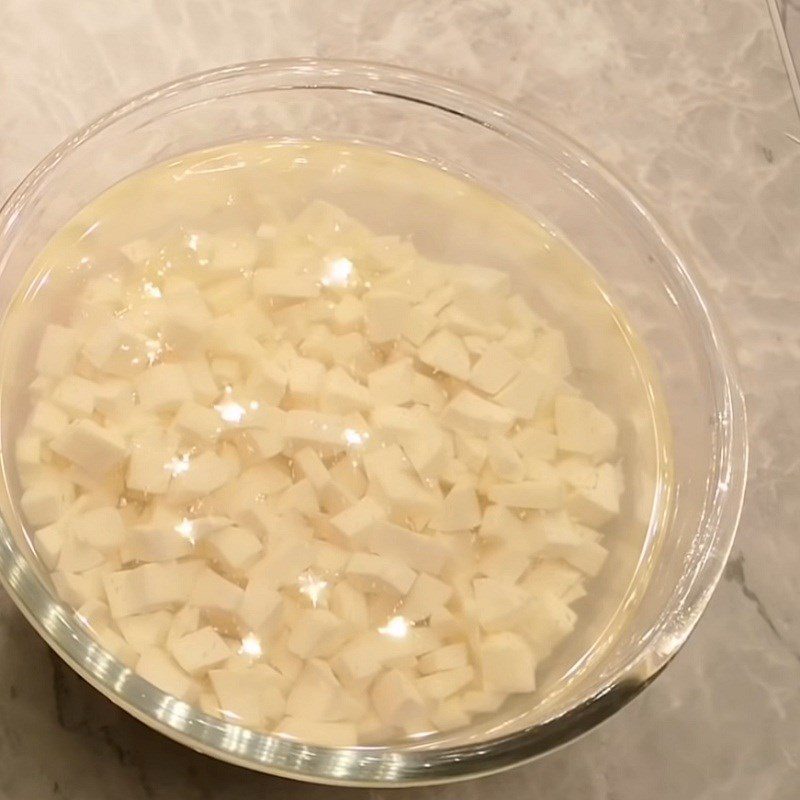
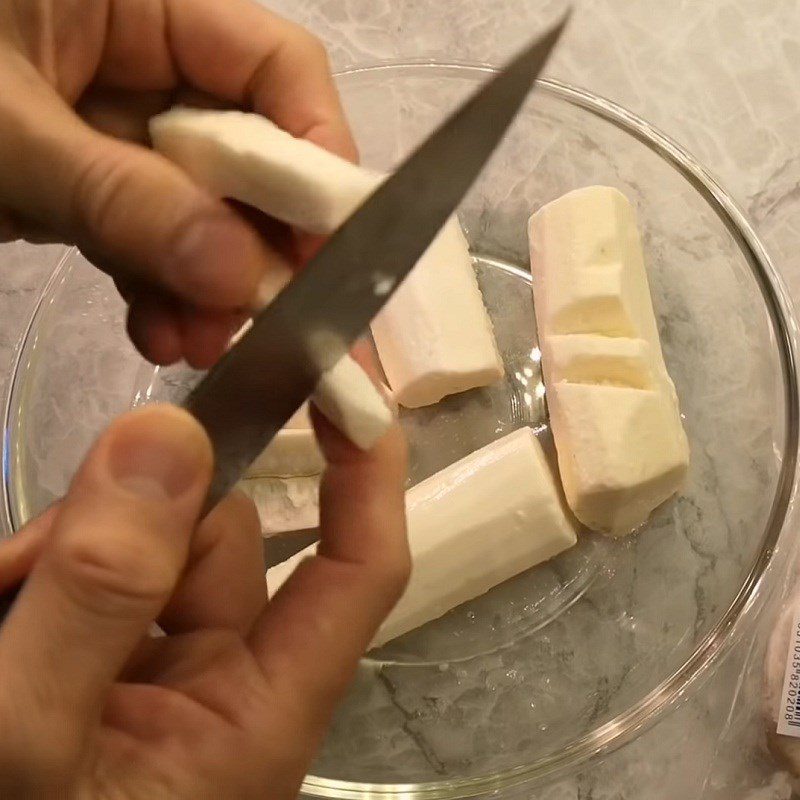
    After peeling the cassava, cut it into small pieces and then dice it. Next, put the cassava into a bowl with 1 teaspoon of salt and soak for about 30 minutes.

    How to prepare cassava to reduce toxicity:
    • The outer skin of cassava often contains toxins, so it’s best to prepare the cassava a day before making the cake!
    • Soaking cassava in a little salt helps prevent browning and reduces toxins.
    • During the soaking process, you must frequently change the water.

    For the taro, peel the outer skin, then soak it in diluted salt water for about 10 minutes and drain. Next, cut the taro into small square pieces.

    Rinse the sticky rice with water to clean it, then put it in a bowl to soak with 500ml of pandan leaf water and 1 teaspoon of salt mixed well; let the rice soak for about 3 hours.

    Tips to clean taro without itching:
    • Method 1: When buying taro, do not wash it first but leave it whole and use dry hands to peel the skin and soak it in diluted salt water immediately after peeling to remove the itchy substance.
    • Method 2: Use nylon gloves or cloth gloves when preparing taro to limit contact with the itchy substance. However, this method makes it harder to grip and takes more time to peel.
    • Method 3: Wrap the taro in aluminum foil and place it in the oven for about 2 – 3 minutes to allow the sap to flow out.
    Step 1 Prepare the ingredients for Cassava Cake with Taro Filling
    Step 1 Prepare the ingredients for Cassava Cake with Taro Filling
    Step 1 Prepare the ingredients for the cassava cake with taro filling
    Step 1 Prepare the ingredients for the cassava cake with taro filling
  • Prepare the taro and coconut filling

    Put the taro into a steamer placed on the stove, steam for about 20 minutes until cooked.

    After that, take the taro out and put it in a pan, use a flat spatula to mash the taro with 50ml of water and proceed to stir-fry the filling over medium heat.

    Season the taro with 1 teaspoon of salt, 50g of sugar, mix well to combine the taro and seasoning.

    Next, put 30g of dried coconut into a bowl along with 50ml of water and soak for about 20 minutes to let the coconut expand.

    Then drain the water and take the coconut meat into the taro pan, stir quickly and add another 50g of sugar.

    Continue to stir well until the filling thickens, then turn off the heat and let it cool.

    Tip: While frying the filling, you should stir quickly and continuously to prevent it from burning.
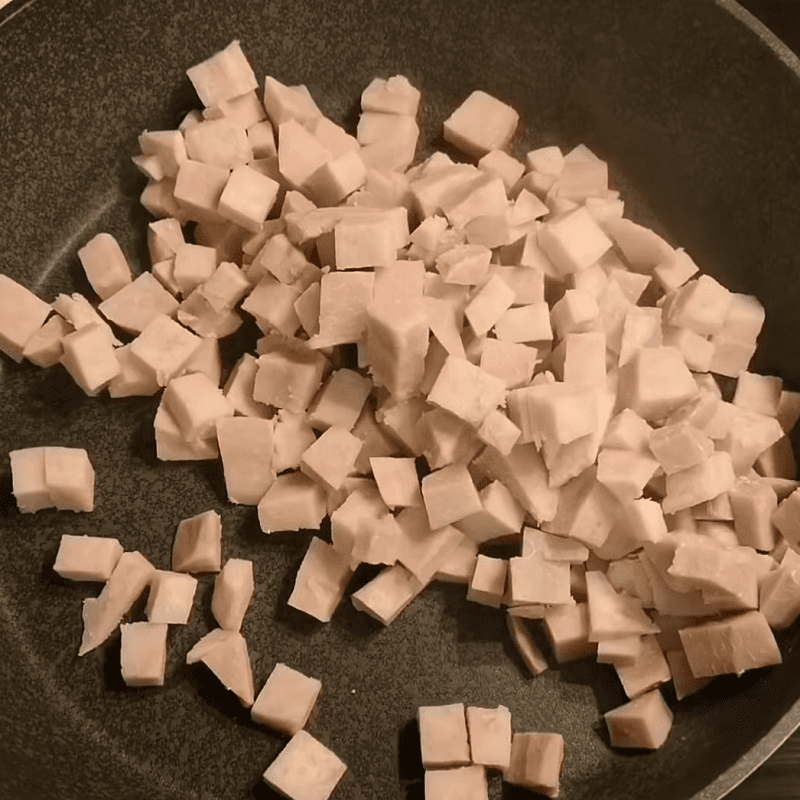
    Step 2 Prepare the taro and coconut filling for the cassava cake
    Step 2 Prepare the taro and coconut filling for the cassava cake
    Step 2 Prepare the taro and coconut filling for the cassava cake
    Step 2 Prepare the taro and coconut filling for the cassava cake
  • Mixing the dough

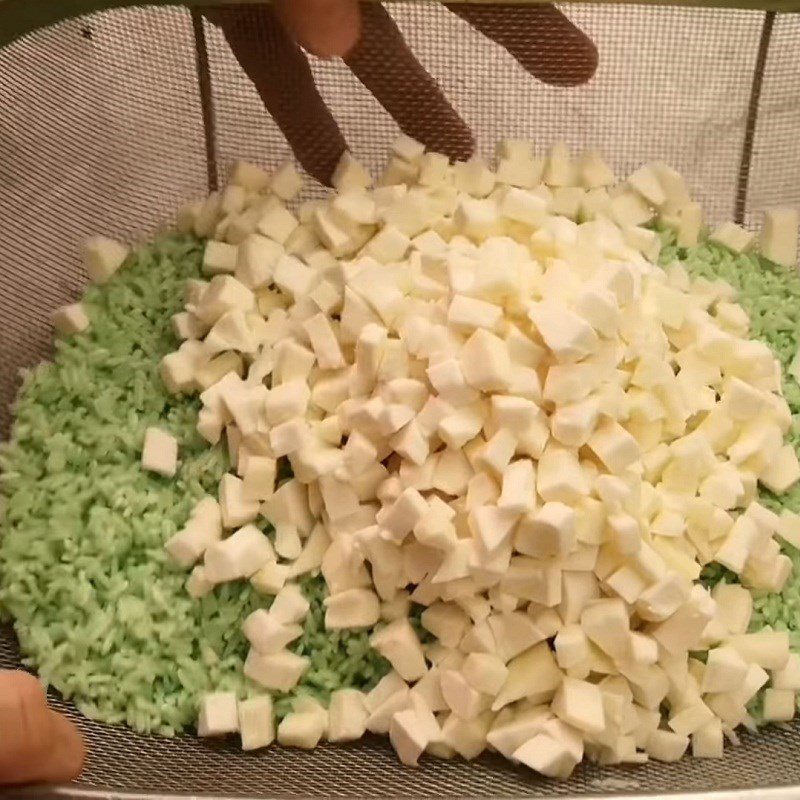
    After soaking the rice, drain it in a basket. Wash the cassava to clean it and then let it drain.

    Next, put the sticky rice and cassava into a large basket and mix them well, then add 1 teaspoon of salt.

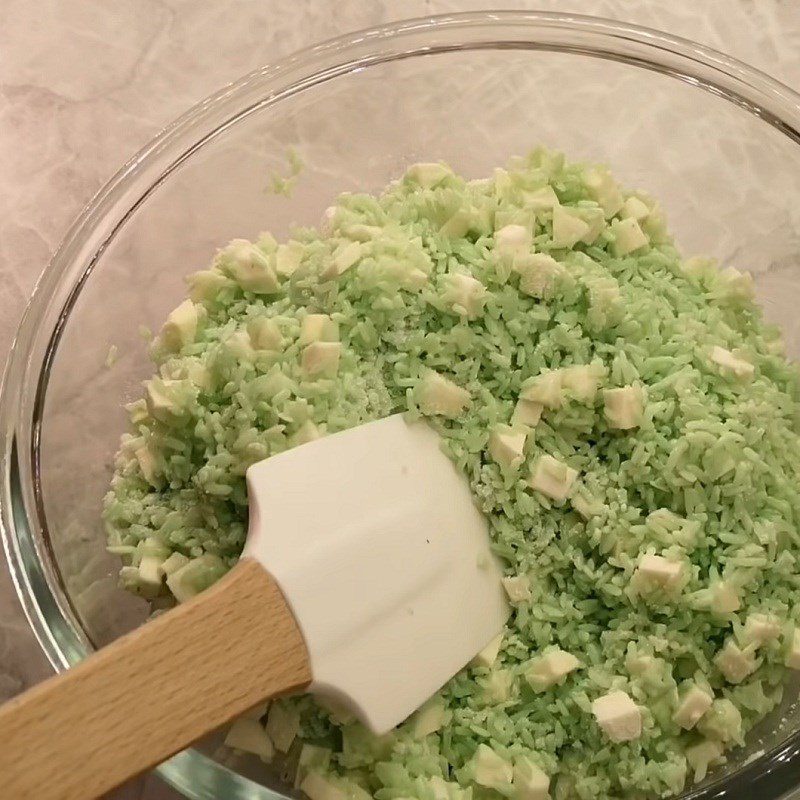
    Mix well and then transfer the sticky rice and cassava mixture to a large bowl and mix thoroughly with 60g of grated coconut and 30g of sugar.
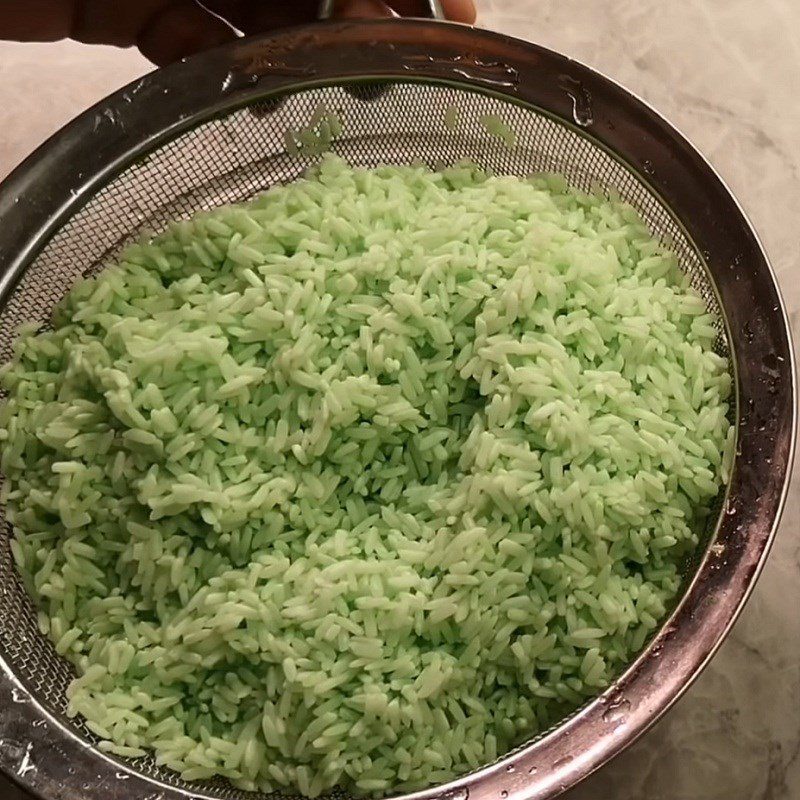
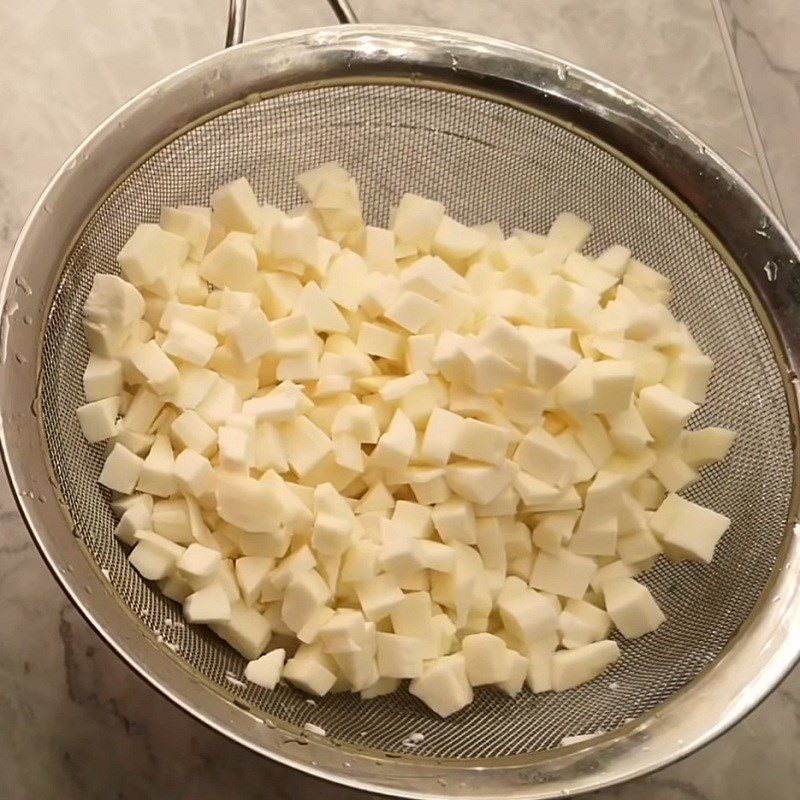
    Step 3 Mixing the dough for cassava cake with taro filling
    Step 3 Mixing the dough for cassava cake with taro filling
    Step 3 Mixing the dough for cassava cake with taro filling
    Step 3 Mixing the dough for cassava cake with taro filling
  • Wrapping the cake

    After cooling, divide the taro filling evenly and roll it into balls, each ball weighing about 30g.

    Divide the sticky rice mixture evenly into bowls, each bowl containing about 90g of the sticky rice and cassava mixture.

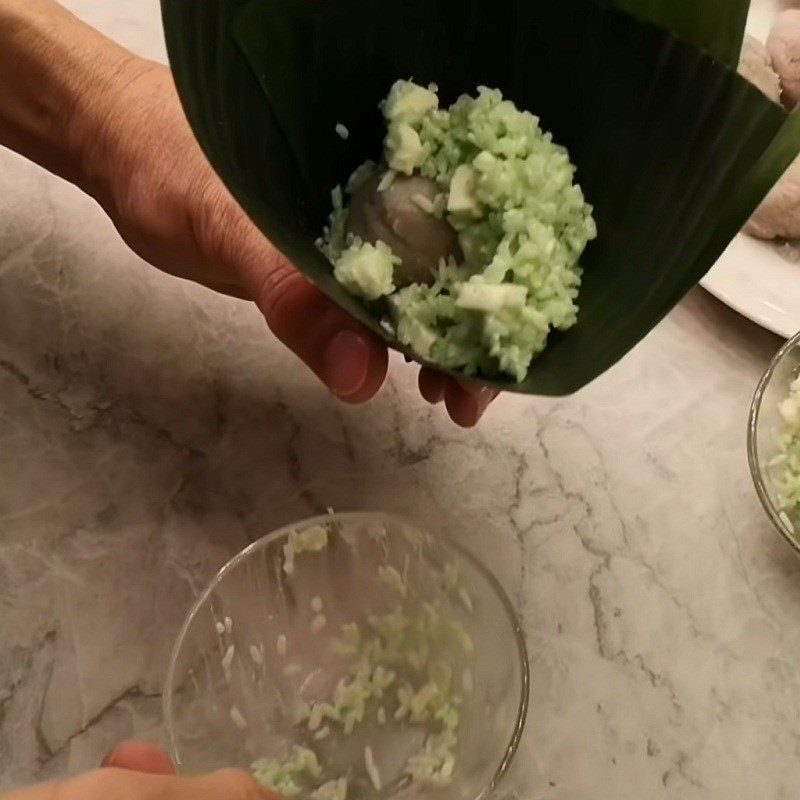
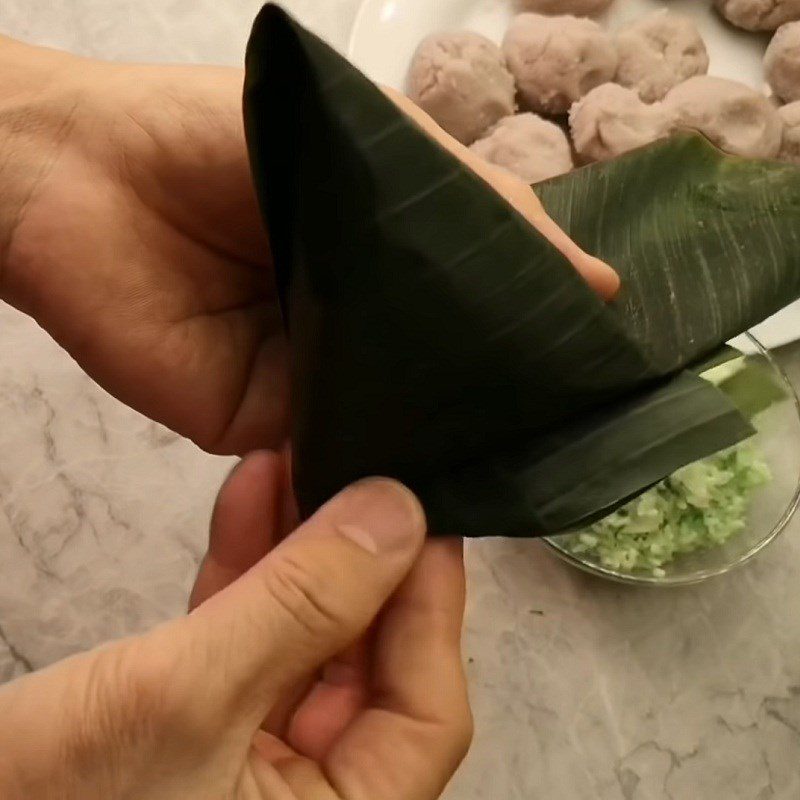
    Layer 2 banana leaves on top of each other, fold the edges of the leaves, then wrap the leaves into a funnel shape. Place 2 tablespoons of sticky rice at the bottom to create a small hole, then put the taro filling in the center and add the remaining sticky rice on top.

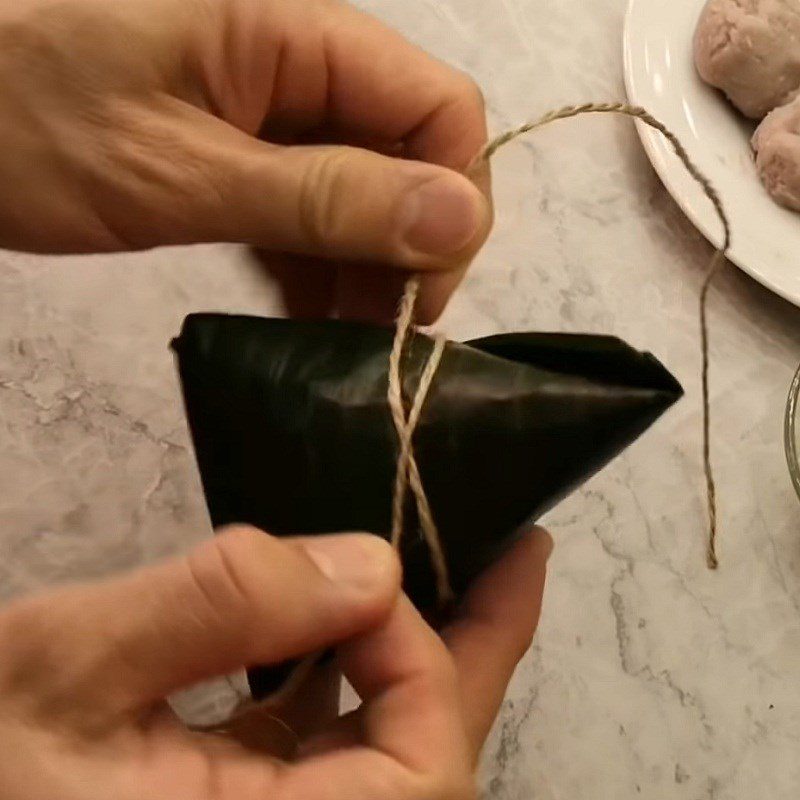
    Fold the remaining edges of the leaves and use string to tie each corner of the cake tightly. Continue wrapping until all the bowls of sticky rice are used up.

    How to prepare banana leaves and tying string
    • Prepare banana leaves by tearing them into pieces approximately 15cm x 25cm, clean the leaves, then blanch them in boiling water briefly to soften, remove the leaves and dry them with a clean towel.
    • The tying string used for wrapping the cake is dried banana string available at supermarkets. Buy the tying string, blanch it briefly in water twice, then dry it again; at this point, the string will be softer and stronger.
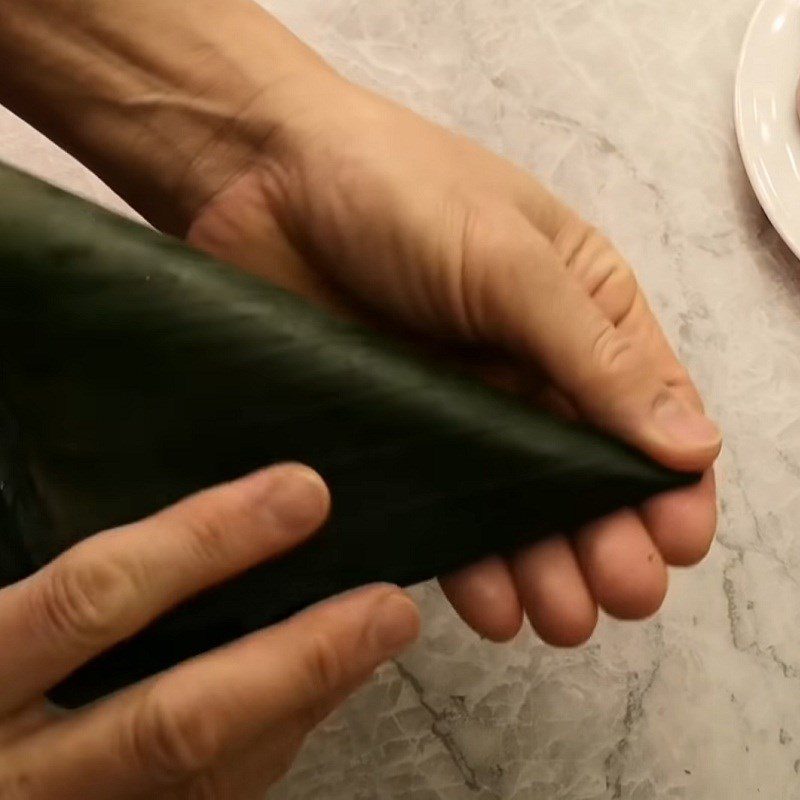
    Step 4 Wrapping the cake Taro-filled cassava cake
    Step 4 Wrapping the cake Taro-filled cassava cake
    Step 4 Wrapping the cake Taro-filled cassava cake
    Step 4 Wrapping the cake Taro-filled cassava cake
  • Boiling the cake

    Use a few banana leaves to line the bottom of the pot, then place the cake in the pot and pour enough water to cover the cake, cover with a lid. Place the pot on the stove and boil for about 2 hours until the cake is cooked.
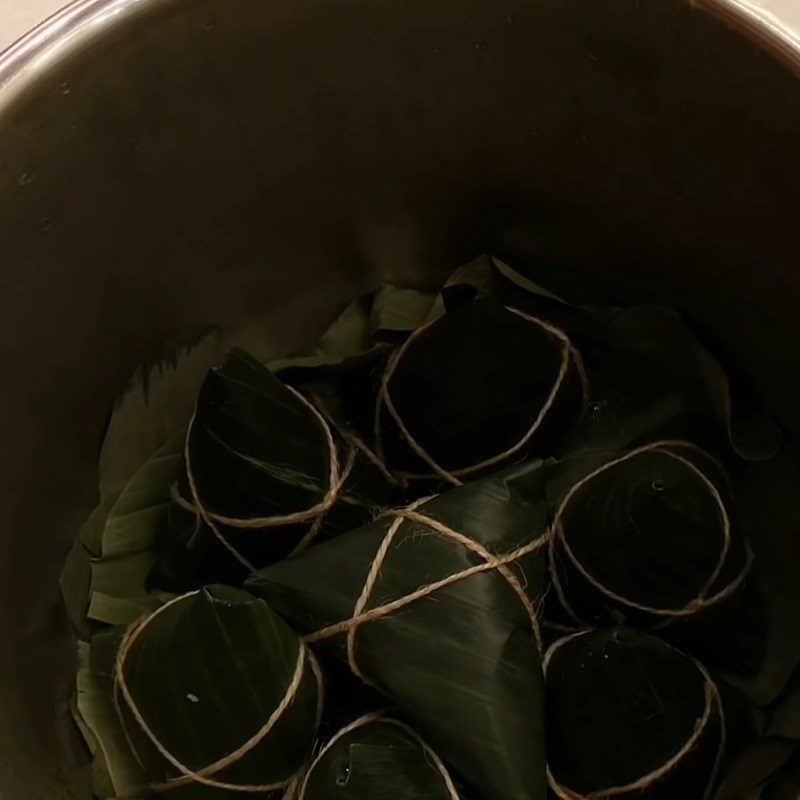
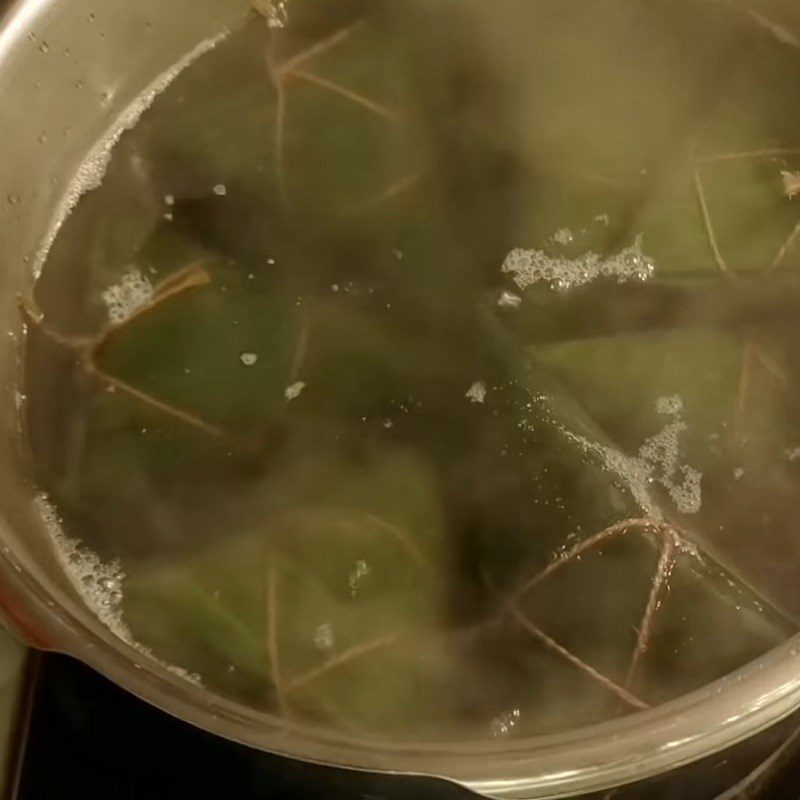
    Step 5 Boiling the cake Cassava cake with taro filling
    Step 5 Boiling the cake Cassava cake with taro filling
  • Final product

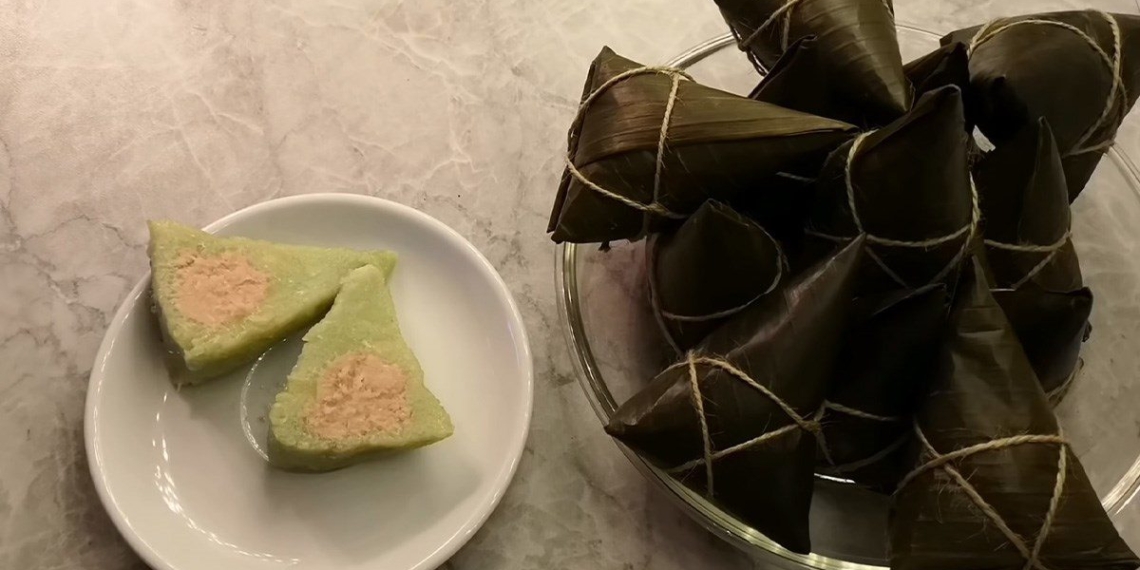
    The cassava cake with taro filling has a chewy exterior thanks to the cassava and releases the fragrant aroma of pandan leaves, with a creamy and sweet taro filling that is very appealing.
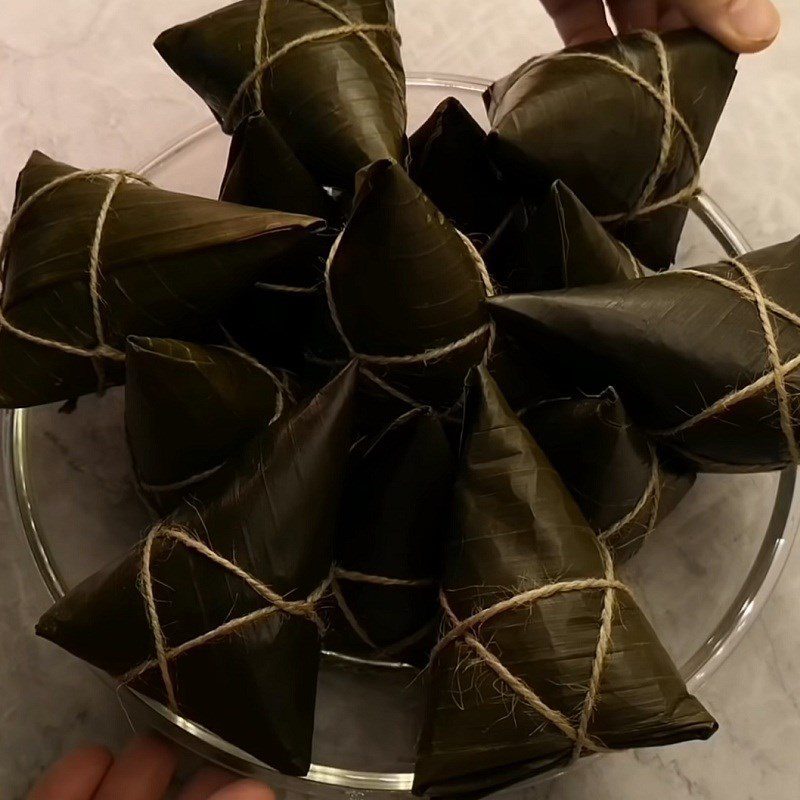
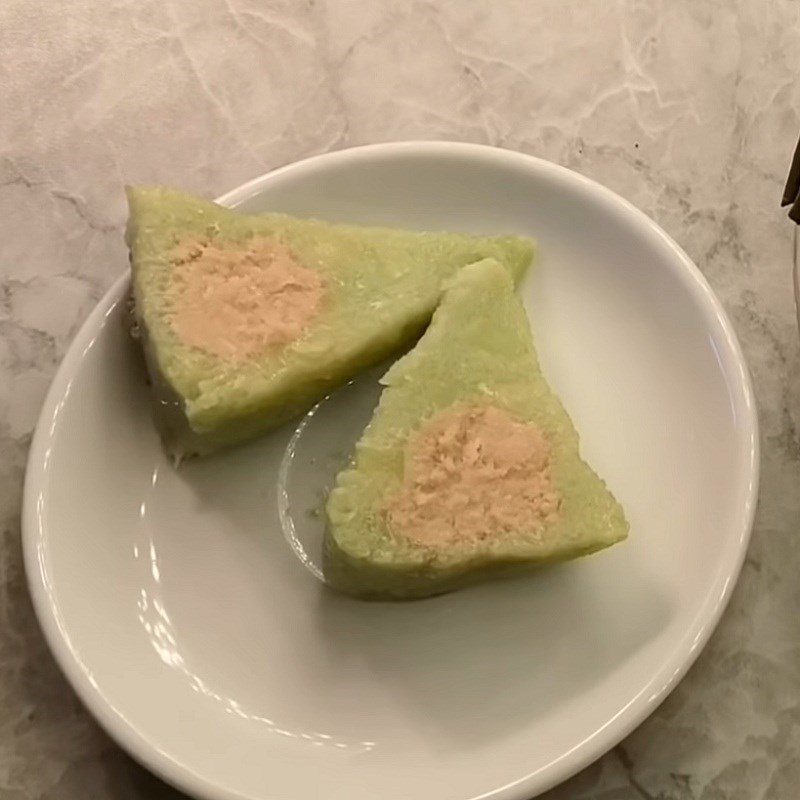
    Step 6 Final product Cassava cake with taro filling
    Step 6 Final product Cassava cake with taro filling

How to store sticky rice cake

  • After boiling, let the sticky rice cake cool at room temperature for 10 – 12 hours.
  • If you want to use it longer, you can store it in the refrigerator for 1 – 2 days, and when eating, steam it again to enjoy it hot.
See more:
  • How to fix undercooked sticky rice cake, square cake extremely effectively
  • How to store square cake – sticky rice cake without spoiling, delicious throughout Tet
  • How to make salted egg sticky rice cake fragrant, rich, soft and delicious for Tet

So the guide on how to make sticky rice cake with cassava and taro filling is complete, very simple, right? Wish you success in making this delicious, fragrant sticky rice cake with cassava and taro filling!

*Refer to images and recipes from the YouTube channel: Văn Phi Thông
Cooking time: 60 minutes
Level: Easy
Tags: how to make steamed tapioca cakesteamed tapioca cakesteamed tapioca cake recipesteamed tapioca cake with taro filling
Previous Post

World-famous seductive Bitter Mai Tai Cocktail Recipe

Next Post

Delicious and Unusual Fried Noodles with Pâté: Rich and Appealing

TasteT

TasteT

I am a food writer specializing in Vietnamese cuisine, sharing traditional recipes, cooking tips, and the culture behind every dish. My goal is to bring the authentic flavors of Vietnam to your kitchen.

Related Posts

No Content Available
Next Post

Delicious and Unusual Fried Noodles with Pâté: Rich and Appealing

Leave a Reply Cancel reply

Your email address will not be published. Required fields are marked *

Navigate

  • About
  • Privacy Policy
  • Contact

Recent Recipes

How to make delicious and nutritious oat milk with lotus seeds

How to make delicious and nutritious oat milk with lotus seeds

2 Simple Ways to Make Delicious Sausage Rolls for a Convenient Breakfast

2 Simple Ways to Make Delicious Sausage Rolls for a Convenient Breakfast

Browse by Category

  • Beef Dishes
  • Beverages
  • Braised Food
  • Cake
  • Chicken Dishes
  • Desserts
  • Dried and Fermented Dishes
  • Festivals & Holidays
  • Fried Food
  • Grilled Food
  • Hot Pot
  • Ice Cream
  • Juices
  • Kitchen Tips
  • Liquid Dishes
  • Milk Tea
  • Porridge
  • Rolls and Salads
  • Salad
  • Smoothies
  • Snacks
  • Soup
  • Steamed Food
  • Stir-fried Dishes
  • Sweet Soup
  • Vegetarian Dishes

Browse by Ingredients

beef beef stew braised fish cake dish dessert fried dish grilled dishes how to cook porridge how to make cake how to make ice cream into the kitchen mixed salad dish noodle soup snacks soup dish sponge cake steamed dish stir-fried dish stir-fried noodles vegetarian dish

© 2024 TasteVN - The ultimate Vietnam food destination for cooking tips, recipes, and more.

Welcome Back!

Login to your account below

Forgotten Password?

Retrieve your password

Please enter your username or email address to reset your password.

Log In
No Result
View All Result
  • Home
  • Main Dishes
    • Beef Dishes
    • Braised Food
    • Fried Food
    • Steamed Food
    • Stir-fried Dishes
    • Soup
    • Grilled Food
    • Hot Pot
    • Liquid Dishes
    • Chicken Dishes
    • Dried and Fermented Dishes
    • Vegetarian Dishes
    • Porridge
  • Desserts
    • Cake
    • Ice Cream
    • Sweet Soup
    • Desserts
  • Beverages
    • Beverages
    • Juices
    • Milk Tea
    • Smoothies
  • Snacks
    • Rolls and Salads
    • Salad
    • Snacks
  • Tips & Holidays
    • Festivals & Holidays
    • Kitchen Tips

© 2024 TasteVN - The ultimate Vietnam food destination for cooking tips, recipes, and more.