TasteVN
  • Home
  • Main Dishes
    • Beef Dishes
    • Braised Food
    • Fried Food
    • Steamed Food
    • Stir-fried Dishes
    • Soup
    • Grilled Food
    • Hot Pot
    • Liquid Dishes
    • Chicken Dishes
    • Dried and Fermented Dishes
    • Vegetarian Dishes
    • Porridge
  • Desserts
    • Cake
    • Ice Cream
    • Sweet Soup
    • Desserts
  • Beverages
    • Beverages
    • Juices
    • Milk Tea
    • Smoothies
  • Snacks
    • Rolls and Salads
    • Salad
    • Snacks
  • Tips & Holidays
    • Festivals & Holidays
    • Kitchen Tips
No Result
View All Result
TasteVN
No Result
View All Result
Home Kitchen Tips

How to make multi-layer peach blossom cake with red bean filling for the Mid-Autumn Festival

by TasteT
3 months ago
in Kitchen Tips
459 34
0
how to make peach flower cake with red bean filling for tet holiday 18088
740
SHARES
3.5k
VIEWS
Share on FacebookShare on Twitter

Mooncake is an essential dish in the lantern festival. However, this holiday if you want to try a different, unique cake to treat your family, let’s join TasteVN cook and show off your skills right away with the thousand-layer peach blossom cake filled with rich red bean paste, which is very appealing!

Quick view hide
1 Soak the red beans
2 Simmer and puree the red beans
3 Red bean filling
4 Final product
5 Make the Water Dough
6 Make the Oil Dough
7 Make the cake wrapper
8 Wrap the filling
9 Shape the peach blossom
10 Baking the cake
11 Completion

1. How to cook red bean paste

How to cook red bean paste
  • Preparation

    5 hours

  • Cooking

    1 hour

  • Difficulty

    Easy

Ingredients for How to cook red bean paste For 300g of filling

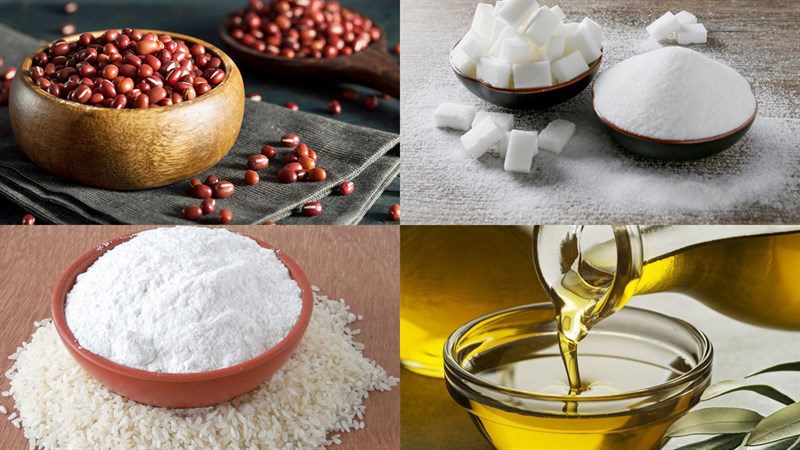
Red beans 250 g Water 800 ml Sugar 130 g Glutinous rice flour 30 g Water 45 ml (Mix with glutinous rice flour) Cooking oil 55 g

How to choose good quality red beans

  • Choose beans that are bright red, free from pests, and have no signs of mold or unpleasant odors.
  • Choose beans that are of moderate size so that after cooking, the beans achieve the desired softness and delicious taste.
  • Avoid choosing oversized beans, as these tend to taste less good, are less nutritious than smaller beans, and especially often create a slight bitterness when eaten.
See more: The benefits of red beans

Ingredients for making multi-layer peach blossom cake with red bean filling

Tools Required

Non-stick pan, bowl, stove

How to Make Red Bean Filling

  • Soak the red beans

    Wash the red beans, then soak them in water for 5 – 7 hours or overnight.

    Step 1 Soak the red beans How to make red bean filling
  • Simmer and puree the red beans

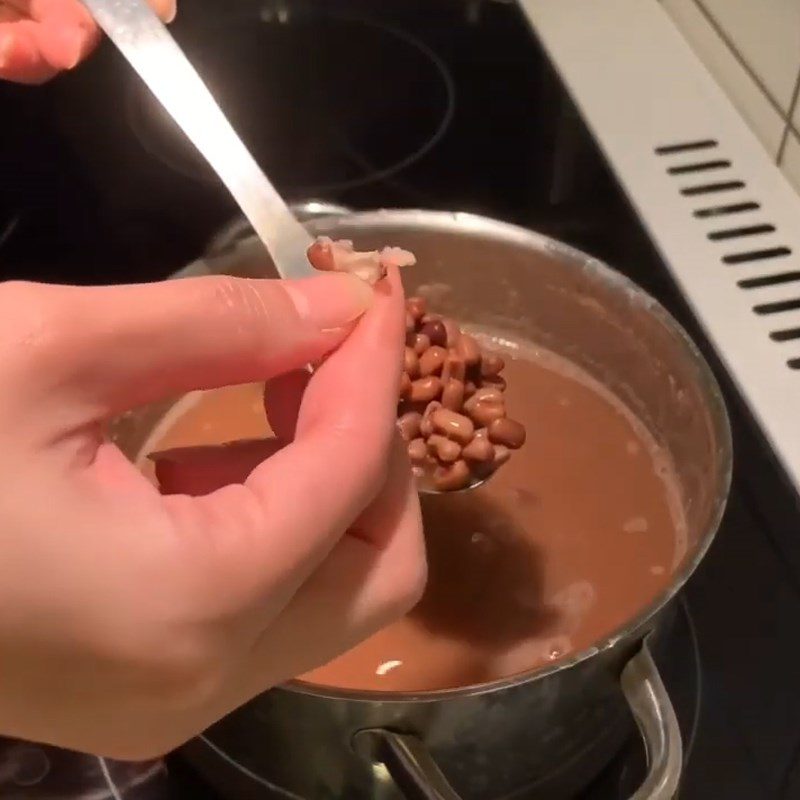
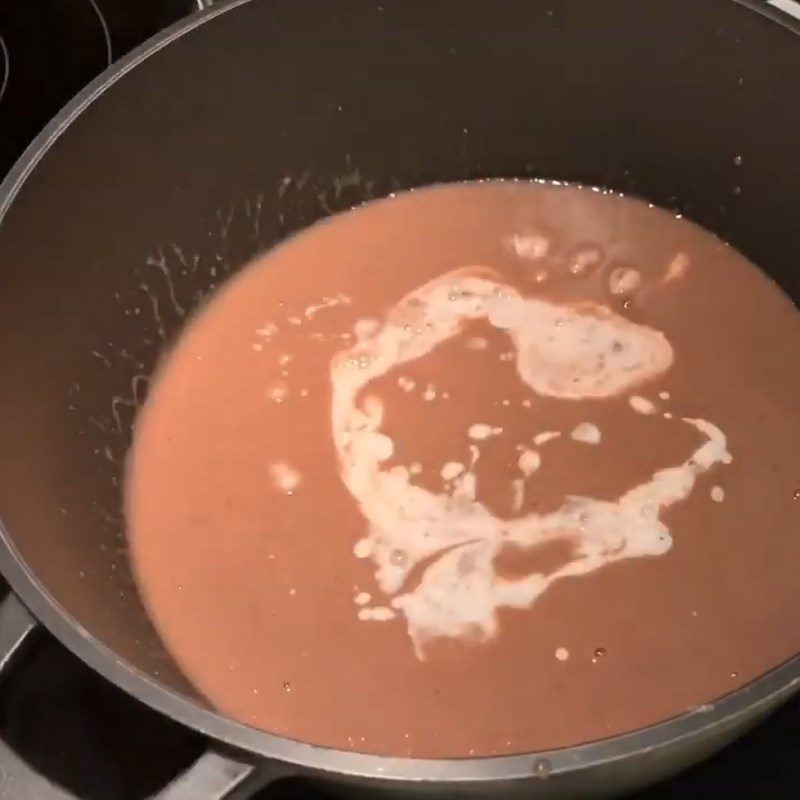
    Add the red beans to a pot with 800ml of water, ½ teaspoon of salt, and cook over high heat until the mixture boils.

    When the mixture boils, skim off the impurities, reduce the heat, and simmer the beans until they are soft.

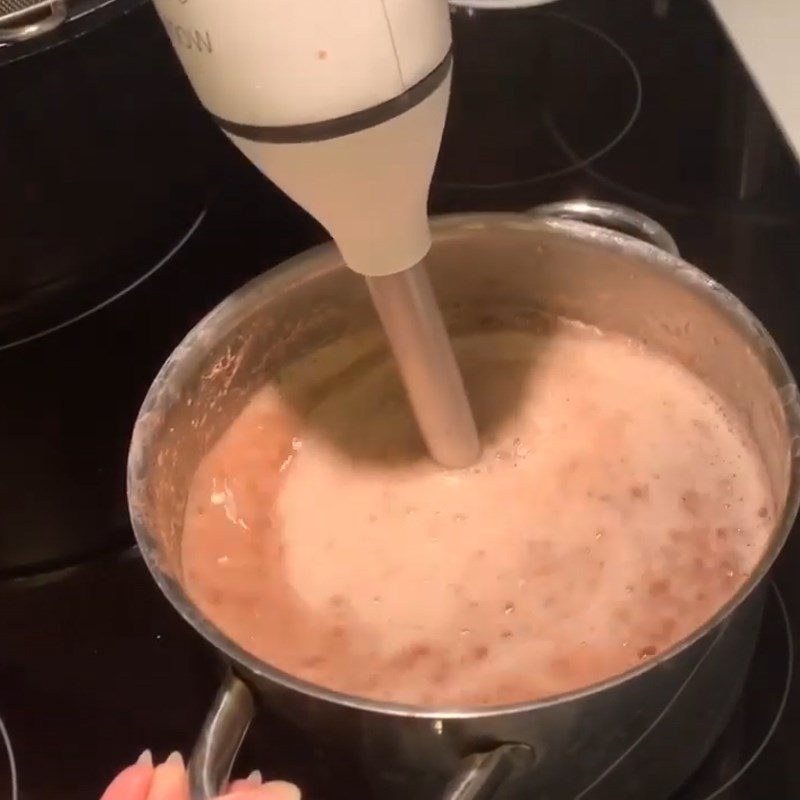
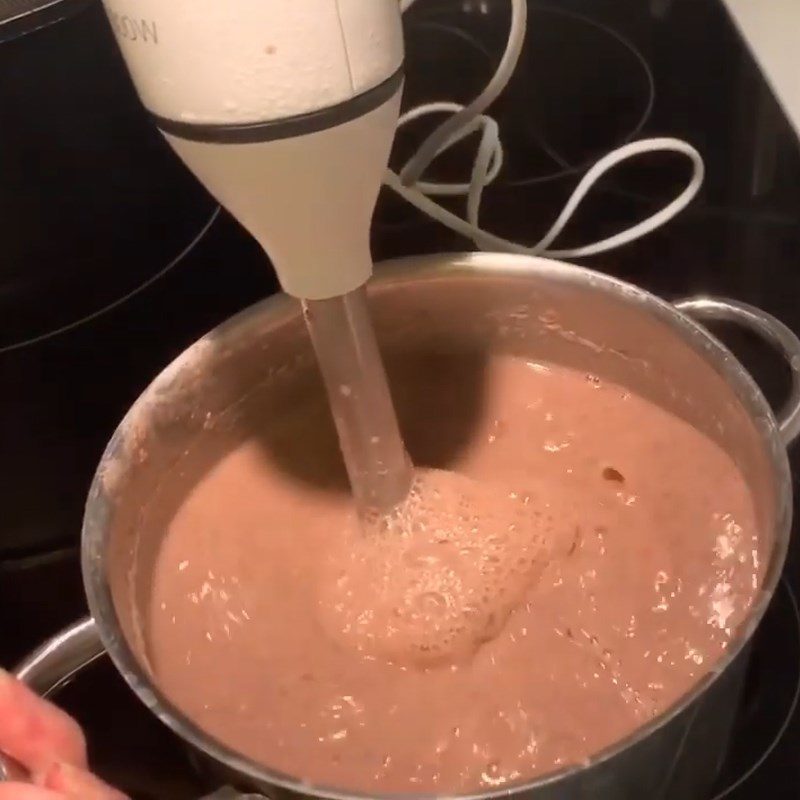
    Then, use a hand blender or a blender to puree the beans.
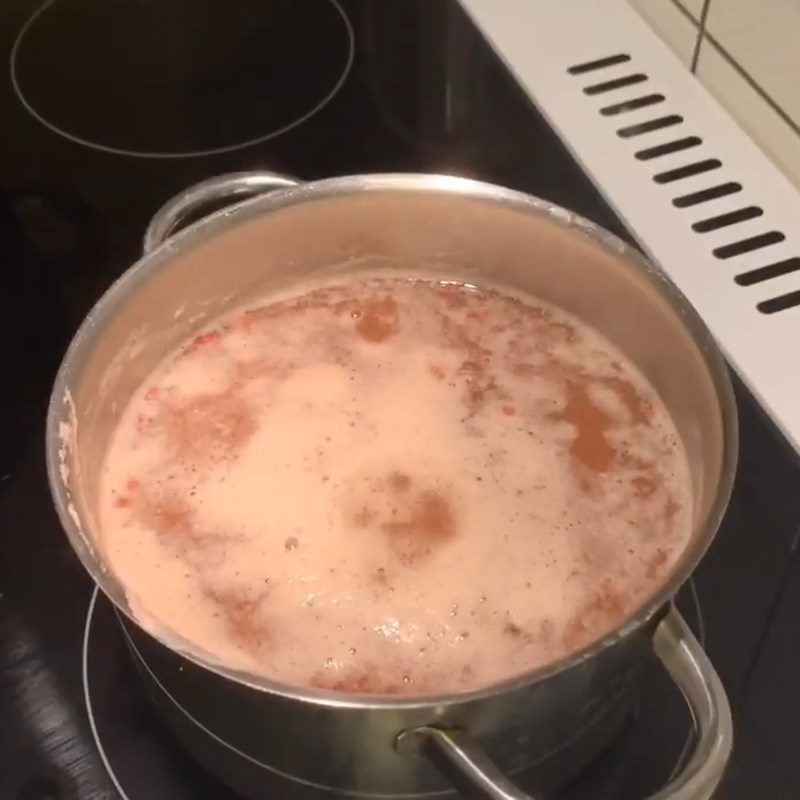
    Step 2 Simmer and puree the red beans How to make red bean filling
    Step 2 Simmer and puree the red beans How to make red bean filling
    Step 2 Simmer and puree the red beans How to make red bean filling
    Step 2 Simmer and puree the red beans How to make red bean filling
  • Red bean filling

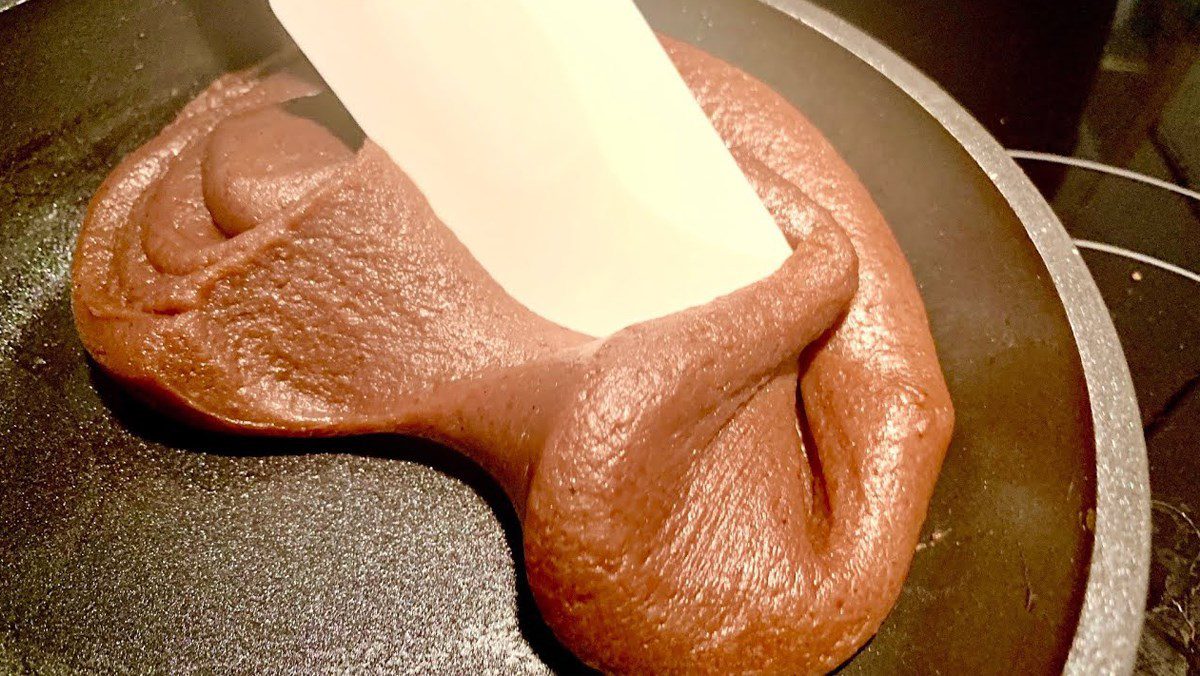
    Strain the red bean mixture through a sieve, then put it in a pan with 130g of sugar and cook over medium heat.

    Dissolve 30g of glutinous rice flour in 45ml of water. When the sugar dissolves, add the flour mixture and stir well.

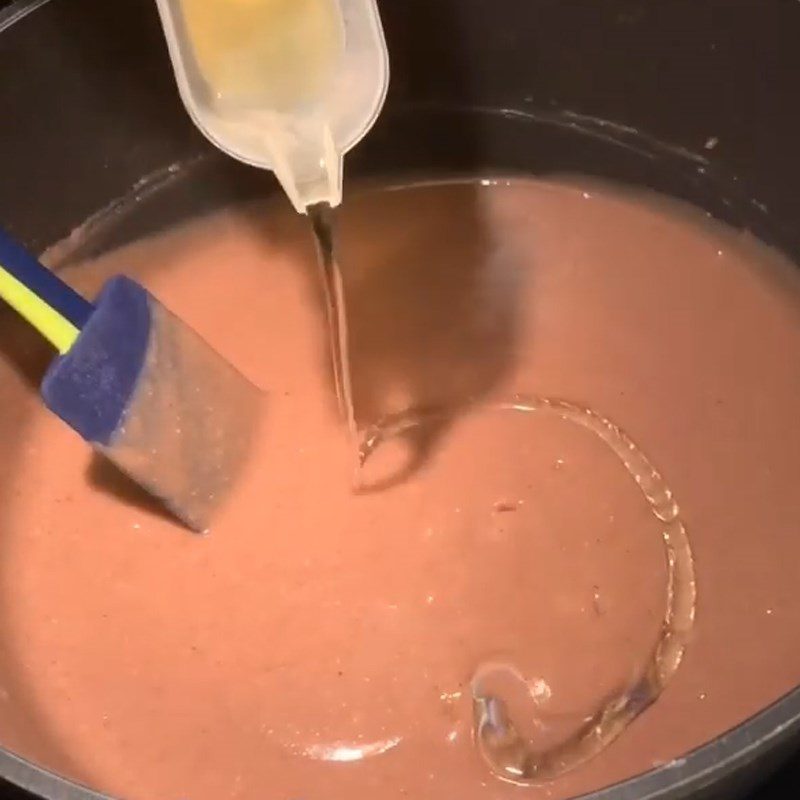
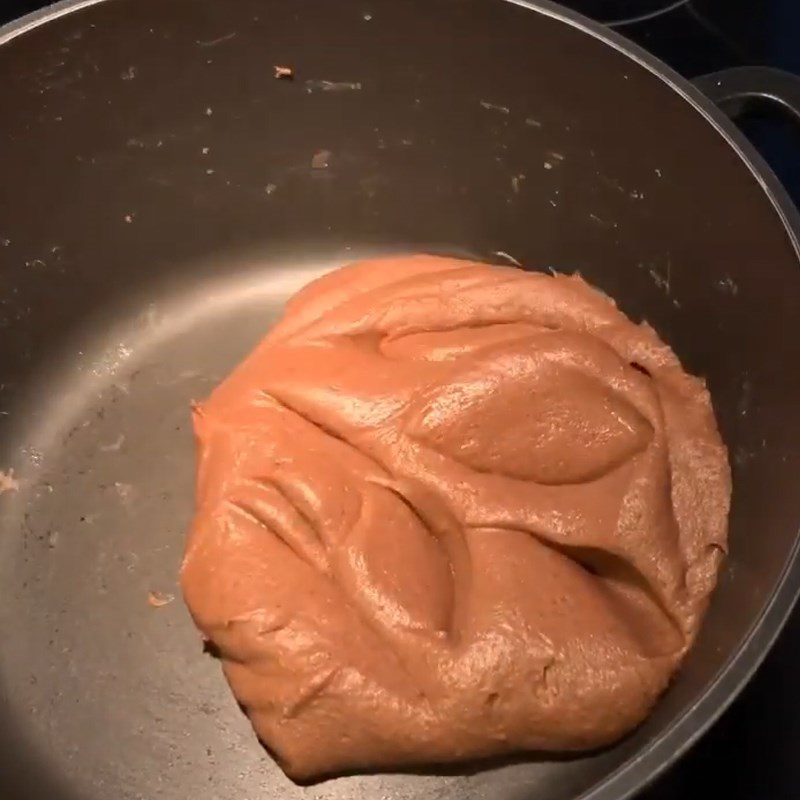
    When the filling thickens slightly, gradually add 55g of cooking oil while stirring, reduce the heat to low, and continue cooking until the filling is dry and forms a smooth, pliable mass.

    Note:

    • Do not add all the oil at once; only add a little at a time, stirring completely before adding more oil.
    • If the filling becomes oily while cooking, it may be due to high heat; you can fix this by adding a little hot water and continuing to cook.
    • After cooking or letting it cool, if the filling is crumbly, it may be due to not covering it, causing it to lose moisture, or using too little oil or sugar.
    Step 3 Red bean filling cooking method
    Step 3 Red bean filling cooking method
    Step 3 Red bean filling cooking method
    Step 3 Red bean filling cooking method
  • Final product

    The red bean filling has a characteristic fragrant smell along with a nutty, slightly sweet taste from the red beans. You can use this filling for baked or sticky rice cakes according to your preference!
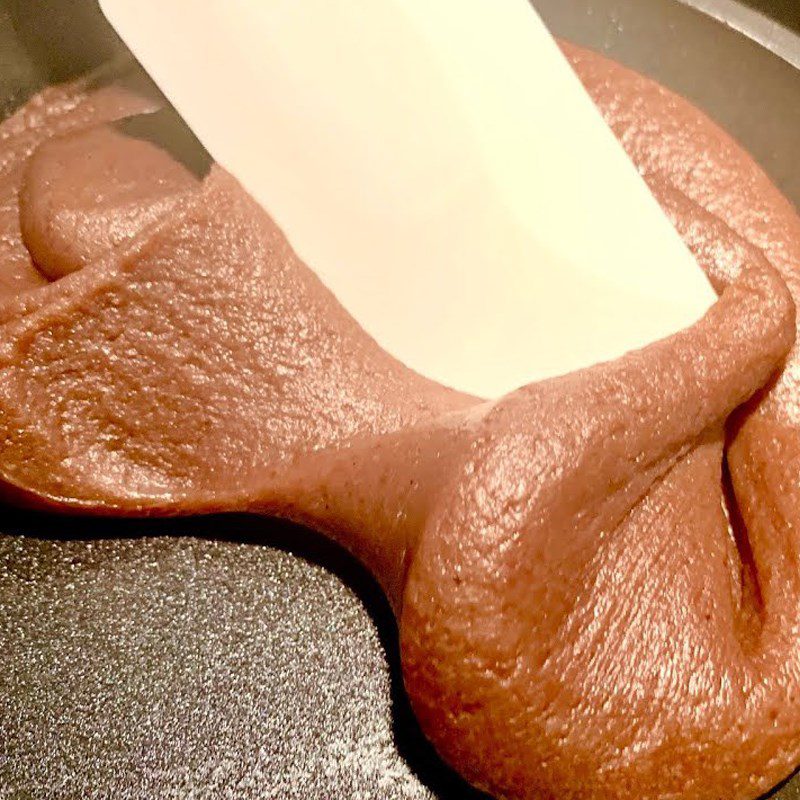
    Step 4 Final product Red bean filling cooking method

2. Layered peach blossom cake with red bean filling

Layered peach blossom cake with red bean filling

  • Preparation

    1 hour 30 minutes

  • Cooking

    45 minutes

  • Difficulty

    Medium

Ingredients for Layered peach blossom cake with red bean filling Serves 4 – 5 people

All-purpose flour No. 8 220 gr (120gr for water dough – 100gr for oil dough) Granulated sugar 20 gr Shortening 100 gr (45gr for water dough – 55gr for oil dough) Cold water 50 ml Pink chrysanthemum powder 5 gr

Tools needed

Oven, dough scraper, spatula, bowl, rolling pin,…

How to choose flour for making layered cakes

To achieve a soft and fluffy layered cake crust, you should use all-purpose flour rather than general-purpose flour. This is because the protein content in all-purpose flour is higher, which produces more gluten during kneading, making it easier to roll out the dough.

It is best to use No. 8 flour, as it has just the right amount of protein. If you choose No. 10 or No. 11 flour, the higher protein content will make the crust tough, resulting in a dry texture when eaten.
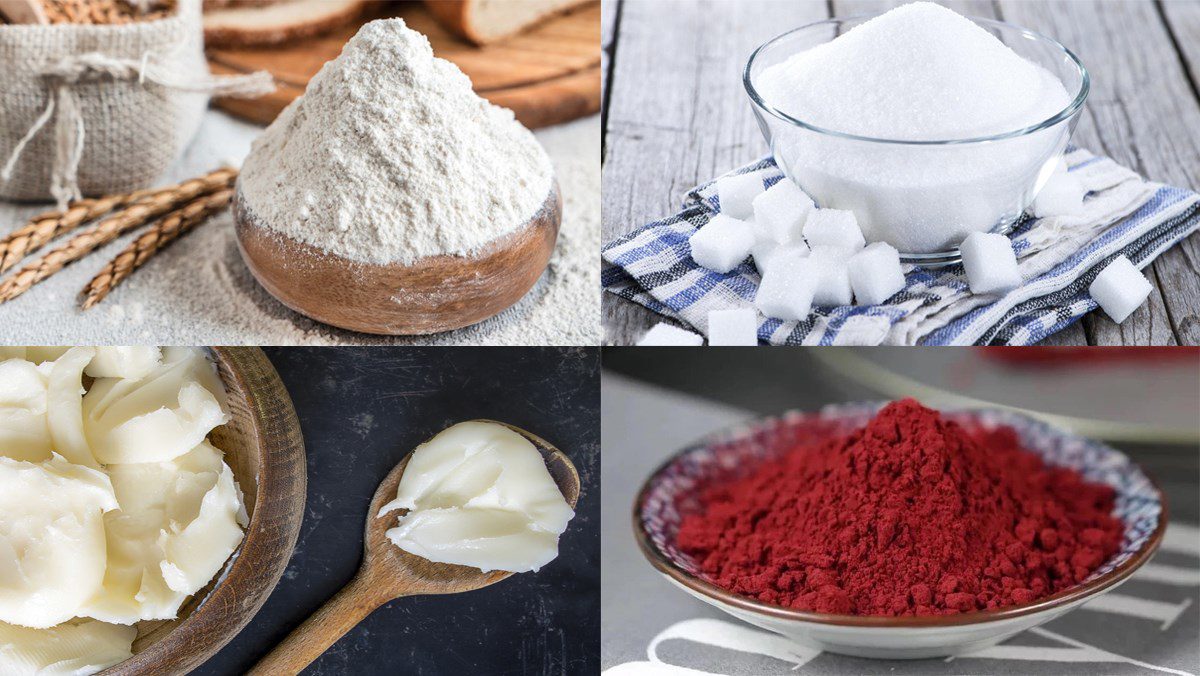
Ingredients and how to make layered peach blossom cake with red bean filling

How to make Layered Peach Blossom Cake with Red Bean Filling

  • Make the Water Dough

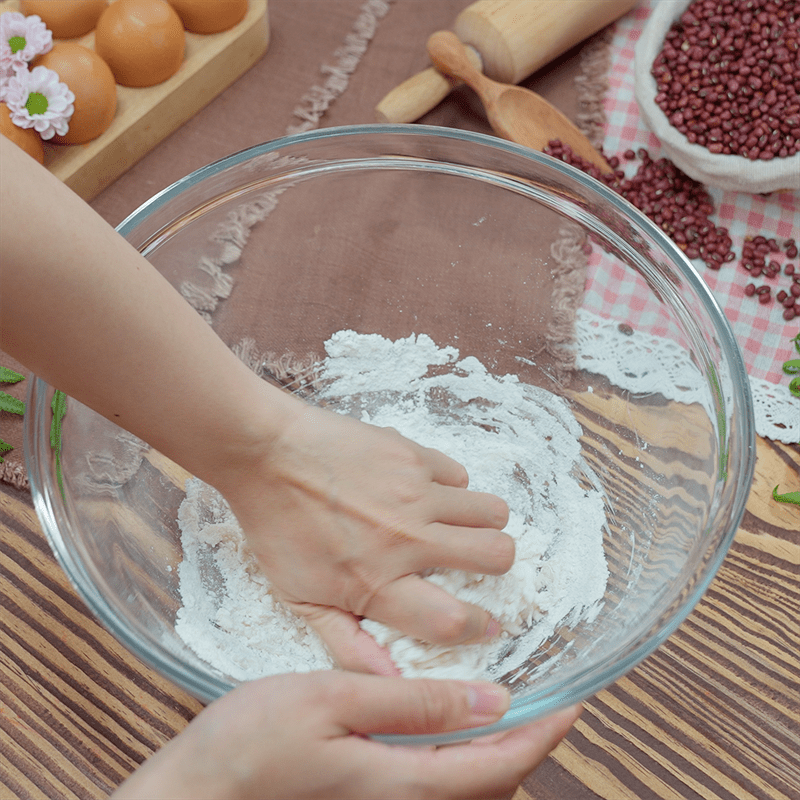
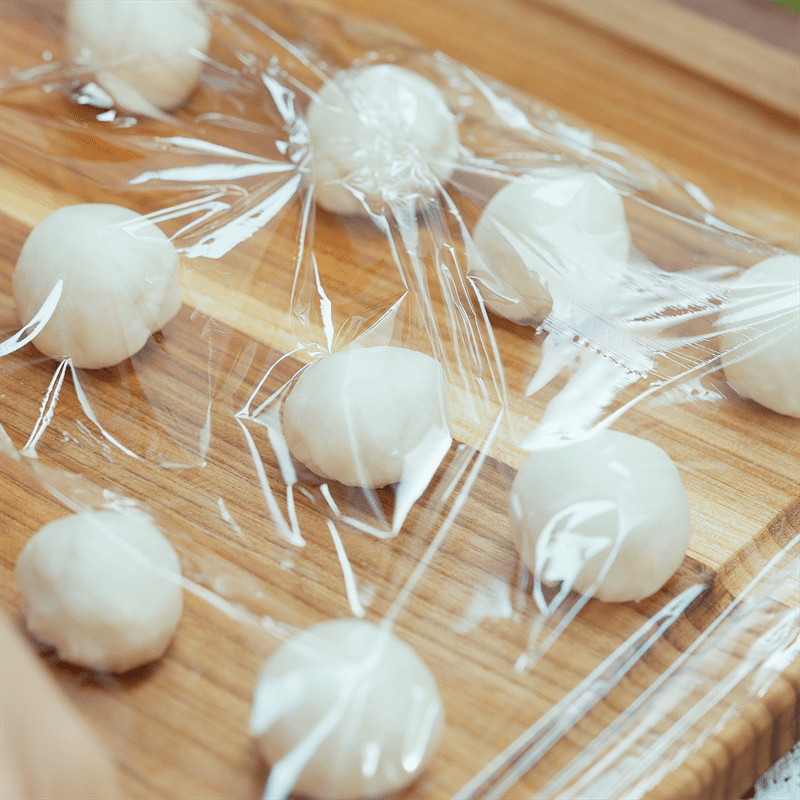
    Put all the ingredients: 120 grams of flour number 8, 20 grams of granulated sugar, 45 grams of shortening, and 50 ml of cold water into a bowl and use a spatula to mix well.

    When the dough feels heavy while mixing, switch to using your hands to knead the dough until it becomes smooth. Then, divide the dough into small balls of 20 grams each and let the dough rest for 15 minutes.
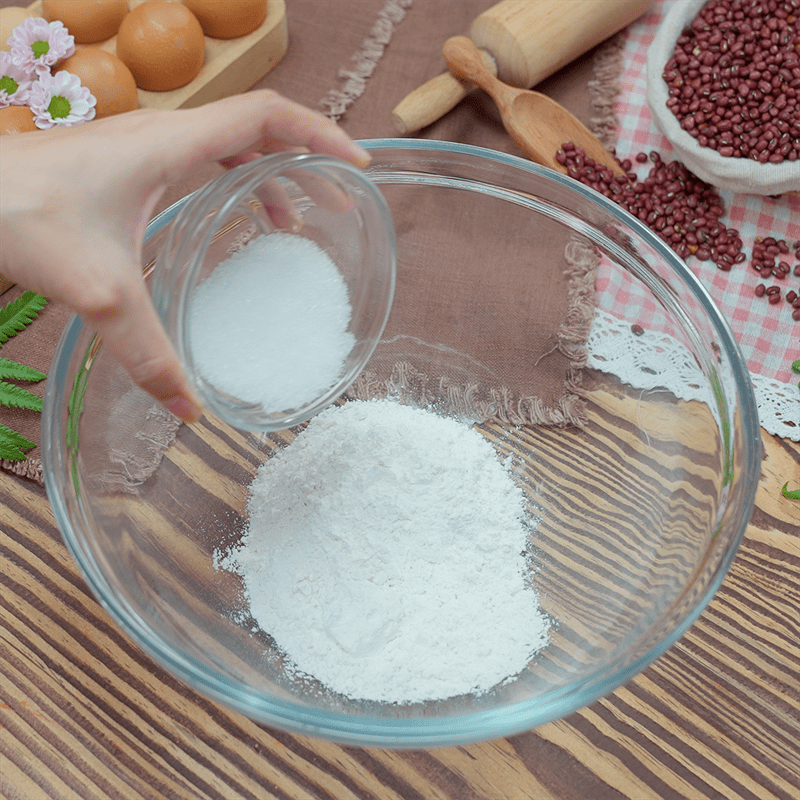
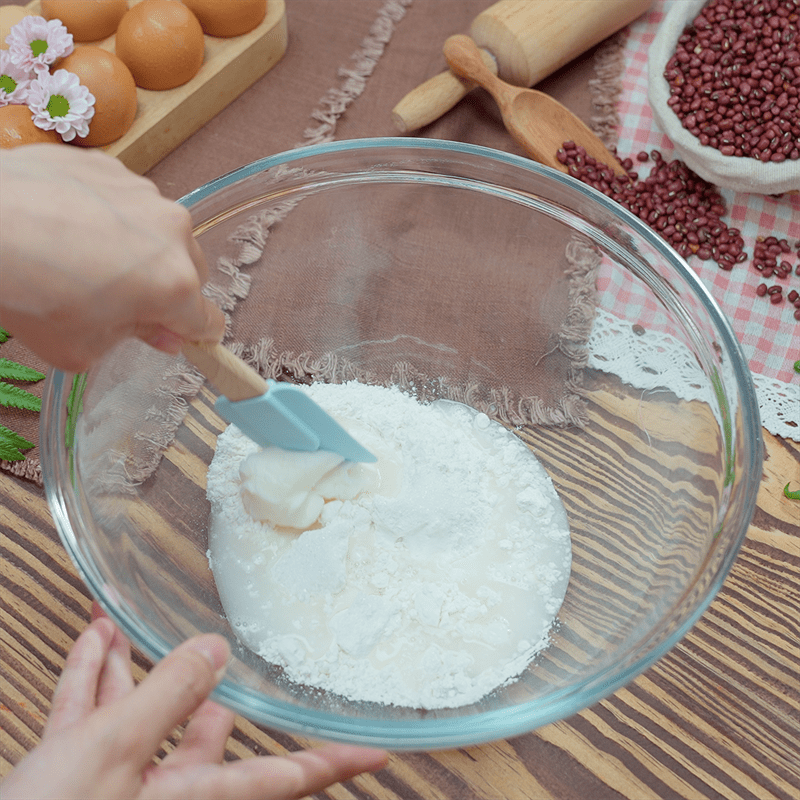
    Step 1 Make Water Dough Layered Peach Blossom Cake with Red Bean Filling
    Step 1 Make Water Dough Layered Peach Blossom Cake with Red Bean Filling
    Step 1 Make Water Dough Layered Peach Blossom Cake with Red Bean Filling
    Step 1 Make Water Dough Layered Peach Blossom Cake with Red Bean Filling
  • Make the Oil Dough

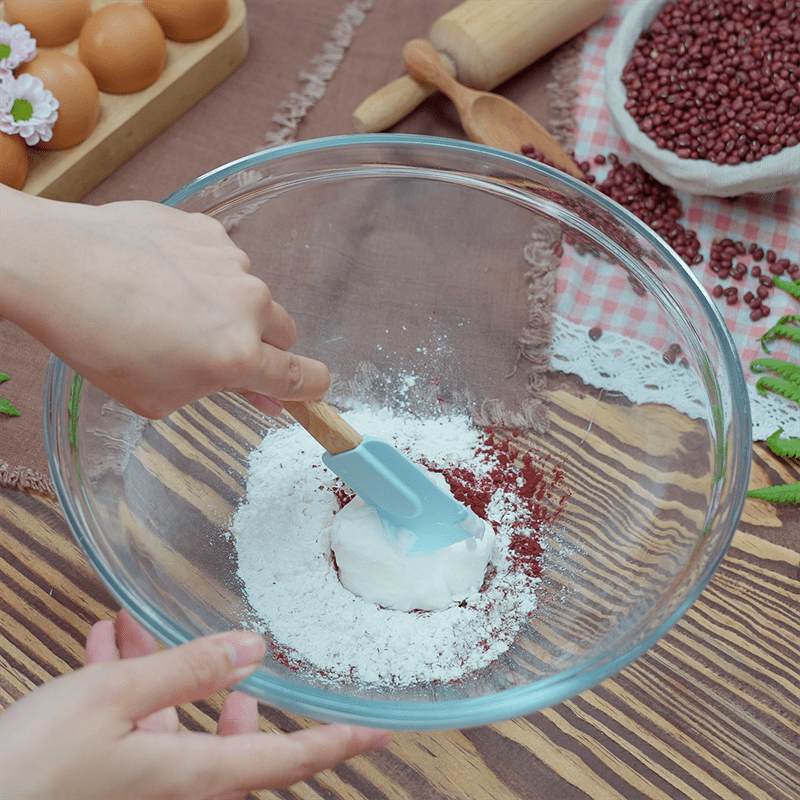
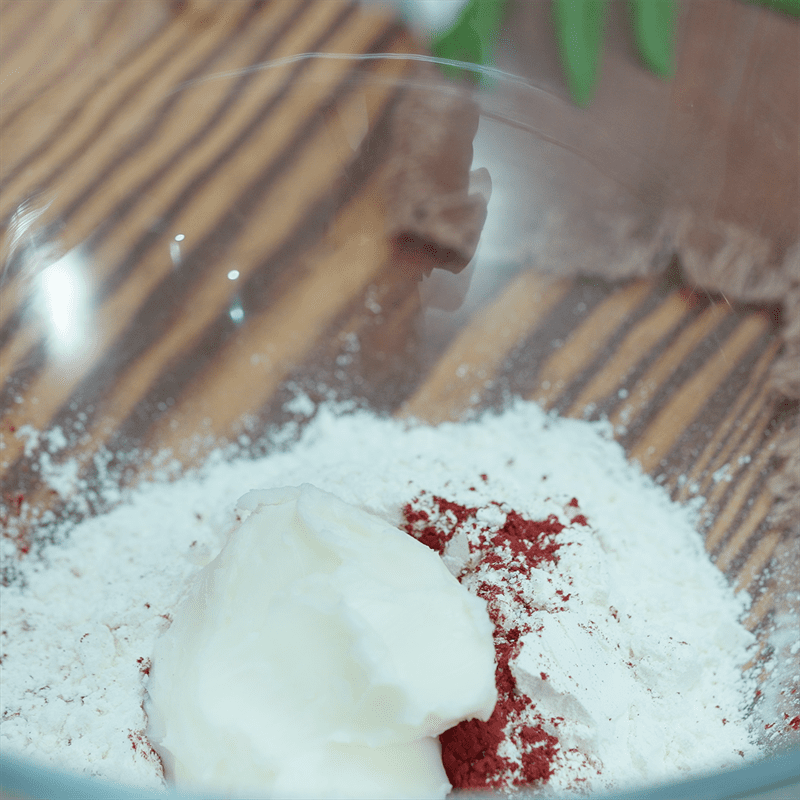
    To make the oil dough, use a spatula to mix 100 grams of flour number 8 with 55 grams of shortening until well combined. To create a pink color for the cake skin resembling cherry blossom petals, remember to add 5 grams of pink chrysanthemum powder!

    After the ingredients are well mixed, use your hands to knead the dough until it becomes smoother, then continue to divide the dough into small balls of 15 grams each and let it rest for 15 minutes.

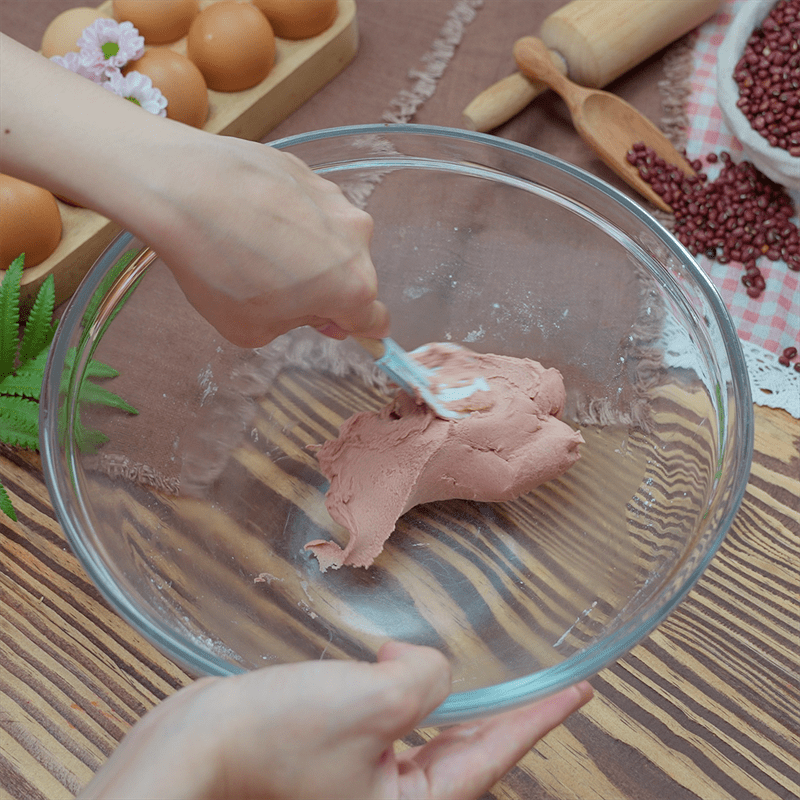
    Step 2 Make Oil Dough Layered Peach Blossom Cake with Red Bean Filling
    Step 2 Make Oil Dough Layered Peach Blossom Cake with Red Bean Filling
    Step 2 Make the oil dough for the multi-layer peach blossom cake with red bean filling
    Step 2 Make the oil dough for the multi-layer peach blossom cake with red bean filling
  • Make the cake wrapper

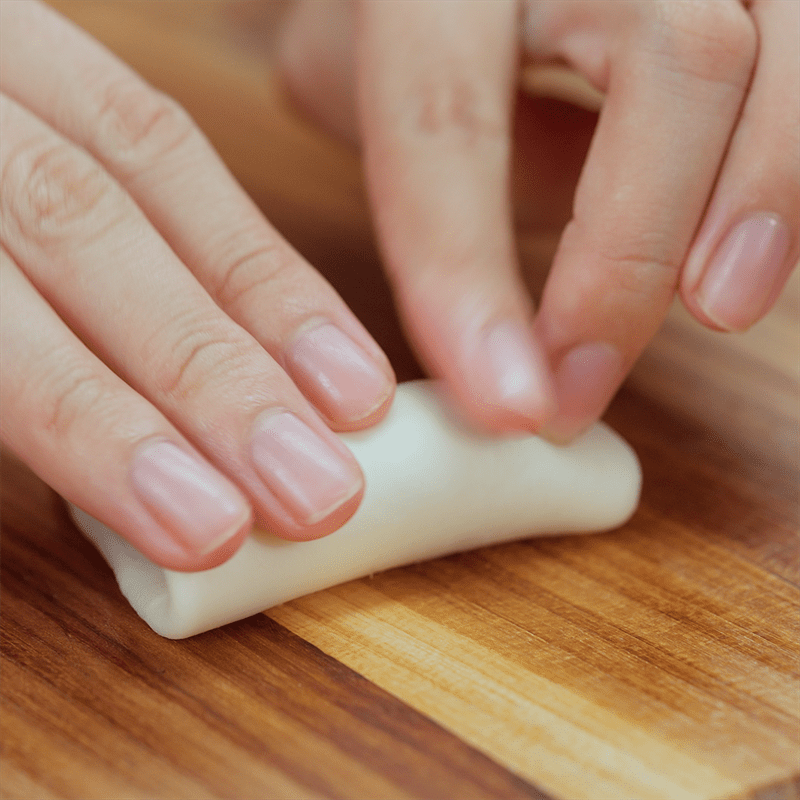
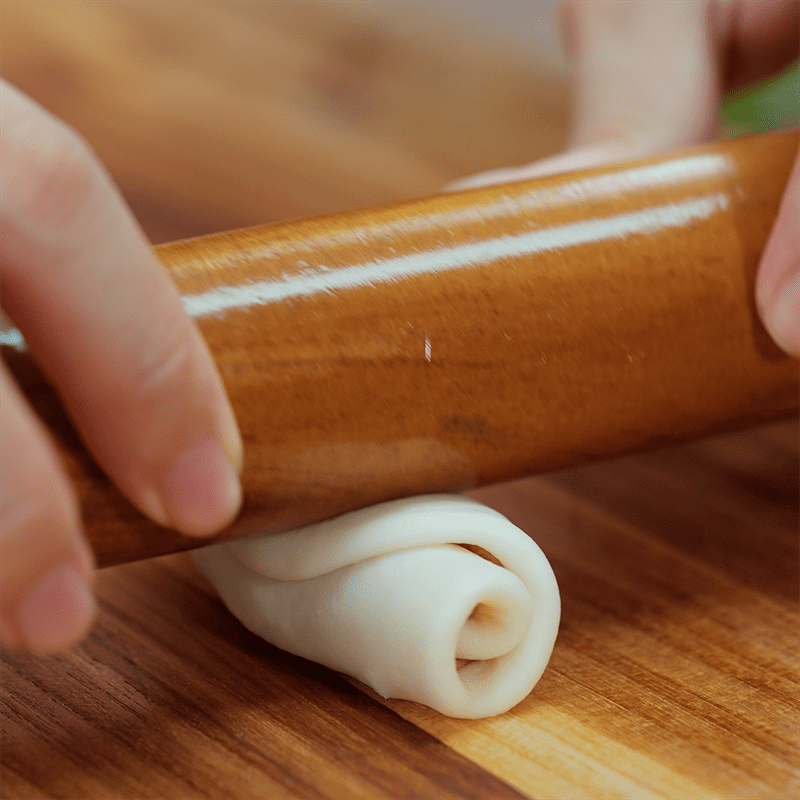
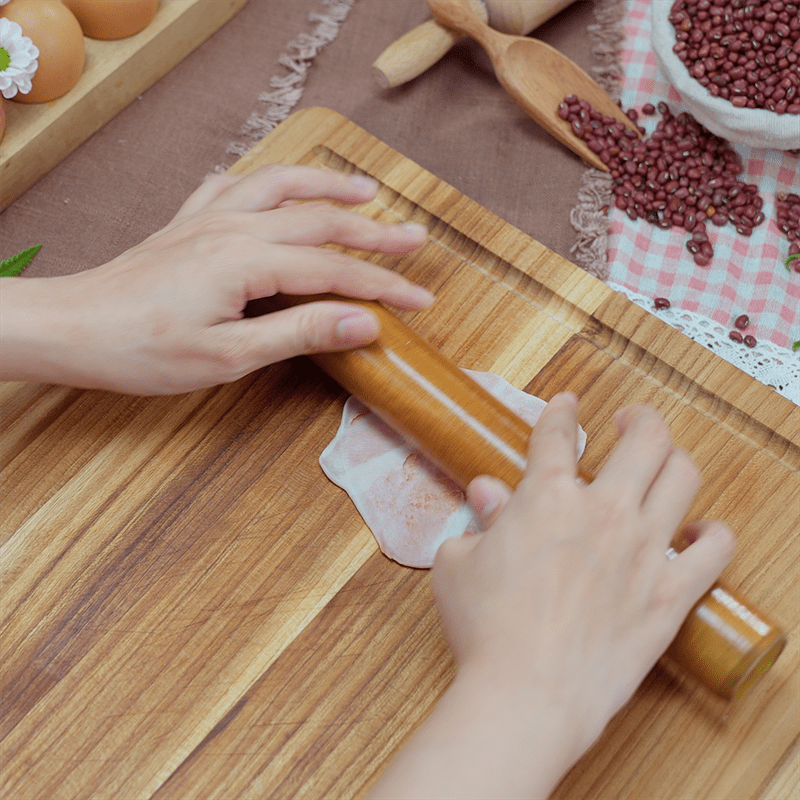
    You use a rolling pin to flatten the water dough ball first (note that you roll the dough vertically, you don’t need to roll all four sides to make it round).

    Next, you place the red oil dough ball on top of the flattened water dough and spread it evenly, then roll it up and flatten it again to complete the cake wrapper!
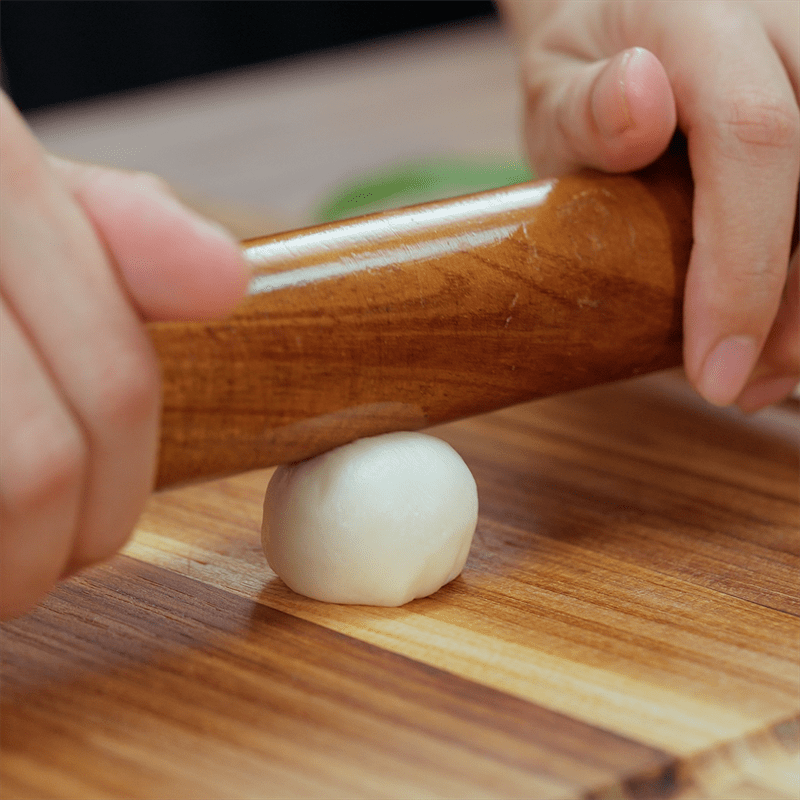
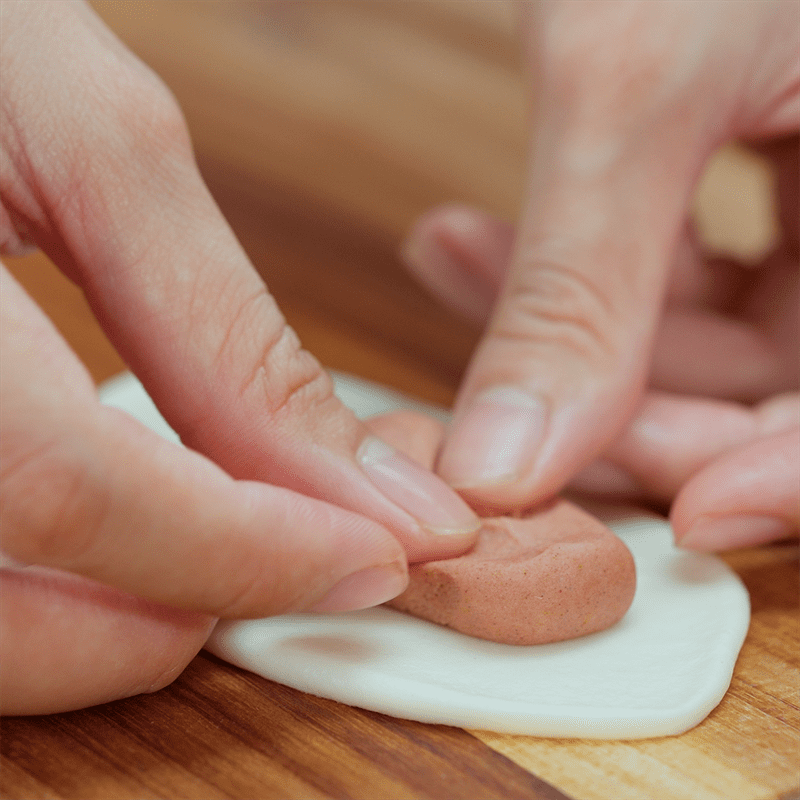
    Step 3 Make the cake wrapper for the multi-layer peach blossom cake with red bean filling
    Step 3 Make the cake wrapper for the multi-layer peach blossom cake with red bean filling
    Step 3 Make the cake wrapper for the multi-layer peach blossom cake with red bean filling
    Step 3 Make the cake wrapper for the multi-layer peach blossom cake with red bean filling
  • Wrap the filling

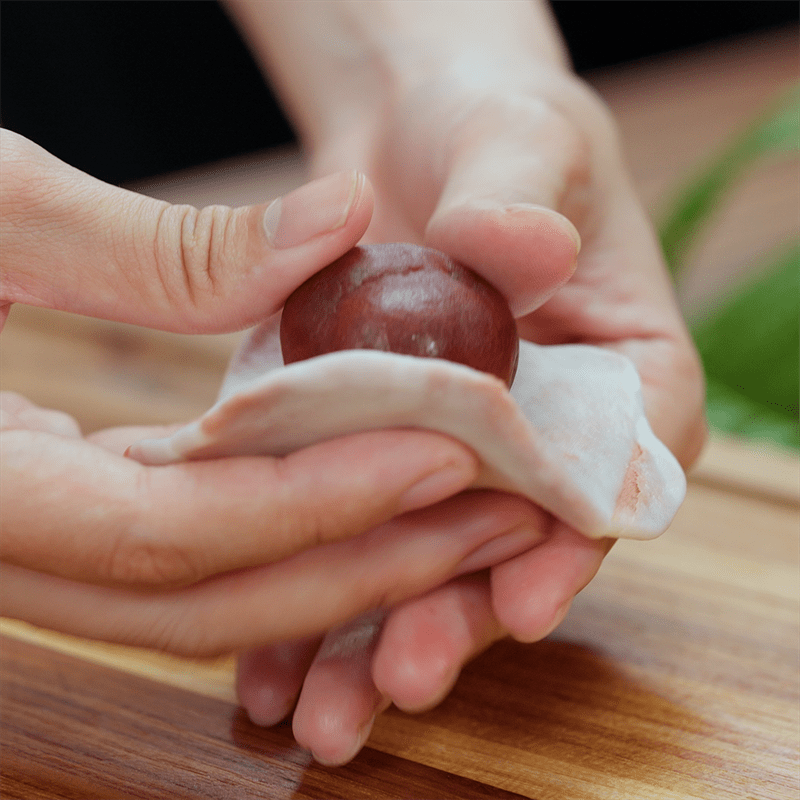
    After rolling out the dough, you proceed to roll it up and use your finger to press firmly in the center of the dough, then fold the edges of the dough inwards and use a rolling pin to roll evenly in all four directions so that the dough forms a circle.

    Next, you place the flattened dough in your hand and put a red bean filling (about 20 grams) in the middle, using force to shape the filling tightly so that the dough and filling do not separate after baking!
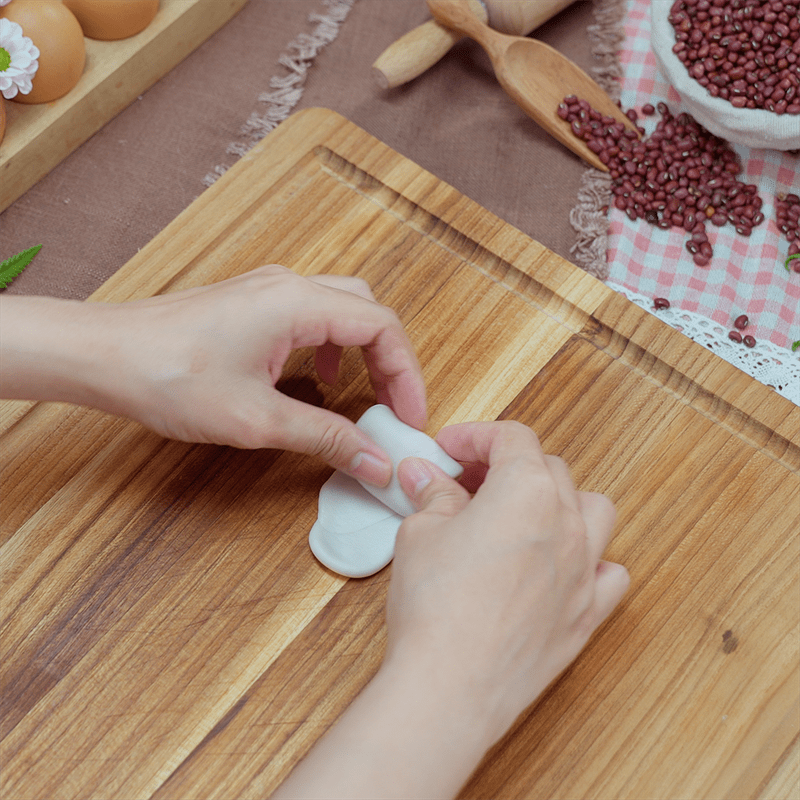
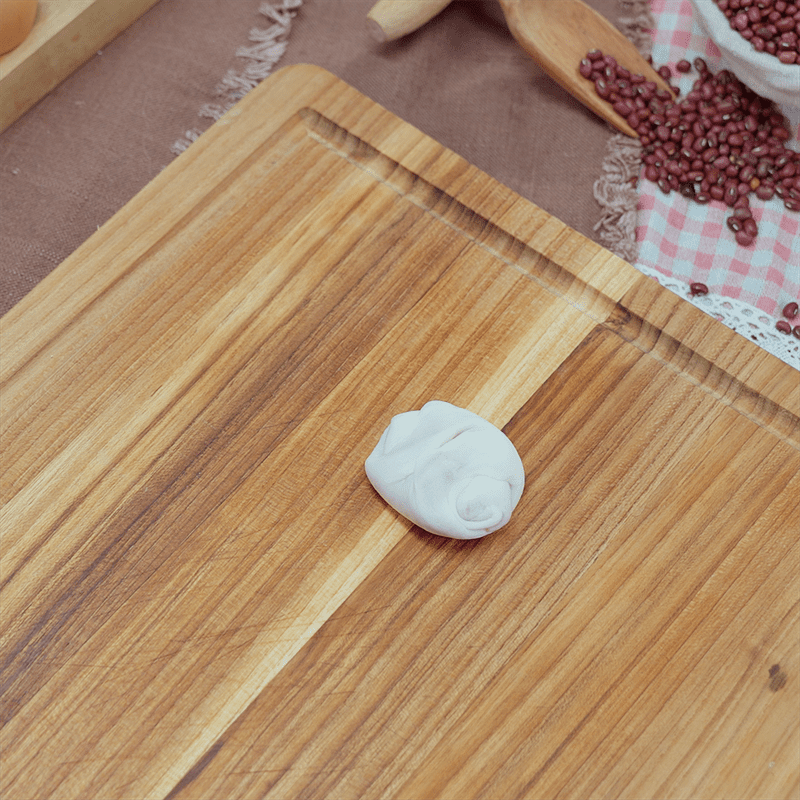
    Step 4 Wrap the filling Layered peach blossom cake with red bean filling
    Step 4 Wrap the filling Layered peach blossom cake with red bean filling
    Step 4 Wrap the filling Layered peach blossom cake with red bean filling
    Step 4 Wrap the filling Layered peach blossom cake with red bean filling
  • Shape the peach blossom

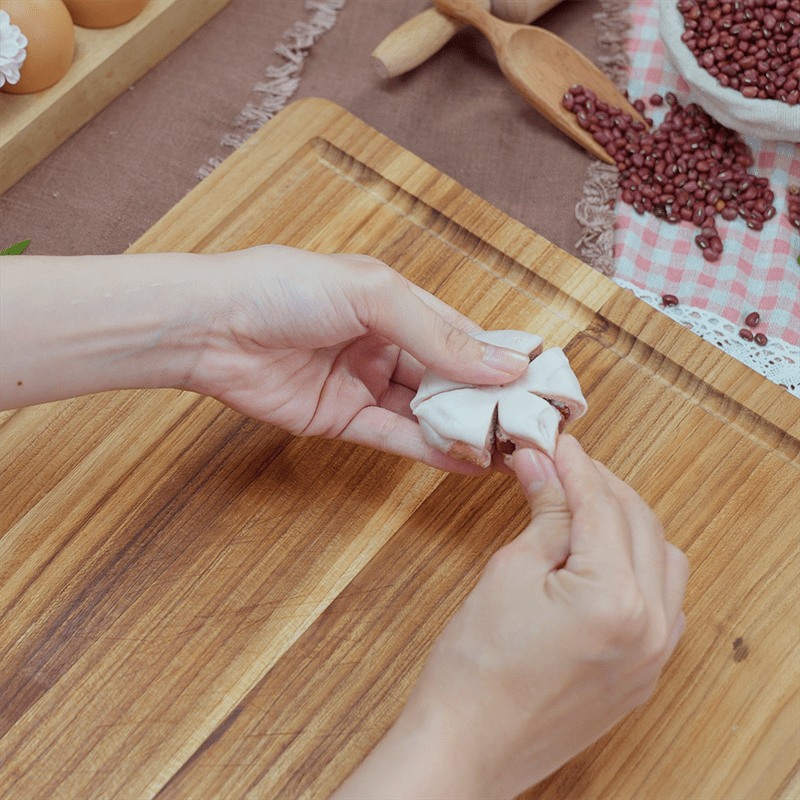
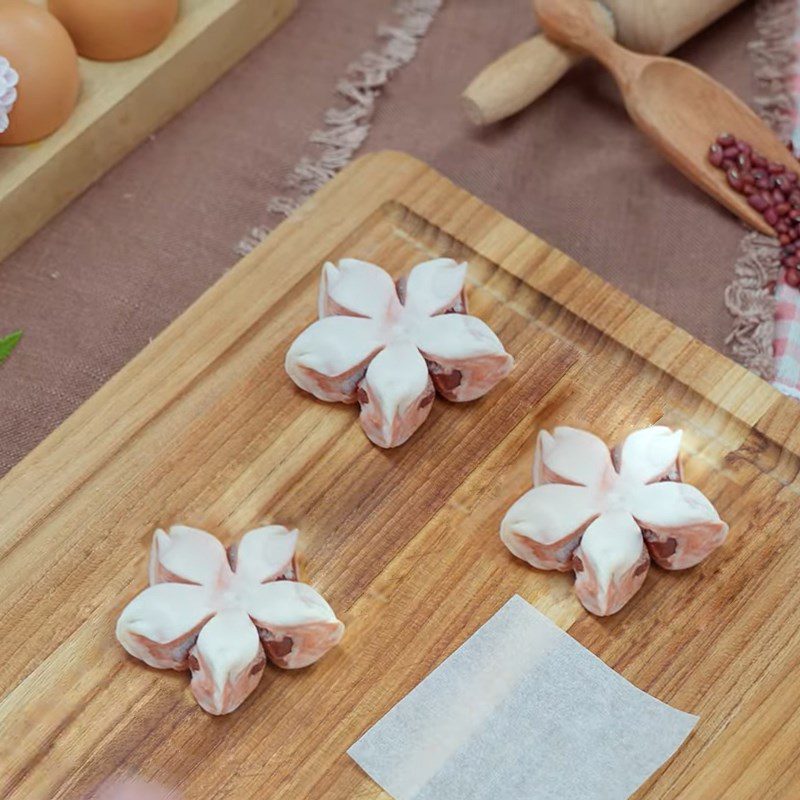
    After completing the filling process, place it on a cutting board or flat surface and use a dough scraper (a tool for scraping dough or a fork) to press lightly down on the dough to form the mold for the flower.

    Next, use scissors to divide the dough into 5 equal parts (note that you only cut 2/3 of the radius of the dough to leave space for the flower’s center). Then, use your fingers to gently pull the two edges to form the shape of the petals of the peach blossom. Repeat this until all the edges are connected, and the layered peach blossom is complete.
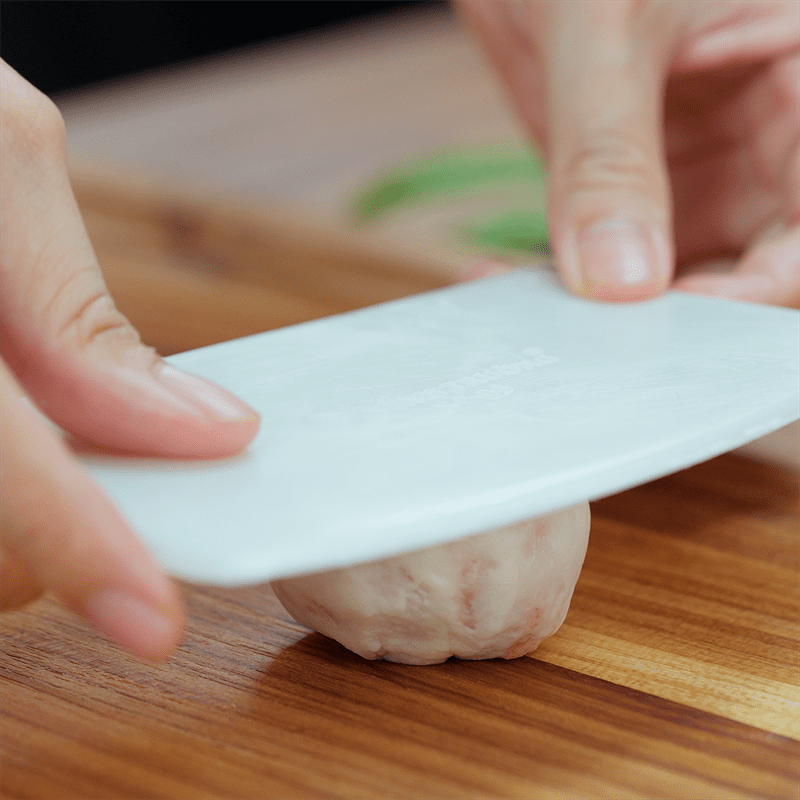
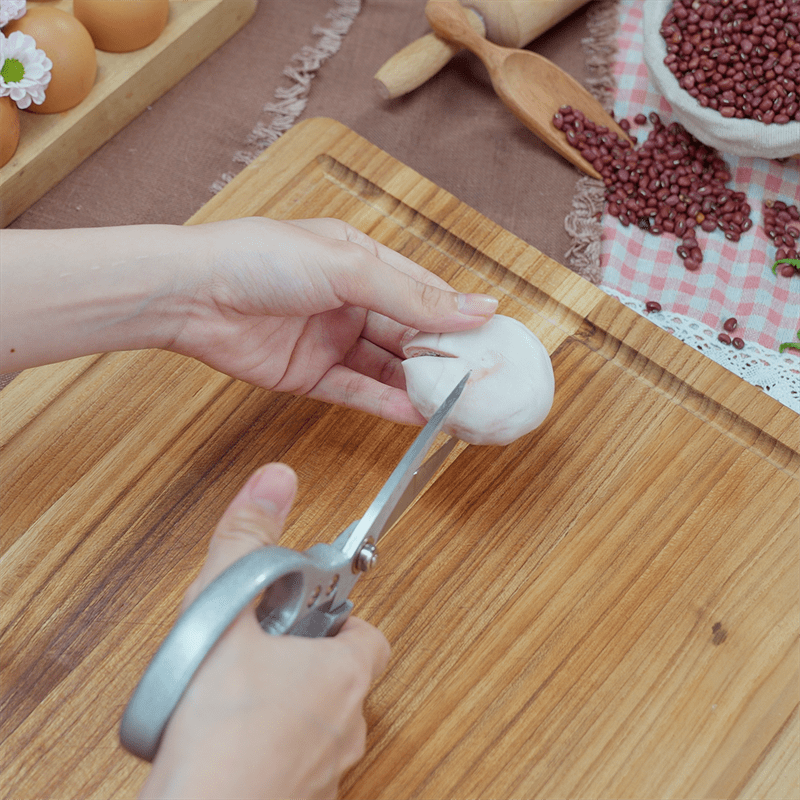
    Step 5 Shape the peach blossom Layered peach blossom cake with red bean filling
    Step 5 Shaping peach flower Peach cake with layers of red bean filling
    Step 5 Shaping peach flower Peach cake with layers of red bean filling
    Step 5 Shaping peach flower Peach cake with layers of red bean filling
  • Baking the cake

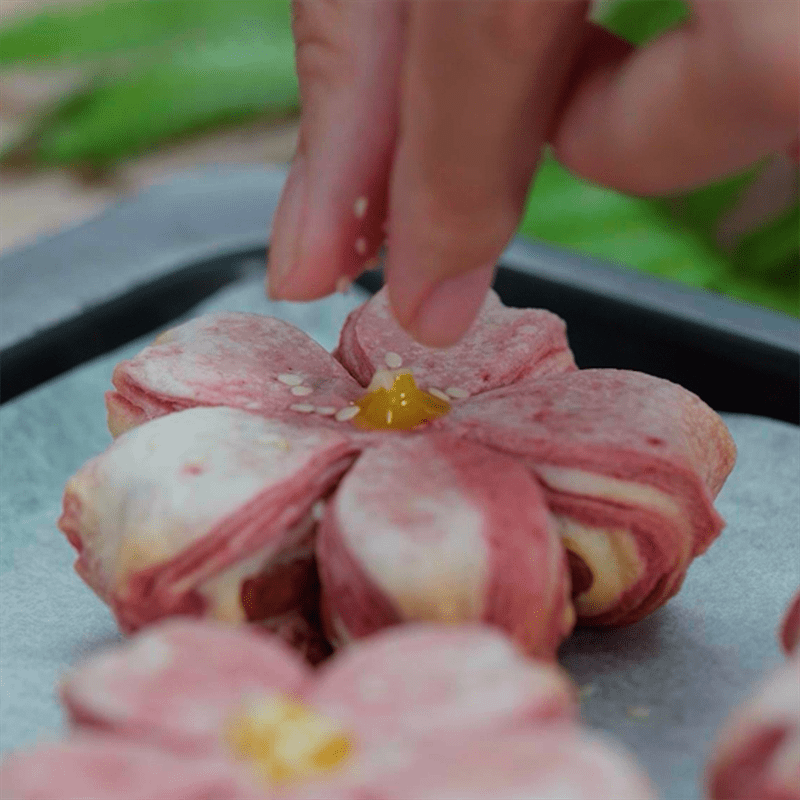
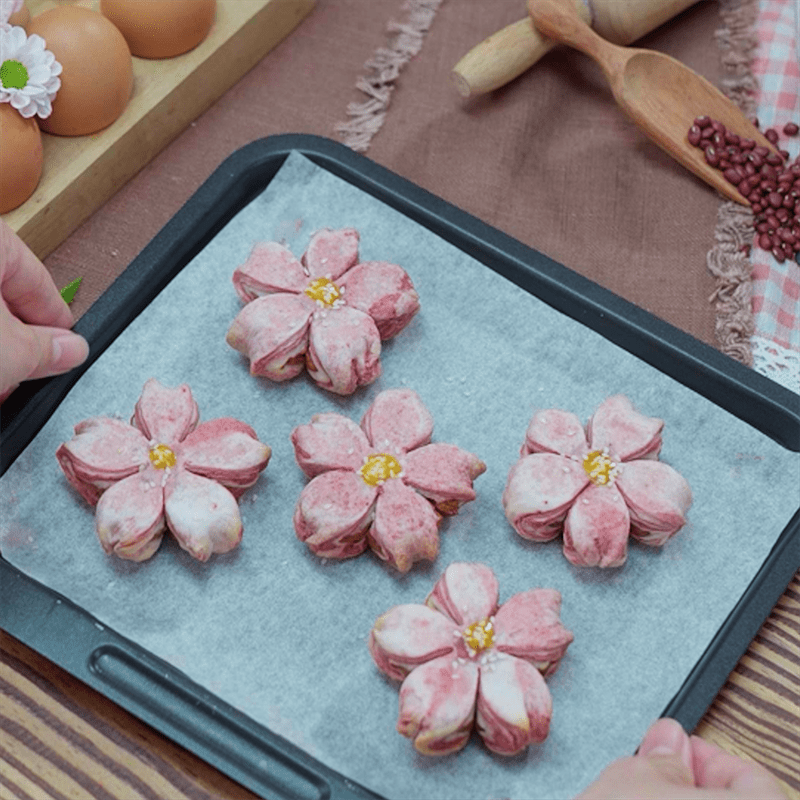
    Place the cake on parchment paper and put it in the oven for the first time for 25 minutes at 170 degrees Celsius. After the time is up, flip the cake over, add an egg yolk in the center of the cake, and sprinkle a little white sesame to make the flower’s stamen, then bake for the second time for 25 minutes at 170 degrees Celsius.
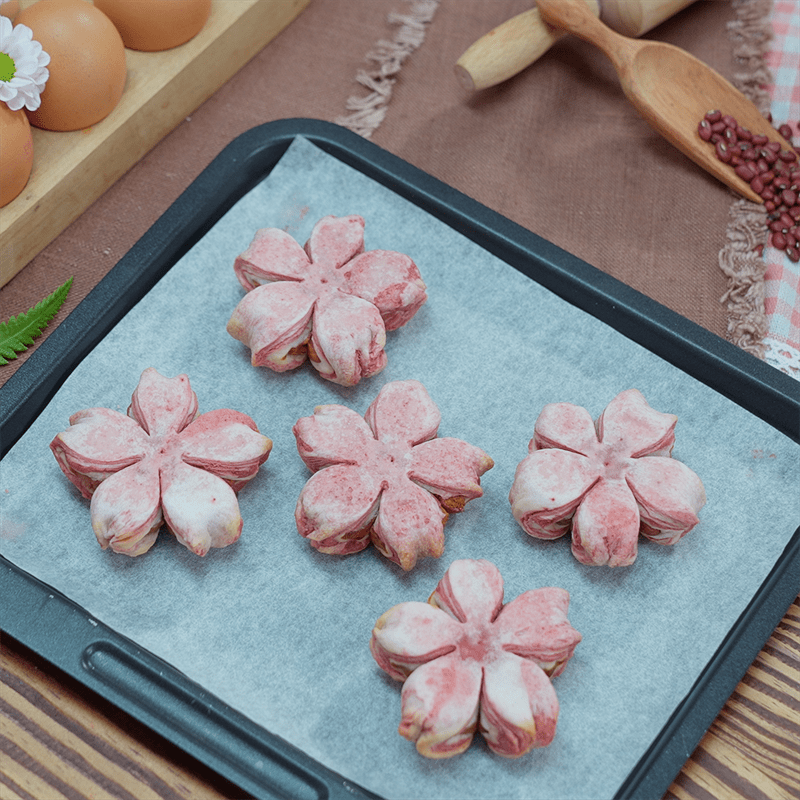
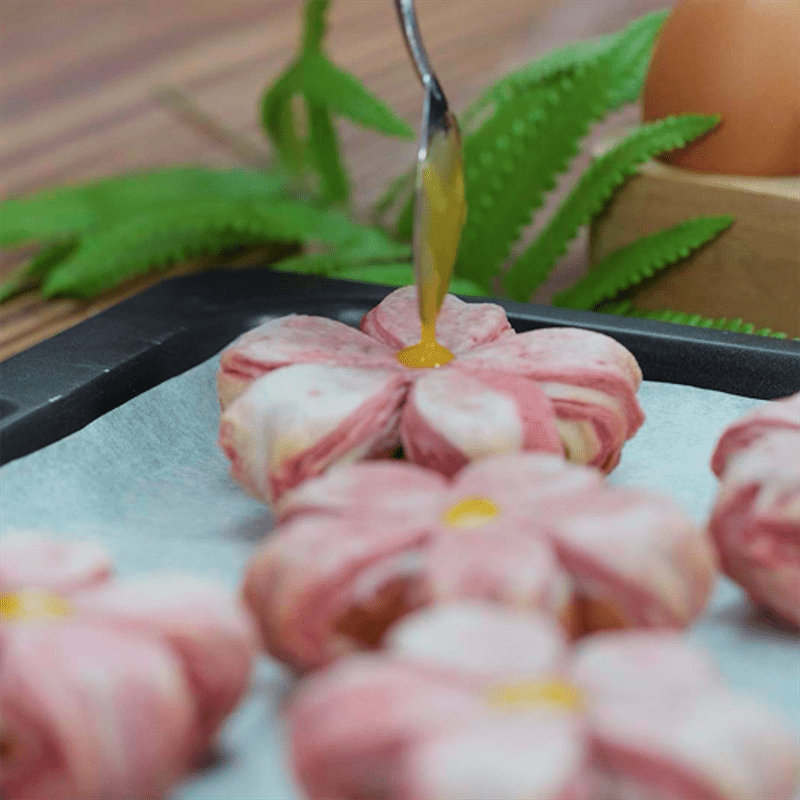
    Step 6 Baking the cake Peach cake with layers of red bean filling
    Step 6 Baking the cake Peach cake with layers of red bean filling
    Step 6 Baking the cake Peach cake with layers of red bean filling
    Step 6 Baking the cake Peach cake with layers of red bean filling
  • Completion

    The multi-layer peach flower cake with red bean filling, after baking, has a pink color of peach blossoms that is extremely sweet and appealing, combined with the rich and nutty flavor of the red bean filling, making you want to enjoy it endlessly.
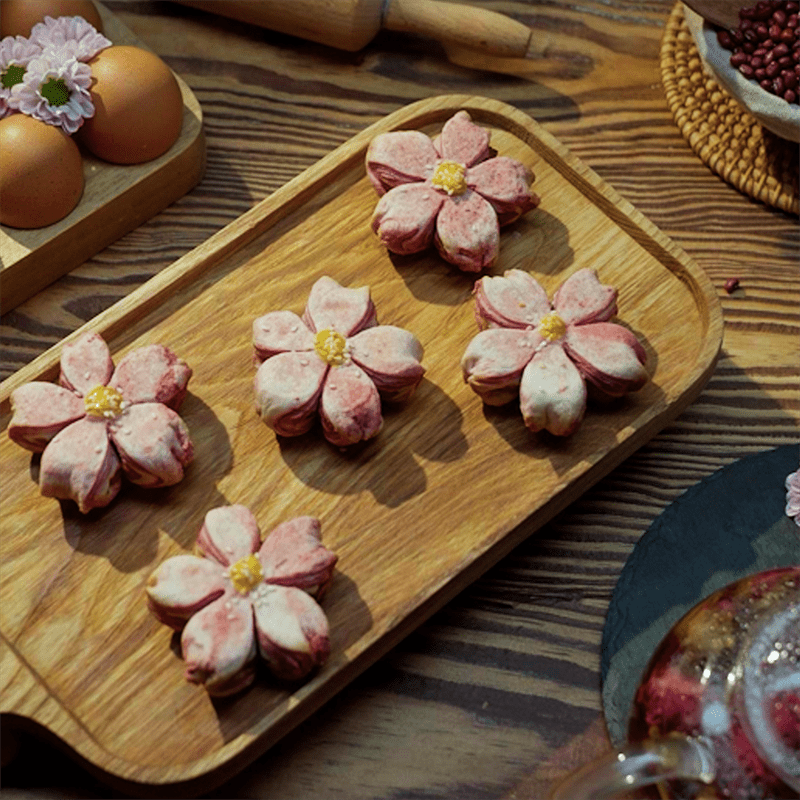
    Step 7 Completion Multi-layer Peach Flower Cake with Red Bean Filling
See more:
  • 2 ways to make multi-layer salted egg and red bean cakes that are rich and fragrant
  • How to make multi-layer salted egg cakes that melt in your mouth, rich and delicious
  • How to make multi-layer mooncakes with mung bean filling using an air fryer

Multi-layer Peach Flower Cake with Red Bean Filling features an extremely sweet pink outer layer, blended with rich, delicious flavors, making it suitable for gifting during festive occasions. This Mid-Autumn Festival, let’s get into the kitchen with TasteVN to make this delicious cake to treat our family and friends!

Cooking time: 60 minutes
Level: Easy
Tags: cake with red bean fillinglayered cakelayered peach blossom cakepeach blossom cake with layers and red bean fillingpeach blossom cake with red bean filling and layers
Previous Post

Simple and cute watermelon jelly cheesecake recipe for Tet

Next Post

Traditional Delicious Chewy Mooncake with Red Bean Filling Recipe

TasteT

TasteT

I am a food writer specializing in Vietnamese cuisine, sharing traditional recipes, cooking tips, and the culture behind every dish. My goal is to bring the authentic flavors of Vietnam to your kitchen.

Related Posts

No Content Available
Next Post
Traditional Delicious Chewy Mooncake with Red Bean Filling Recipe

Traditional Delicious Chewy Mooncake with Red Bean Filling Recipe

Leave a Reply Cancel reply

Your email address will not be published. Required fields are marked *

Navigate

  • About
  • Privacy Policy
  • Contact

Recent Recipes

How to make delicious and nutritious garlic chicken that is unique for the whole family

How to make delicious and nutritious garlic chicken that is unique for the whole family

How to cook delicious and nutritious flower fish hot pot for the whole family

How to cook delicious and nutritious flower fish hot pot for the whole family

Browse by Category

  • Beef Dishes
  • Beverages
  • Braised Food
  • Cake
  • Chicken Dishes
  • Desserts
  • Dried and Fermented Dishes
  • Festivals & Holidays
  • Fried Food
  • Grilled Food
  • Hot Pot
  • Ice Cream
  • Juices
  • Kitchen Tips
  • Liquid Dishes
  • Milk Tea
  • Porridge
  • Rolls and Salads
  • Salad
  • Smoothies
  • Snacks
  • Soup
  • Steamed Food
  • Stir-fried Dishes
  • Sweet Soup
  • Vegetarian Dishes

Browse by Ingredients

beef beef stew braised fish cake dish dessert fried dish grilled dishes how to cook porridge how to make cake how to make ice cream into the kitchen mixed salad dish noodle soup snacks soup dish sponge cake steamed dish stir-fried dish stir-fried noodles vegetarian dish

© 2024 TasteVN - The ultimate Vietnam food destination for cooking tips, recipes, and more.

Welcome Back!

Login to your account below

Forgotten Password?

Retrieve your password

Please enter your username or email address to reset your password.

Log In
No Result
View All Result
  • Home
  • Main Dishes
    • Beef Dishes
    • Braised Food
    • Fried Food
    • Steamed Food
    • Stir-fried Dishes
    • Soup
    • Grilled Food
    • Hot Pot
    • Liquid Dishes
    • Chicken Dishes
    • Dried and Fermented Dishes
    • Vegetarian Dishes
    • Porridge
  • Desserts
    • Cake
    • Ice Cream
    • Sweet Soup
    • Desserts
  • Beverages
    • Beverages
    • Juices
    • Milk Tea
    • Smoothies
  • Snacks
    • Rolls and Salads
    • Salad
    • Snacks
  • Tips & Holidays
    • Festivals & Holidays
    • Kitchen Tips

© 2024 TasteVN - The ultimate Vietnam food destination for cooking tips, recipes, and more.