TasteVN
  • Home
  • Main Dishes
    • Beef Dishes
    • Braised Food
    • Fried Food
    • Steamed Food
    • Stir-fried Dishes
    • Soup
    • Grilled Food
    • Hot Pot
    • Liquid Dishes
    • Chicken Dishes
    • Dried and Fermented Dishes
    • Vegetarian Dishes
    • Porridge
  • Desserts
    • Cake
    • Ice Cream
    • Sweet Soup
    • Desserts
  • Beverages
    • Beverages
    • Juices
    • Milk Tea
    • Smoothies
  • Snacks
    • Rolls and Salads
    • Salad
    • Snacks
  • Tips & Holidays
    • Festivals & Holidays
    • Kitchen Tips
No Result
View All Result
TasteVN
No Result
View All Result
Home Cake

How to Make Delicious Salted Egg Mooncakes Using a Convection Oven

by TasteT
41 seconds ago
in Cake
478 15
0
how to make salted egg pastry in a oven delicious 22095
739
SHARES
3.5k
VIEWS
Share on FacebookShare on Twitter
  • Preparation

    1 hour 30 minutes

  • Cooking

    1 hour

  • Difficulty

    Medium

Every Mid-Autumn season, food enthusiasts are divided into two factions. One half loves mooncakes, which have become a hallmark of the full moon in August. The other half goes hunting for pía cakes to enjoy during the moonlit night because they are captivated by the aroma and rich flavor of this unique cake. This autumn, if you haven’t found any cakes, let’s join Cooking Tips to make salted egg pía cakes yourself using a box oven that tastes just like those from the store!

Quick view hide
1 Soak mung beans
2 Cook mung beans
3 Grinding mung beans
4 Cooking the filling
5 Adding glutinous rice flour to mung beans
6 Cook durian
7 Mix the filling
8 Mixing the dough for the pastry
9 Mixing the dough for the filling
10 Roll the cake filling into balls
11 Divide the skin dough and the filling dough of the cake
12 Shaping the dough
13 Shaping the pie
14 Flatten the cake and sprinkle sesame seeds
15 Bake the cake for the first time
16 Brush egg on the surface of the cake
17 Bake the cake for the second time
18 Soften the cake
19 Store the cake

Ingredients for Salted Egg Pía Cake For 10 pieces

Mung beans 150 g Glutinous rice flour 35 g Cooking oil 35 g Sugar 200 g Durian flesh 300 g Candied winter melon 60 g Salted eggs 10 pieces Sanh Ki rose flour 400 g Pork fat 107 g Black sesame 3 tablespoons Chicken egg 1 piece Salt a little

Implementation tools

Oven, pot, non-stick pan (2 pieces), hand blender or blender, parchment paper, dough kneader or mixing whisk, food scale, plastic wrap, rolling pin, dough mat, oil brush

Ingredient image
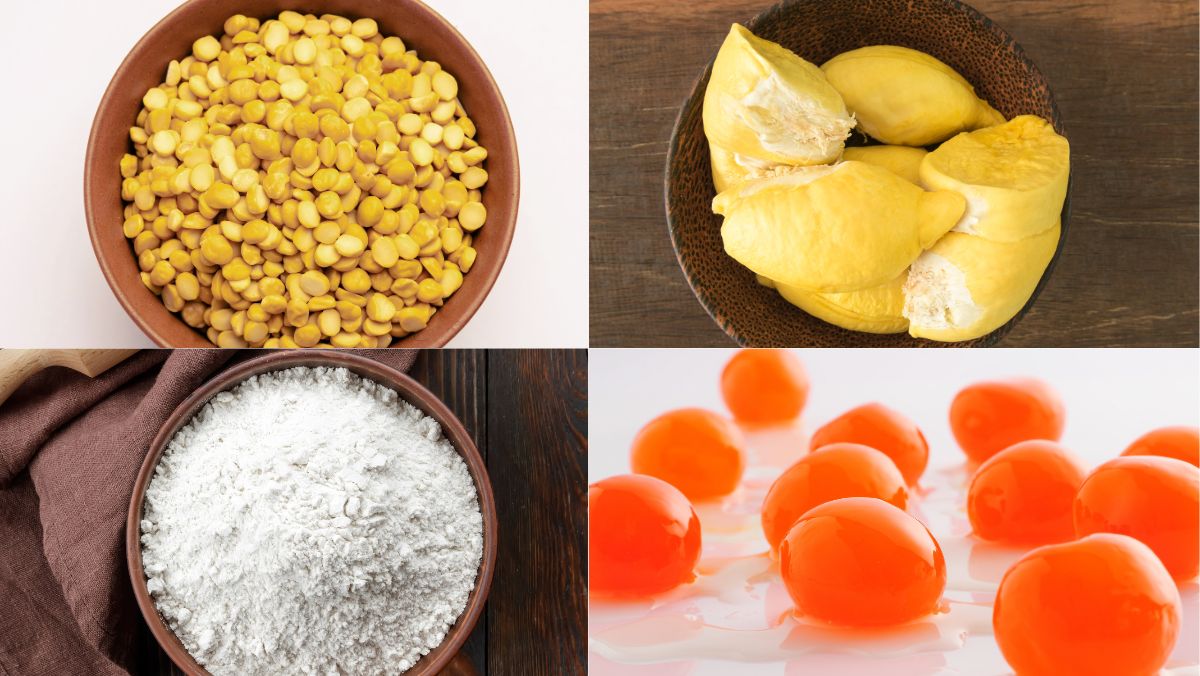
Ingredients for salted egg pie

How to make salted egg pie

  • Soak mung beans

    Choose peeled mung beans, soak them overnight in water, and add a little salt to prevent sourness.
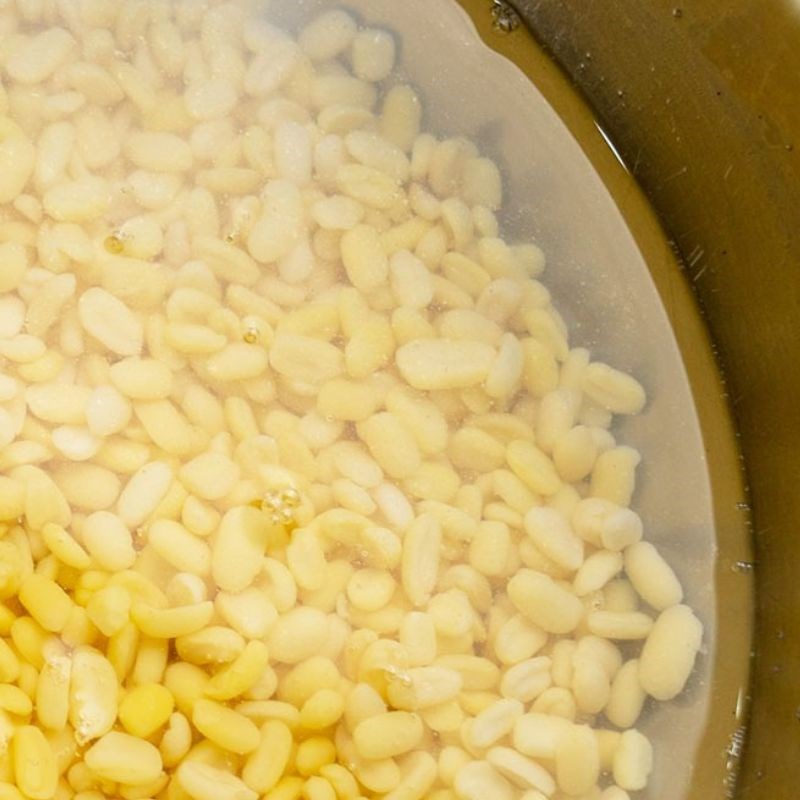

    Step 1 Soak mung beans Salted egg pie
    Step 1 Soak mung beans Salted egg pie
  • Cook mung beans

    After soaking overnight, rinse the mung beans with water.

    Add to a pot with 400 ml water and bring to a boil. When the mung beans are boiling, skim off the foam to preserve the final product longer.

    Cover and reduce the temperature/heat to simmer the mung beans until soft. When the mung beans are soft, add 80g sugar and a little salt, then mix evenly with a mixing whisk.

    Immediately turn off the heat and wait for the mung beans to cool completely.

    Tip: Adding salt to the mung beans while cooking will help the filling have a sweeter and richer flavor.
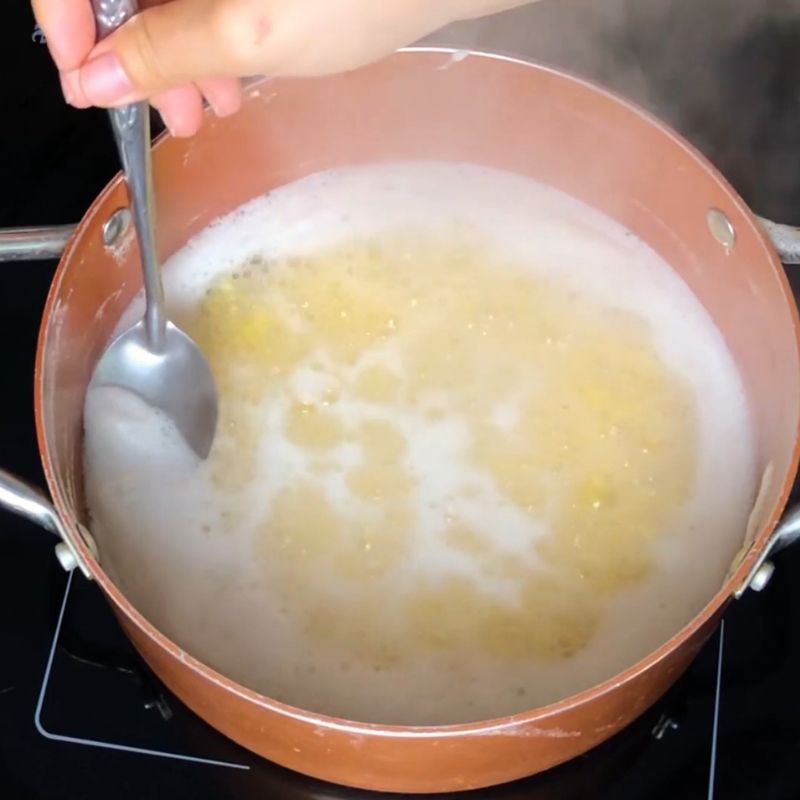
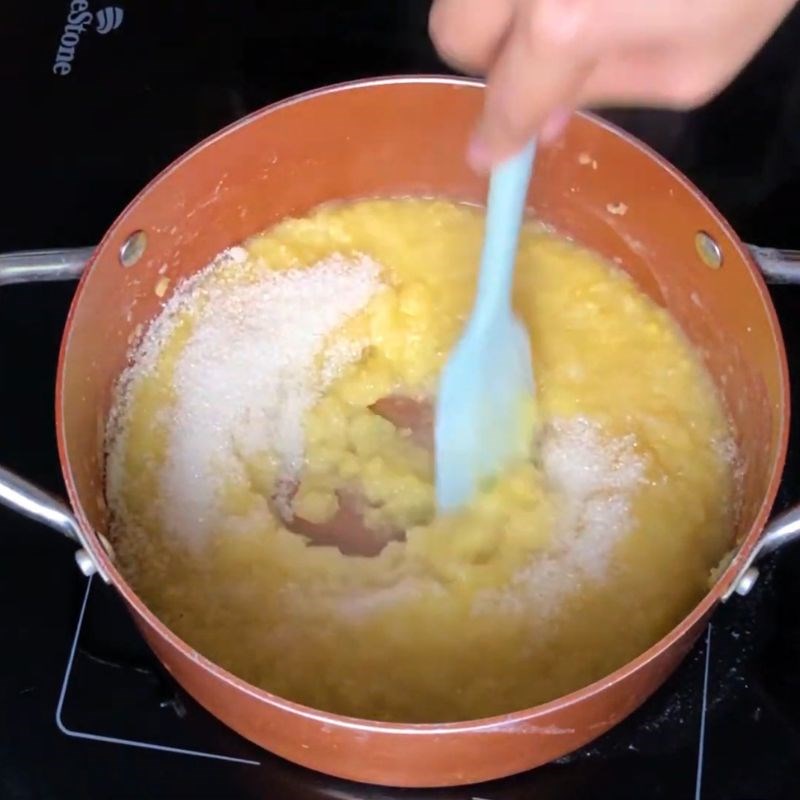
    Step 2 Cooking mung beans Salted egg pia cake
    Step 2 Cooking mung beans Salted egg pia cake
  • Grinding mung beans

    Use a hand blender or a blender to grind the mung beans until smooth.
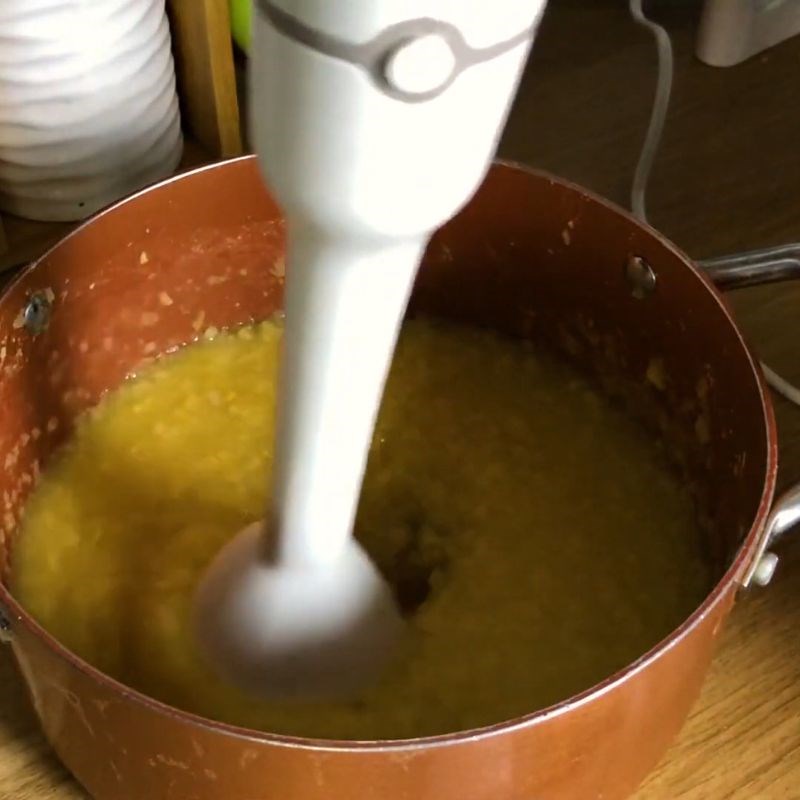
    Step 3 Grinding mung beans Salted egg pia cake
  • Cooking the filling

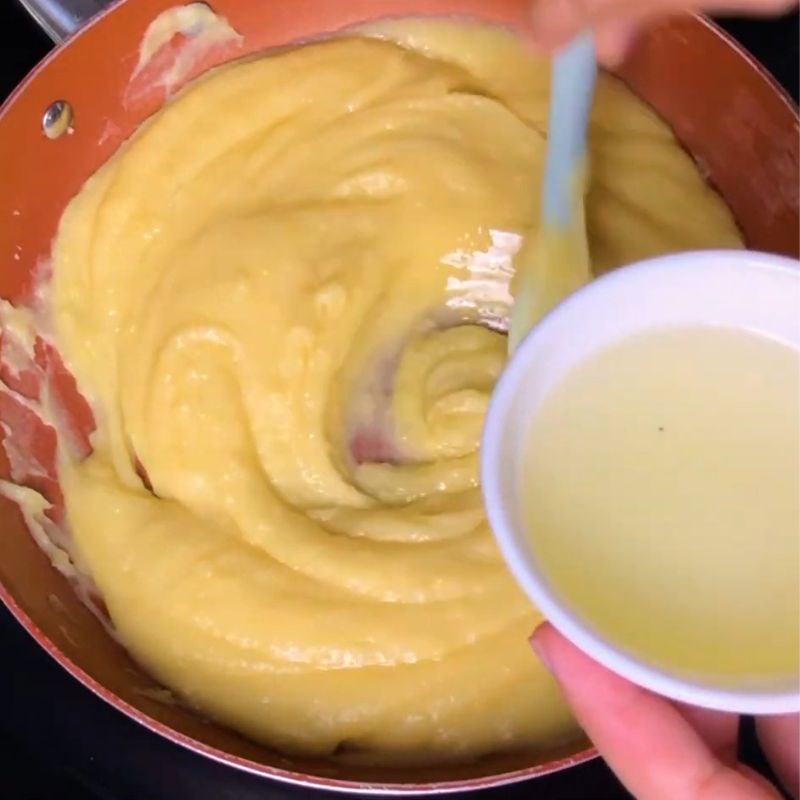
    Add the ground mung beans to a pan, and when the mixture boils, add the cooking oil.

    Reduce the heat, continue stirring to cook the mung beans. Stirring continuously will help prevent the mung beans from burning.

    Note:

    • Add 35g of cooking oil gradually to avoid the filling becoming oily.
    • While adding the oil, you must stir continuously.
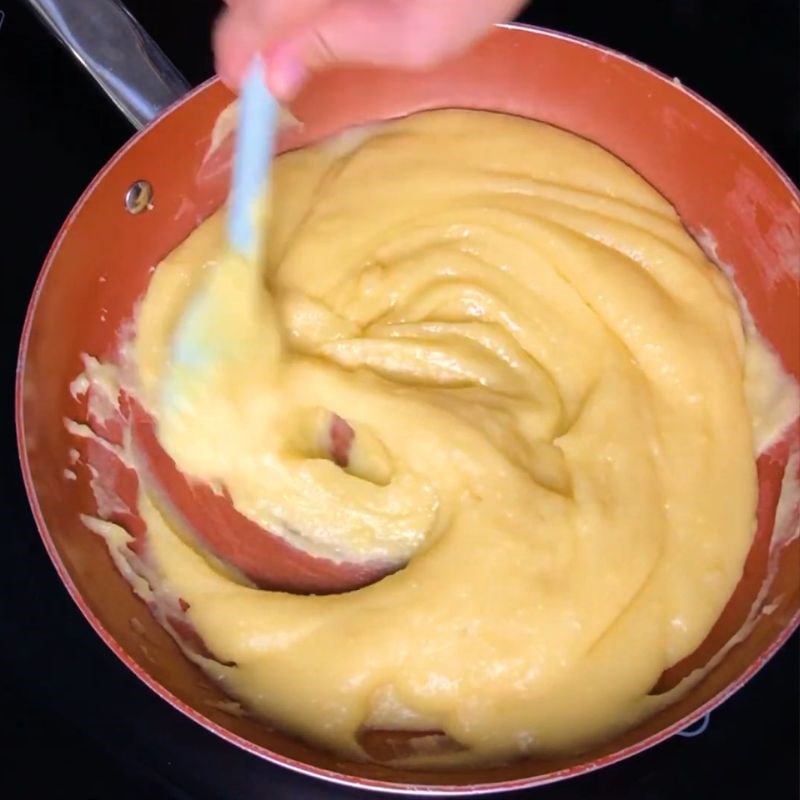
    Step 4 Cooking the filling Salted egg pia cake
    Step 4 Cooking the filling Salted egg pia cake
  • Adding glutinous rice flour to mung beans

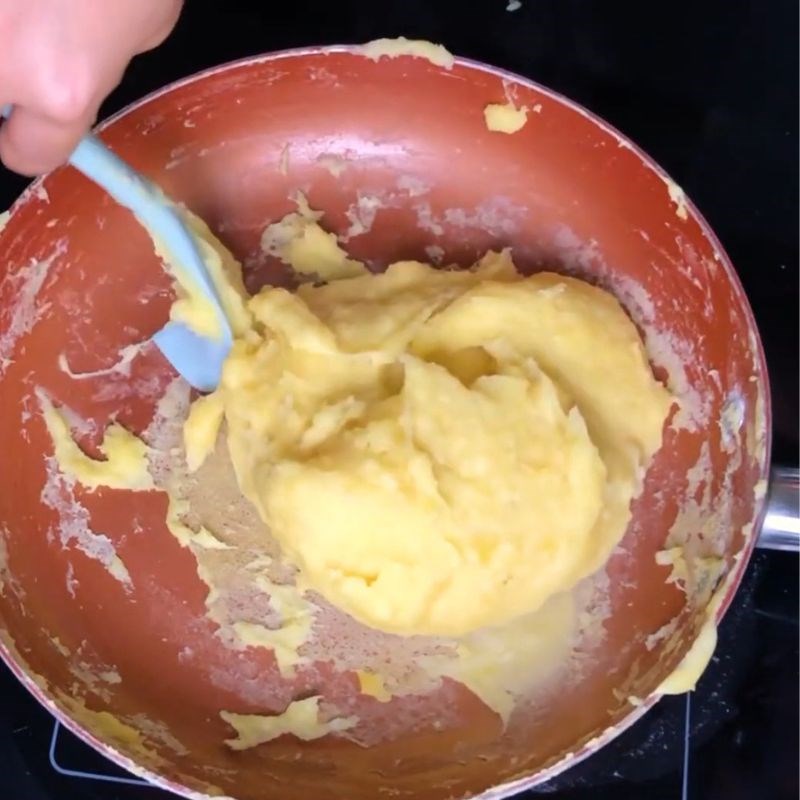
    The glutinous rice flour should also be added gradually like the cooking oil. While adding the flour, you must stir continuously to combine the flour and mung beans.

    Continue to cook until the mung beans separate from the pan, then turn off the heat and let it cool.
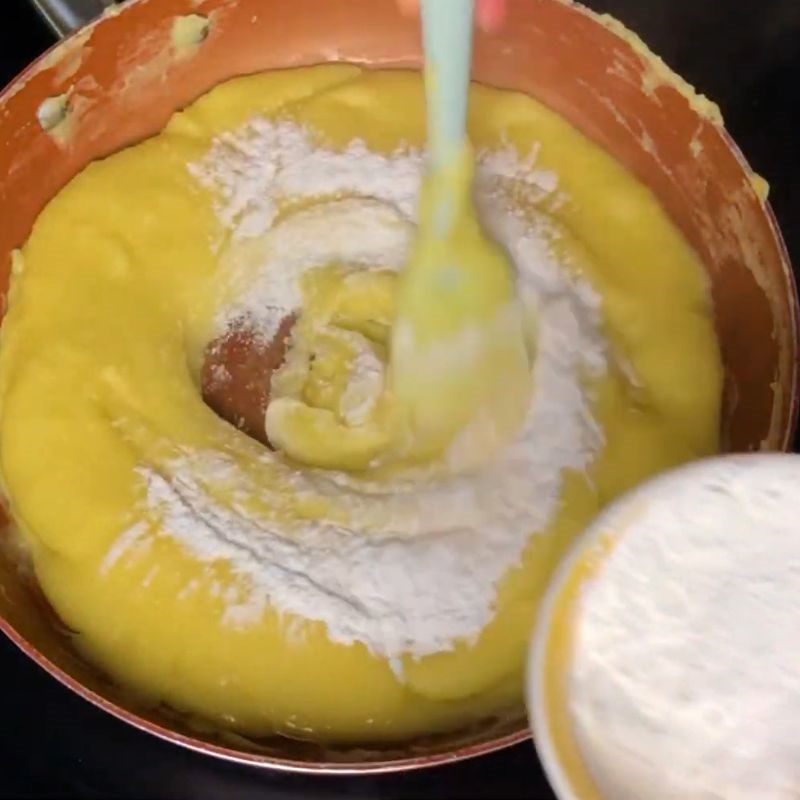
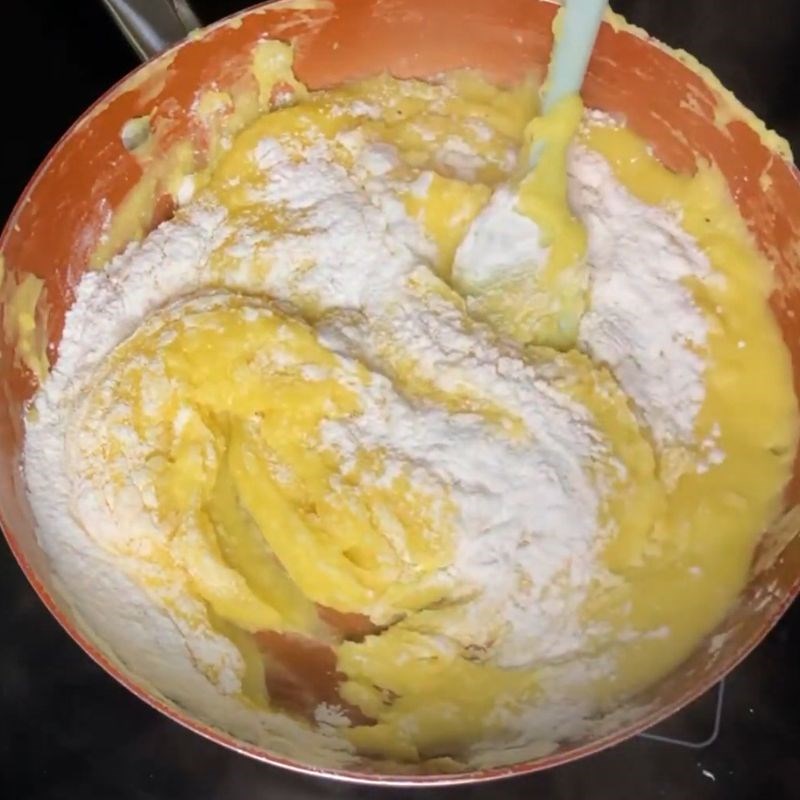
    Step 5 Adding glutinous rice flour to mung beans Salted egg pia cake
    Step 5 Add glutinous rice flour to mung beans Salted egg mooncake
    Step 5 Add glutinous rice flour to mung beans Salted egg mooncake
  • Cook durian

    Add durian flesh to another pan, add 70g of sugar and cook until the sugar completely dissolves, then turn off the heat.
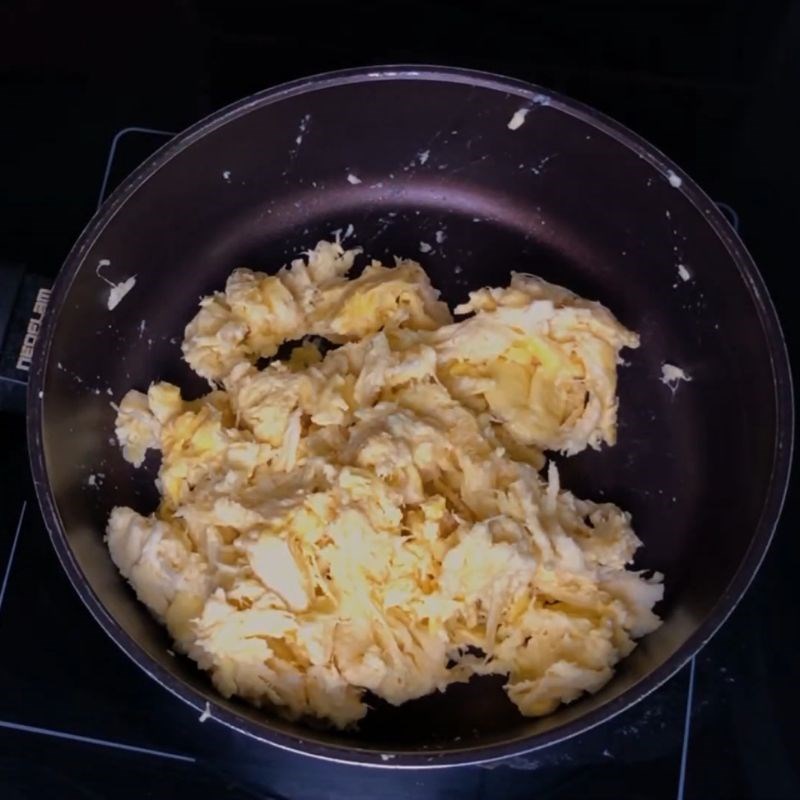
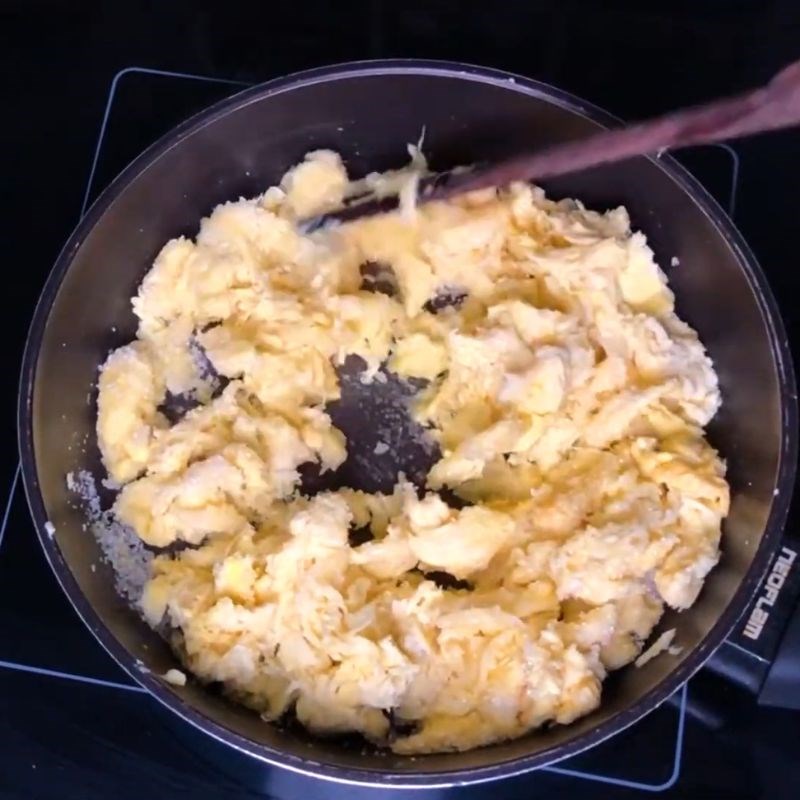
    Step 6 Cook durian Salted egg mooncake
    Step 6 Cook durian Salted egg mooncake
  • Mix the filling

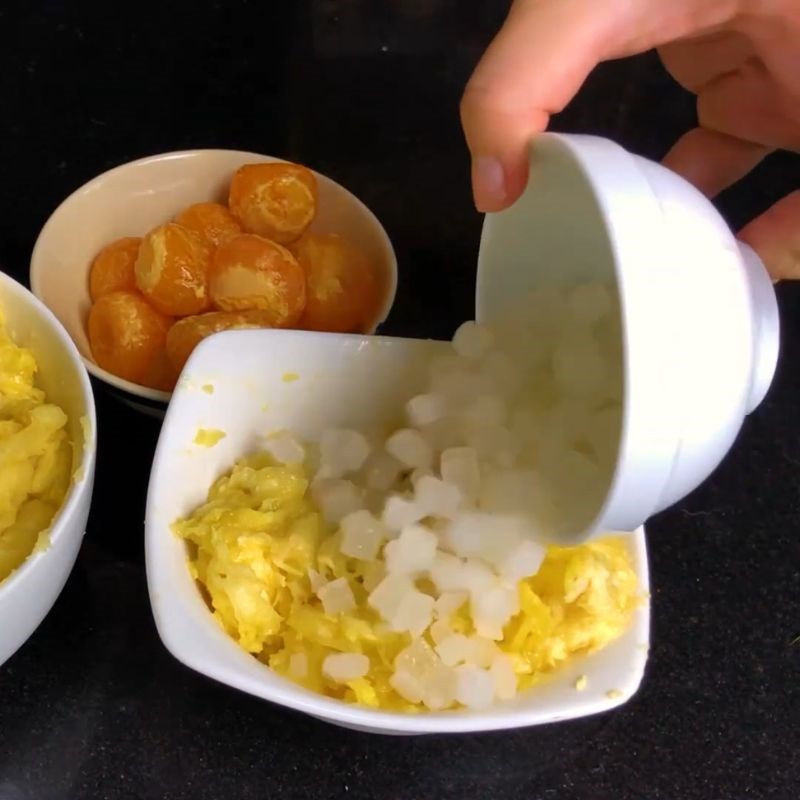
    Take about 2 tablespoons of durian and add it to the mung beans, then mix well.

    Add all the pumpkin jam to the remaining durian.
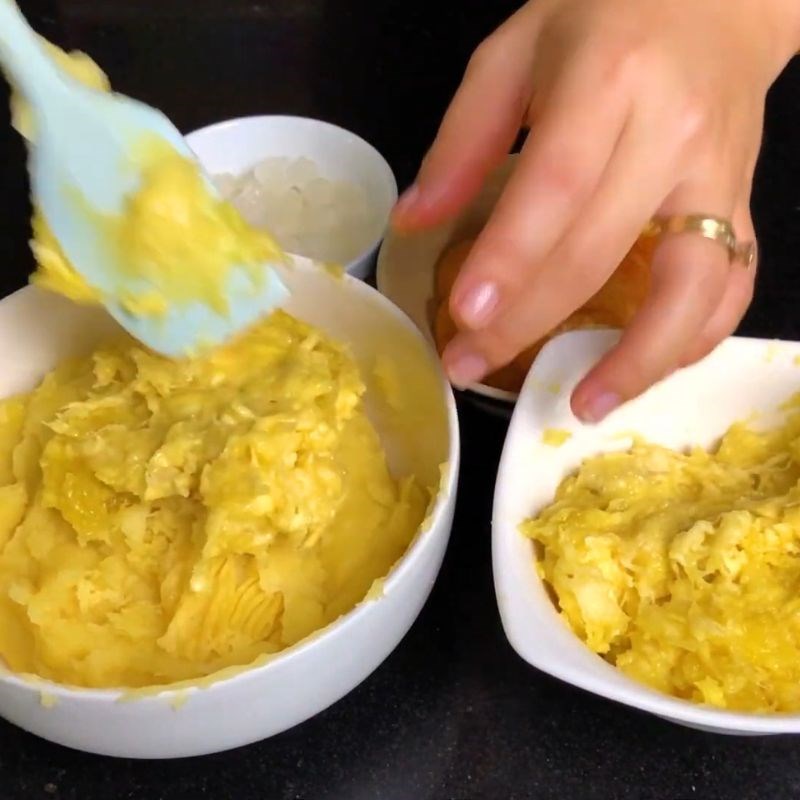
    Step 7 Mix the filling Salted egg mooncake
    Step 7 Mix the filling Salted egg mooncake
  • Mixing the dough for the pastry

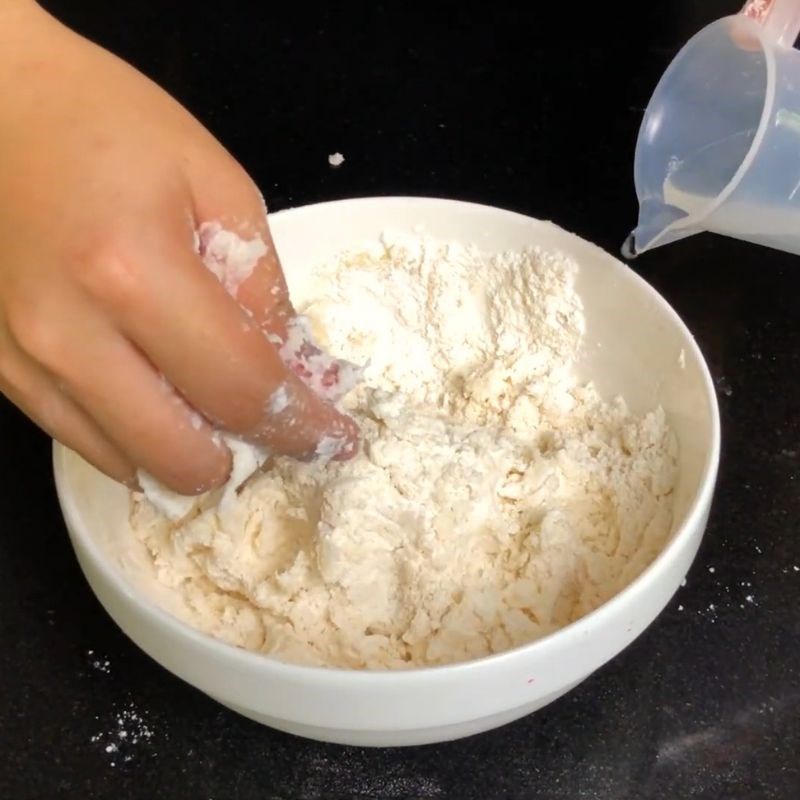
    Mix 50g of sugar into the flour and stir well. Continue adding lard to make the pastry soft, fragrant, and rich.

    Add 90 – 100 ml of water to the flour mixture. Depending on the absorbency of the flour, the amount of water will vary between 90 – 100 ml.

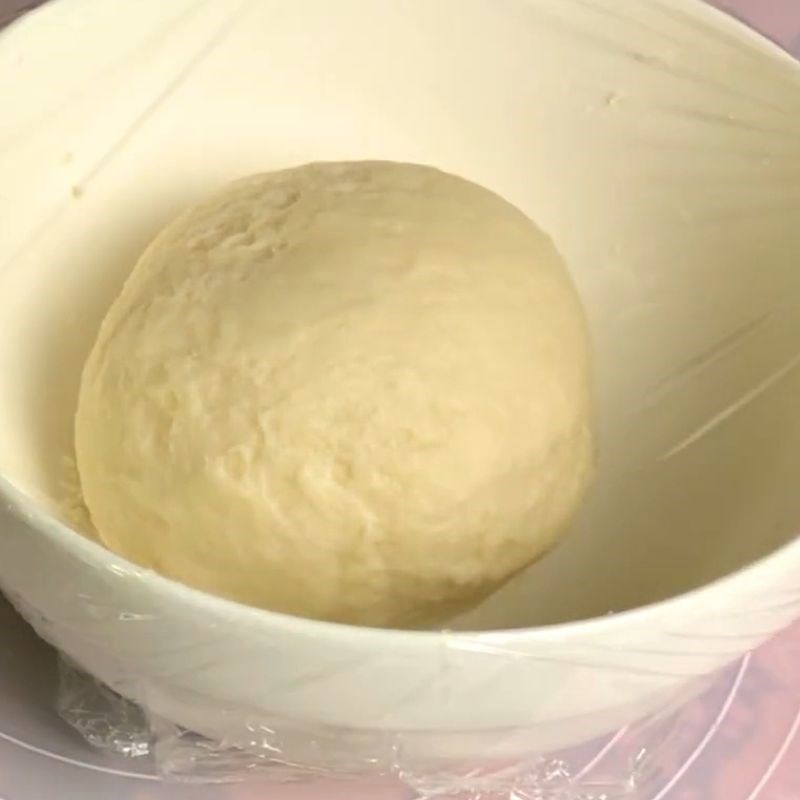
    Knead and press the dough until it no longer sticks to your hands, then let it rest for 30 minutes. Place the dough in a bowl and cover it with plastic wrap.
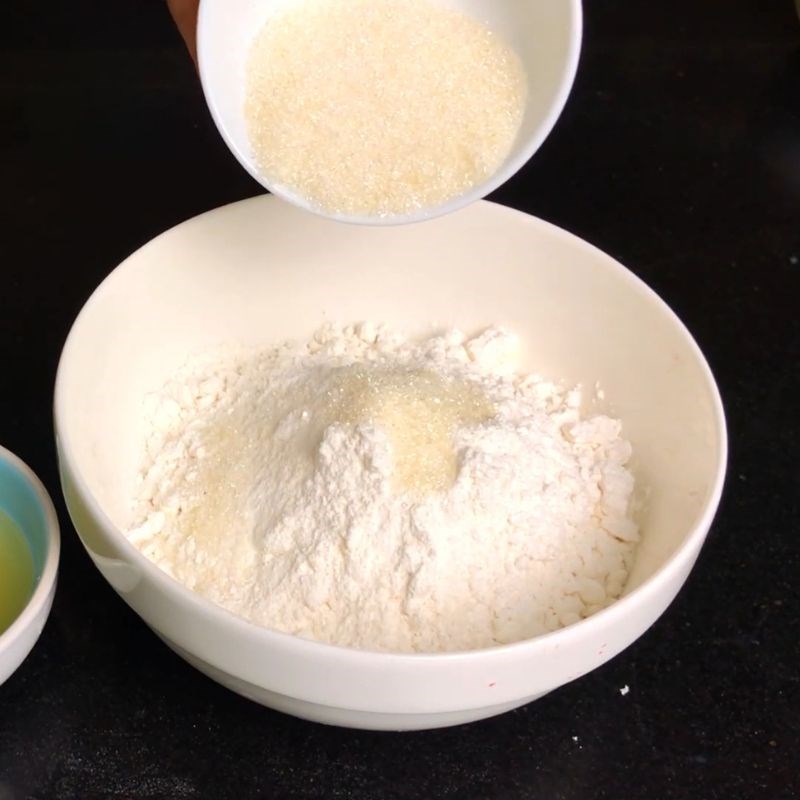
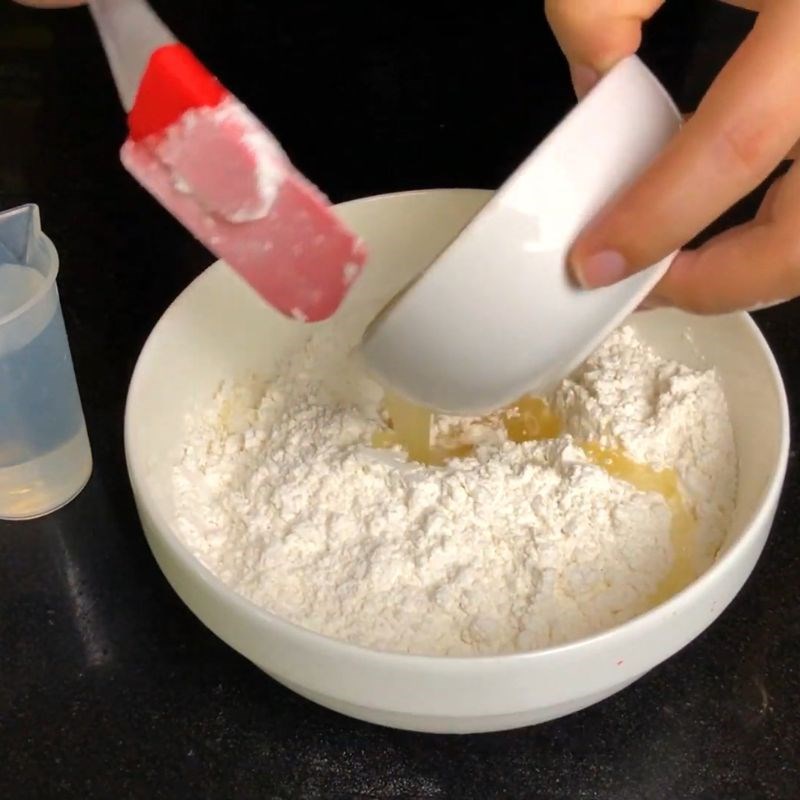
    Step 8 Mixing the dough for the pastry Salted egg pie
    Step 8 Mixing the dough for the pastry Salted egg pie
    Step 8 Mixing the dough for the pastry Salted egg pie
    Step 8 Mixing the dough for the pastry Salted egg pie
  • Mixing the dough for the filling

    Add 62g of lard to 150g of flour and mix well.

    Knead until it no longer sticks to your hands, then let the dough rest for 30 minutes, also stored in a bowl covered with plastic wrap.

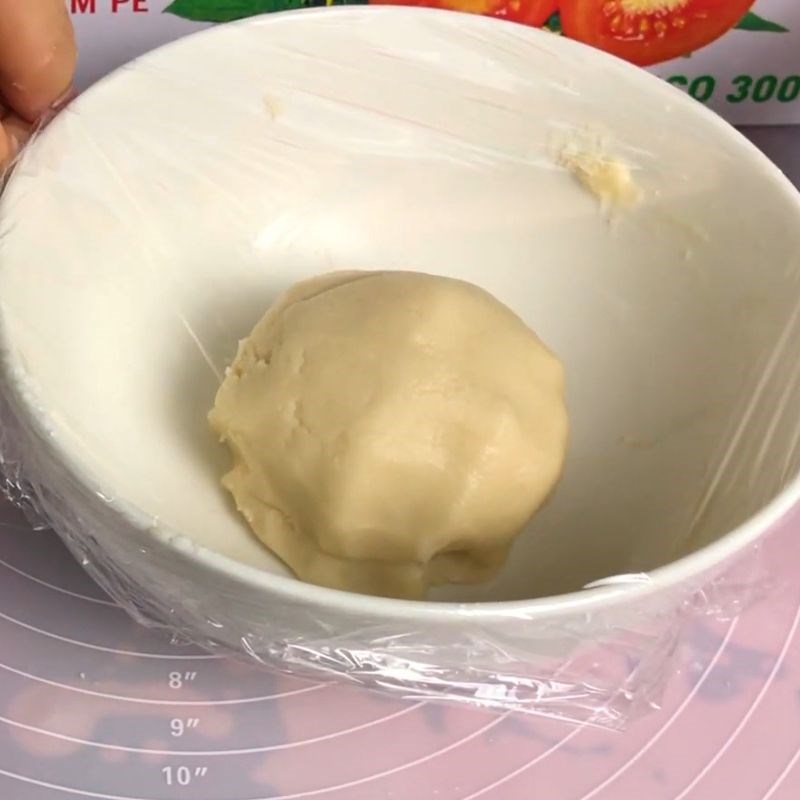
    Step 9 Mixing the dough for the filling Salted egg pie
    Step 9 Mixing the dough for the filling Salted egg pie
  • Roll the cake filling into balls

    Divide the mixture of mung beans and durian into 10 equal parts.

    Apply cooking oil to your hands to prevent sticking, then roll the divided parts into balls.

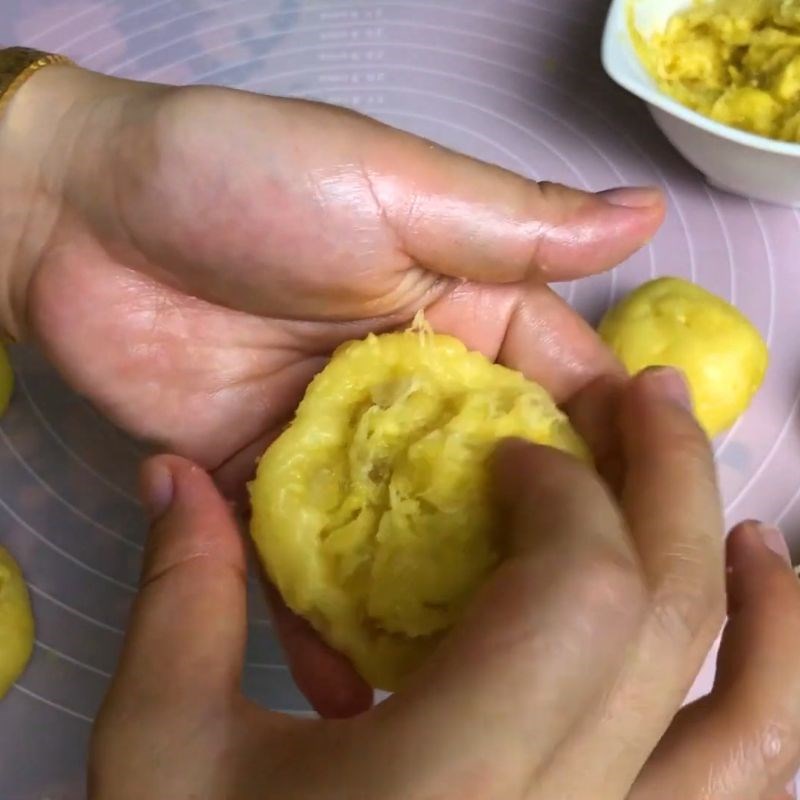
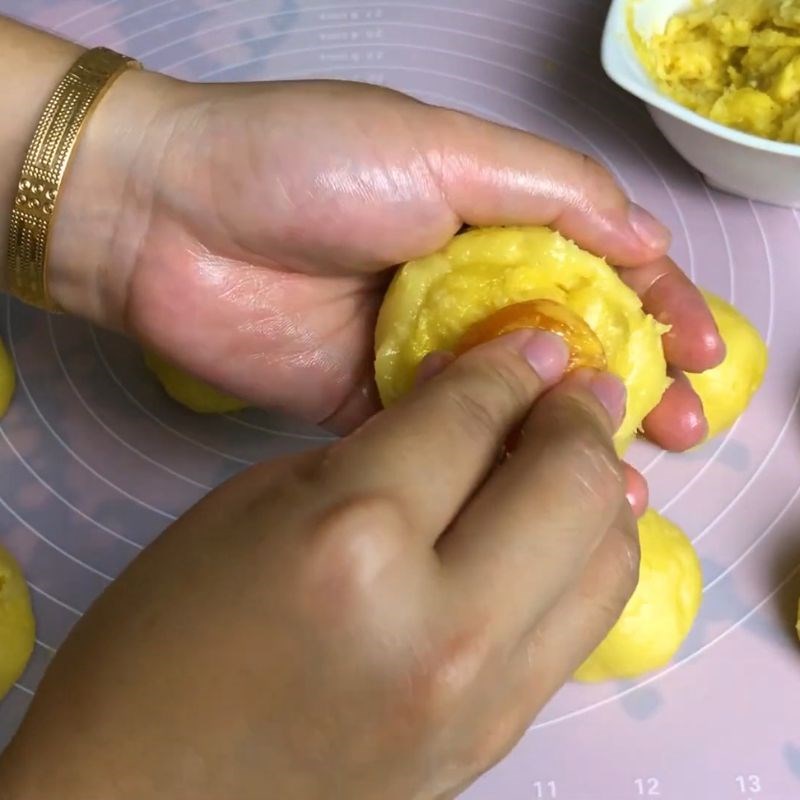
    Create a hole and fill it with the filling consisting of durian and candied squash.

    Use your hands to shape the filling so that it sticks together, then continue to add salted egg yolk in the center.
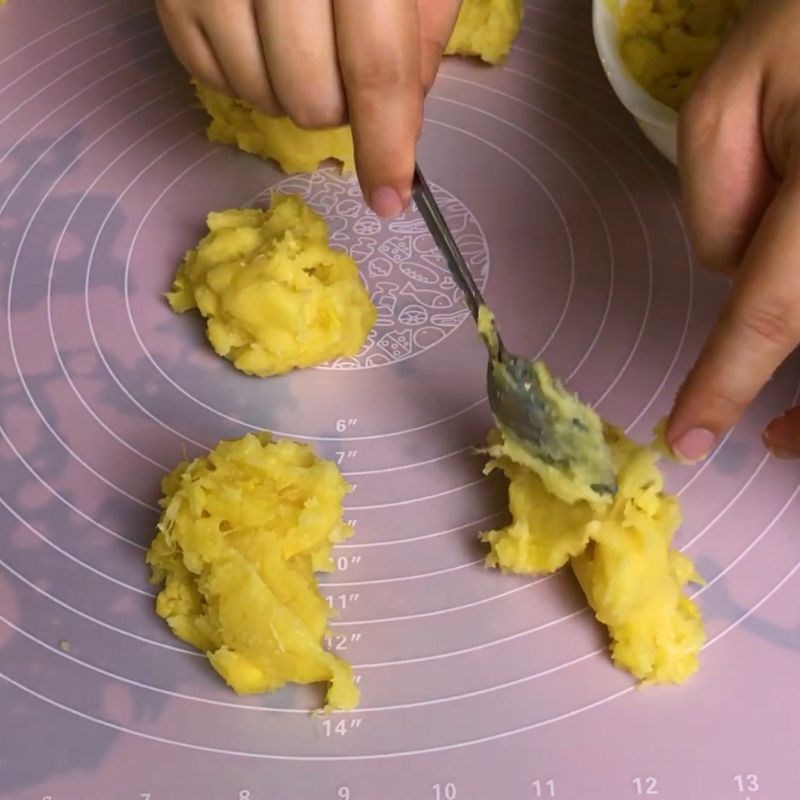
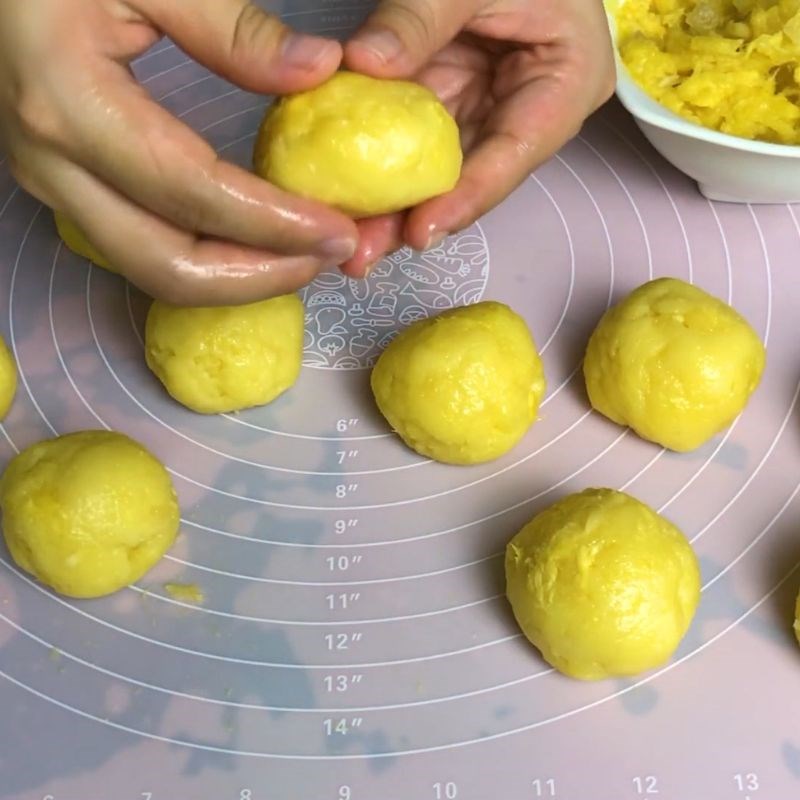
    Step 10 Roll the cake filling into balls Salted egg pía cake
    Step 10 Roll the cake filling into balls Salted egg pía cake
    Step 10 Roll the cake filling into balls Salted egg pía cake
    Step 10 Roll the cake filling into balls Salted egg pía cake
  • Divide the skin dough and the filling dough of the cake

    Weigh the skin dough using a kitchen scale. Take the total weight and divide by 10. Then divide the dough into 10 parts according to the result after division. Do the same for the filling dough.

    Example:

    Weigh the total dough weight as 280g. Take 280g divided by 10 equals 28g. Thus, divide the dough into 10 parts, each part 28g.
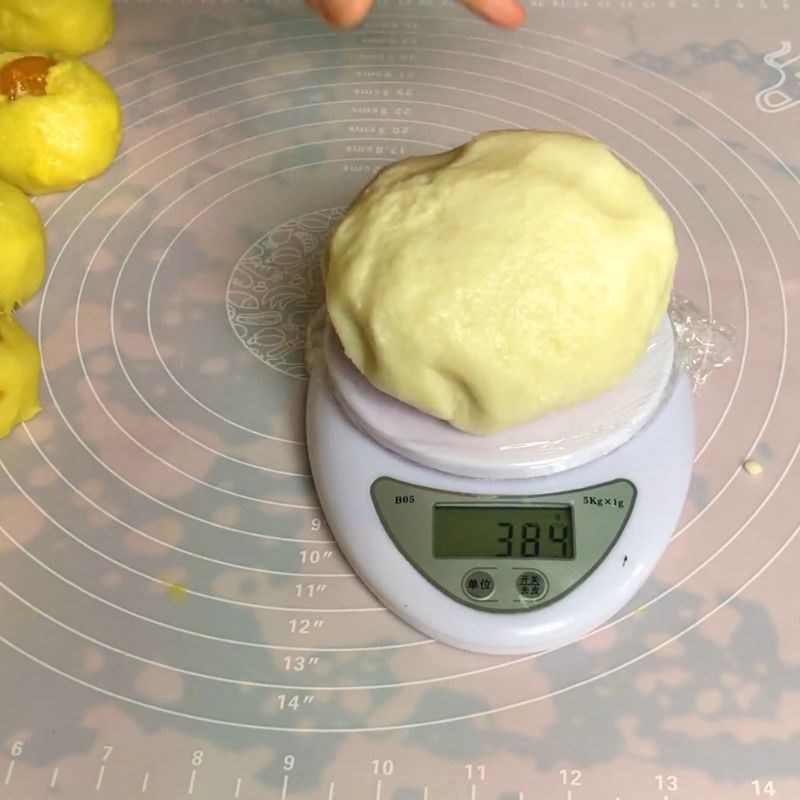
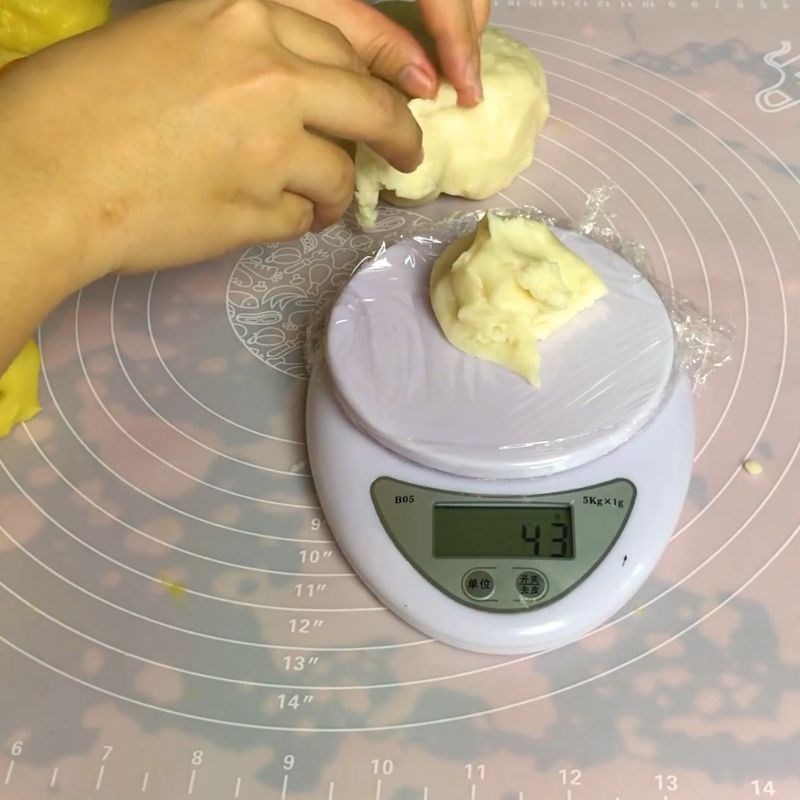
    Step 11 Divide the skin dough and the filling dough of the cake Salted egg pía cake
    Step 11 Divide the skin dough and the filling dough of the cake Salted egg pía cake
  • Shaping the dough

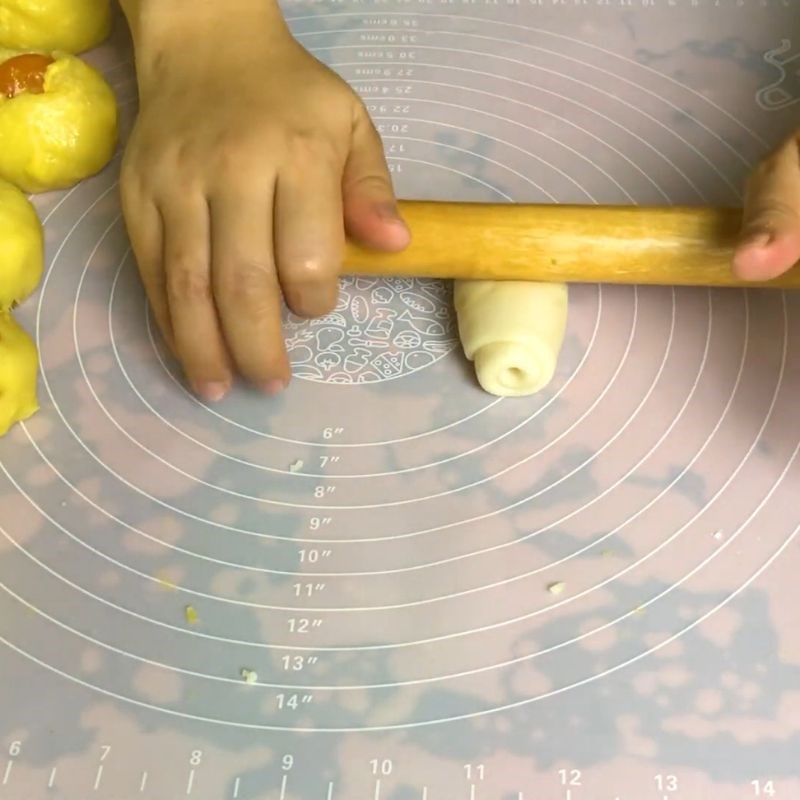
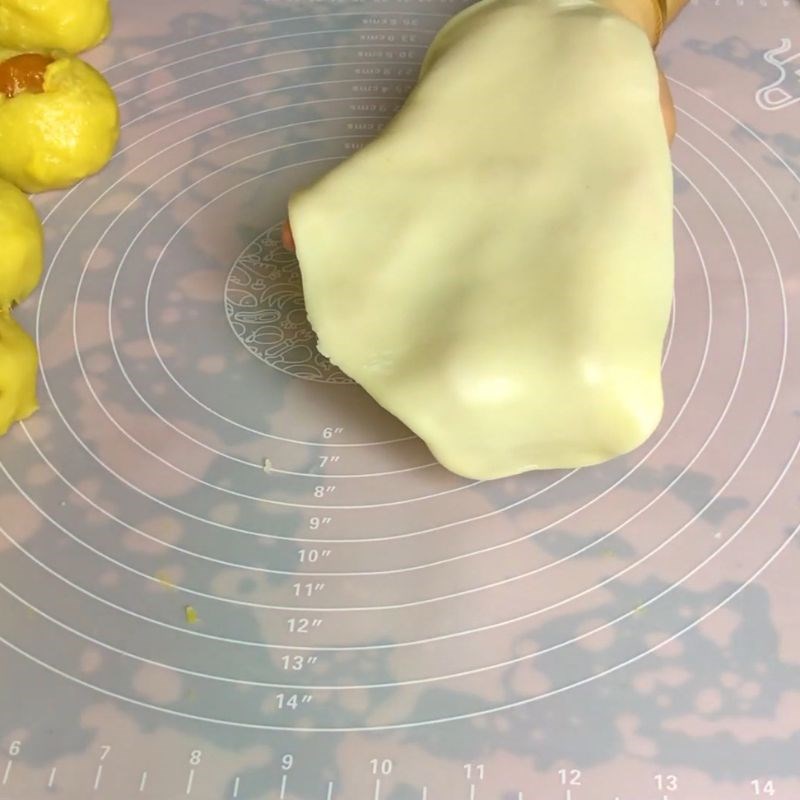
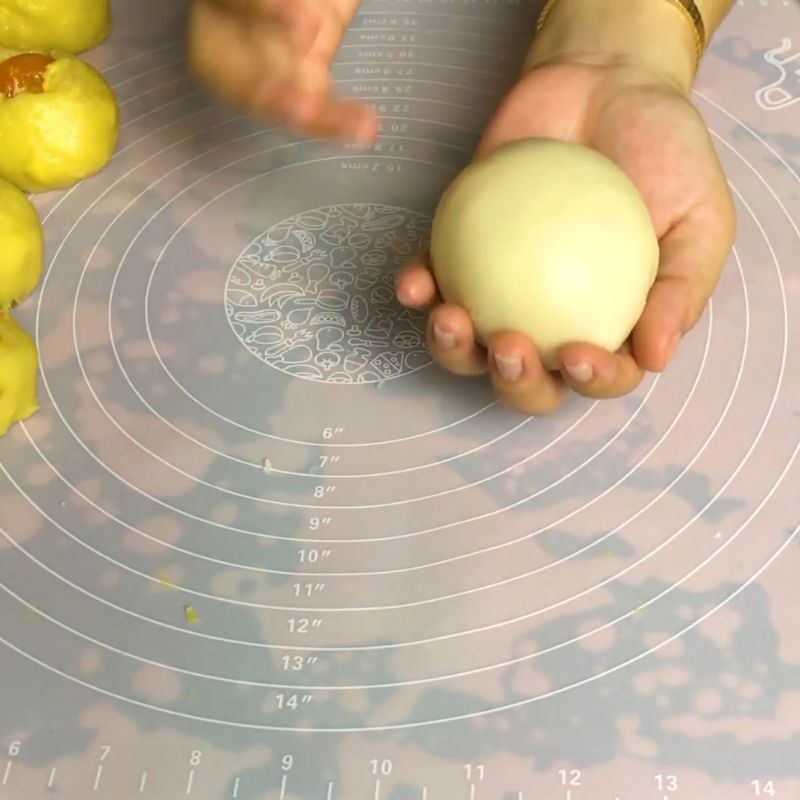
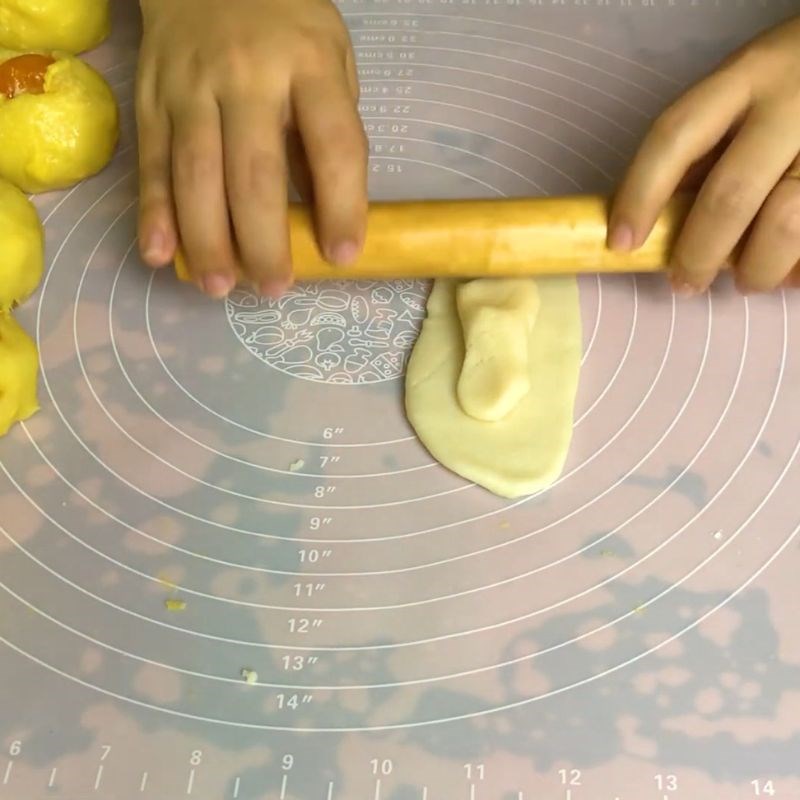
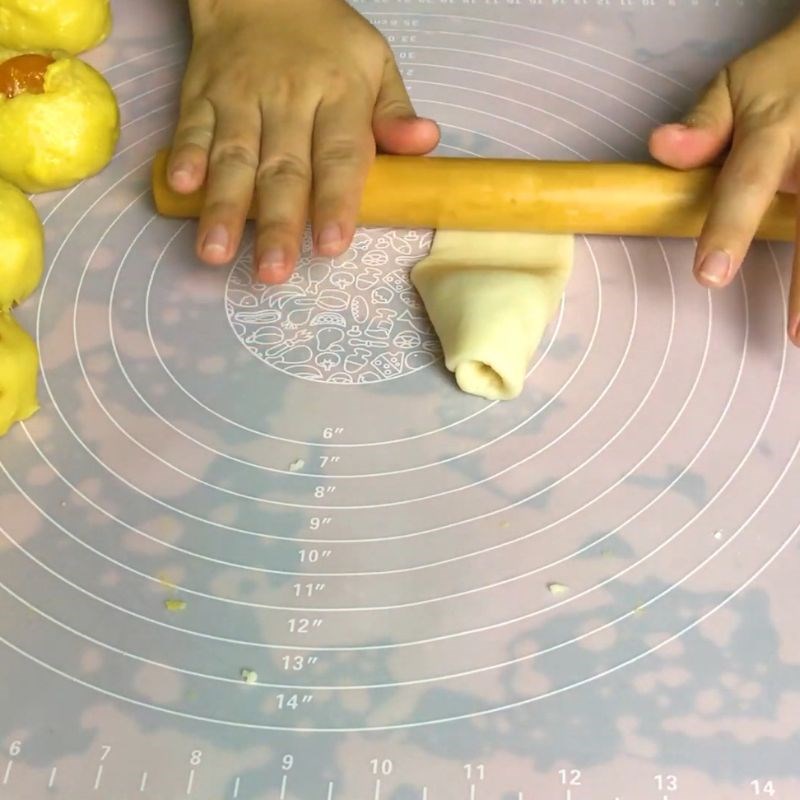
    Take the dough for the crust and roll it flat, then stack the filling dough on top and roll it flat again. After that, roll the dough piece up and then roll it flat. Repeat this process one more time.

    For the second rolling, make sure to roll the dough so that it has a wider cross-section to properly encase the filling.

    Tip: Rolling the dough up and rolling it out twice helps create multiple layers in the final product.
    Step 12 Shaping the dough Salted egg pie
    Step 12 Shaping the dough Salted egg pie
    Step 12 Shaping the dough Salted egg pie
    Step 12 Shaping the dough Salted egg pie
  • Shaping the pie

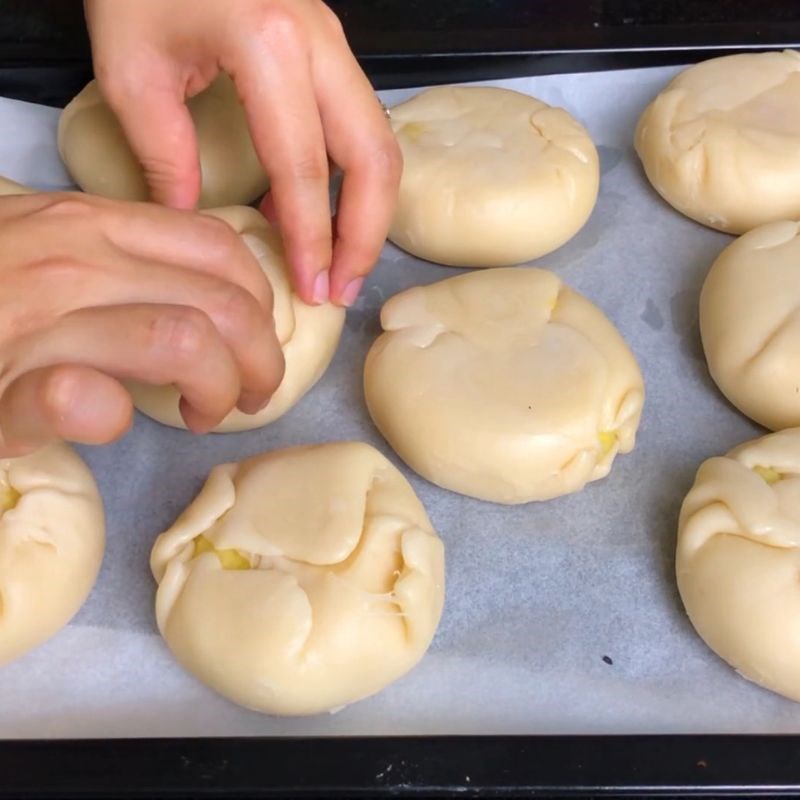
    Place the rounded filling into the dough piece and use your hands to shape it so that the crust completely encloses the filling.

    Step 13 Shaping the pie Salted egg pie
    Step 13 Shaping the pie Salted egg pie
    Step 13 Shaping the pie Salted egg pie
  • Flatten the cake and sprinkle sesame seeds

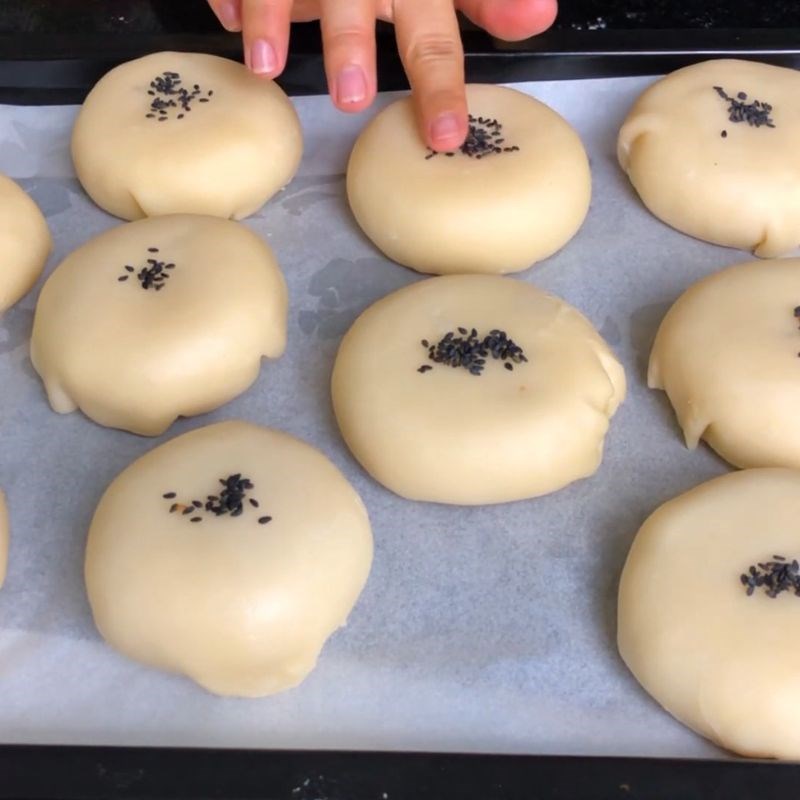
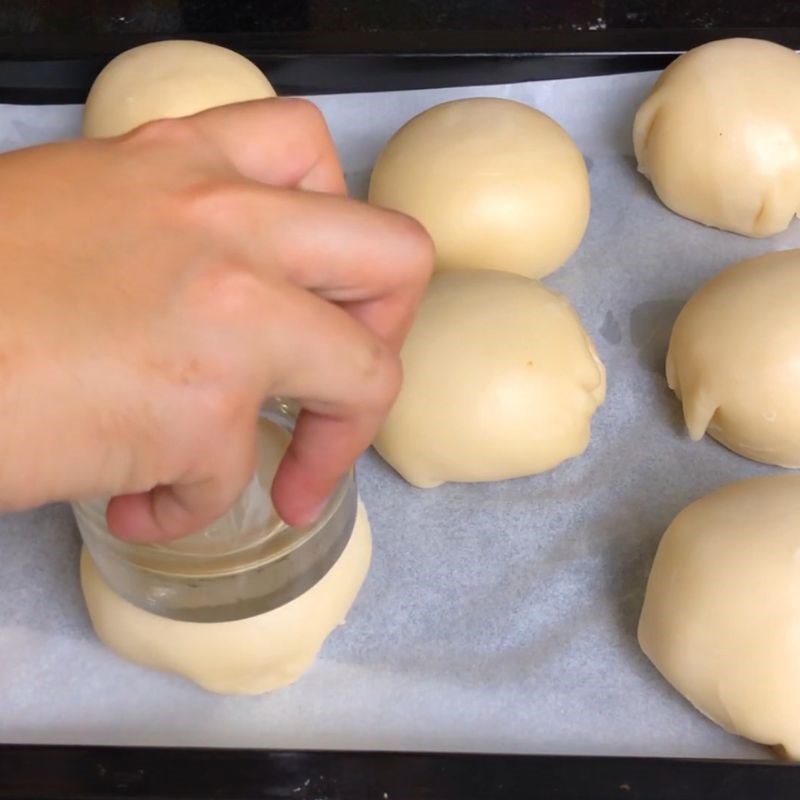
    Line a baking tray with parchment paper and place the cake on it.

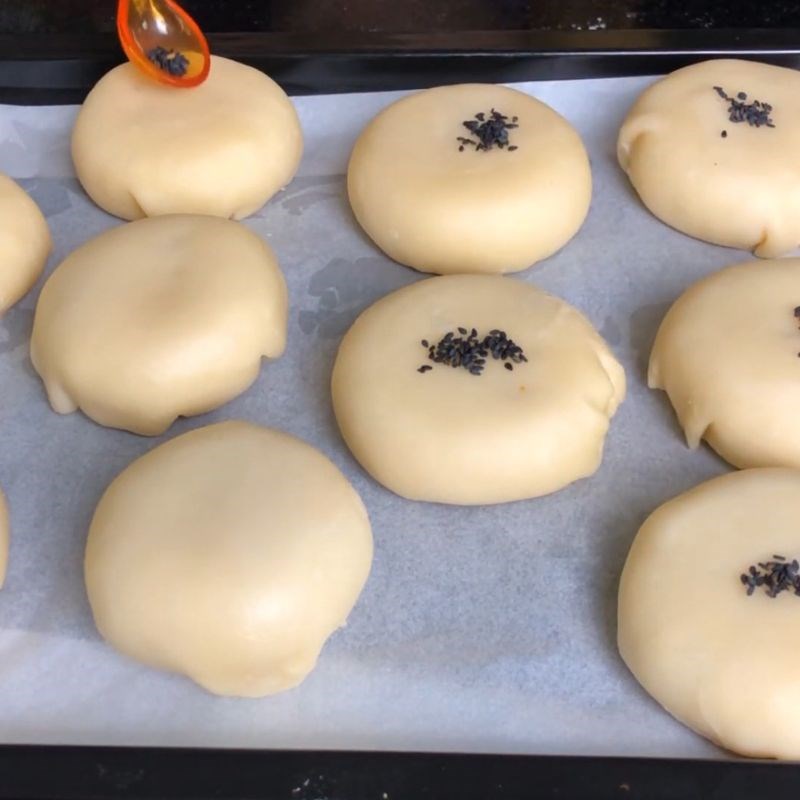
    Use the bottom of a glass to gently press down so that the cake takes on a flat shape like the finished product from the shop.

    Sprinkle black sesame seeds on the surface of the cake and use your hand to gently press down so the seeds stick to the cake.
    Step 14 Flatten the cake and sprinkle sesame seeds Salted egg pie
    Step 14 Flatten the cake and sprinkle sesame seeds Salted egg pie
    Step 14 Flatten the cake and sprinkle sesame seeds Salted egg pie
  • Bake the cake for the first time

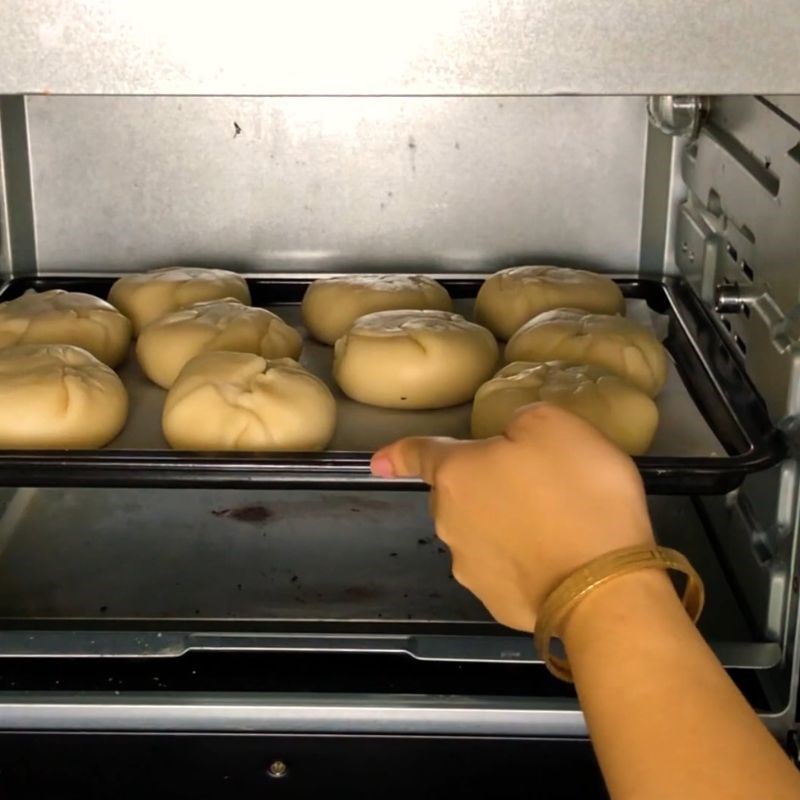
    Flip the cake over so that the side with the sesame seeds is facing down.

    Preheat the oven to 200 degrees Celsius for 15 minutes.

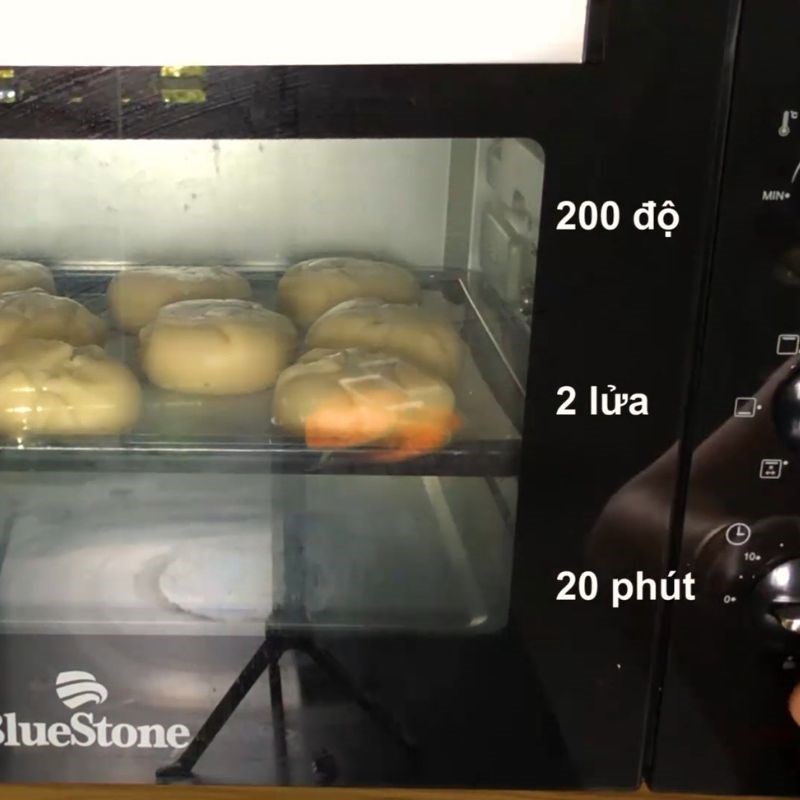
    Place the baking tray in the middle rack of the oven, close the door, and select the following settings:

    • Temperature: 200 degrees Celsius
    • Mode: Top and bottom heating (If your oven does not have this mode, just choose top or bottom heating and turn the cake while baking to ensure even cooking)
    • Time: 20 minutes
    Step 15 Bake the cake for the first time Salted egg pie
    Step 15 Bake the cake for the first time Salted egg pie
    Step 15 Bake the cake for the first time Salted egg pie
  • Brush egg on the surface of the cake

    After baking the cake for 20 minutes, take it out of the oven.

    Beat 1 egg, then brush a thin layer of egg on the surface of the cake that has sesame seeds.

    Tip: The layer of egg brushed on the cake should not be too thick as it will make the surface of the cake easily crack and not look nice.
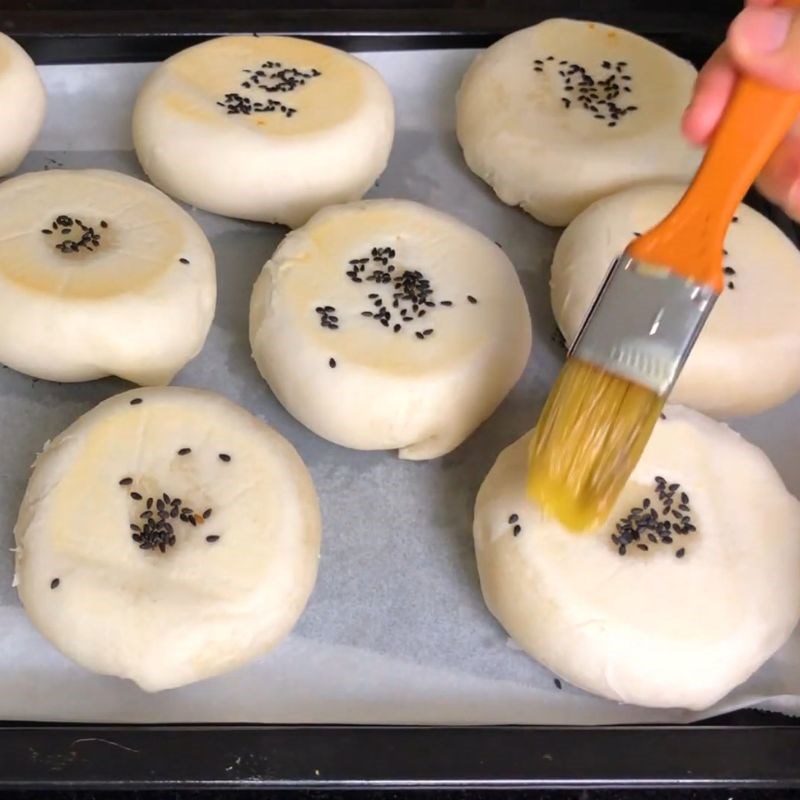
    Step 16 Brush egg on the surface of the cake Salted egg pie
  • Bake the cake for the second time

    After brushing the egg on the surface of the cake, leave it as is and then bake it for the second time.

    For this baking, the parameters will be adjusted as follows:

    • Temperature: 180 degrees Celsius
    • Time: 7 minutes
    Step 17 Bake the cake for the second time Salted egg pie
  • Soften the cake

    After completing the baking process, put it in the refrigerator in the cooling compartment and let it sit overnight. This step helps the cake crust to be softer and more flexible.
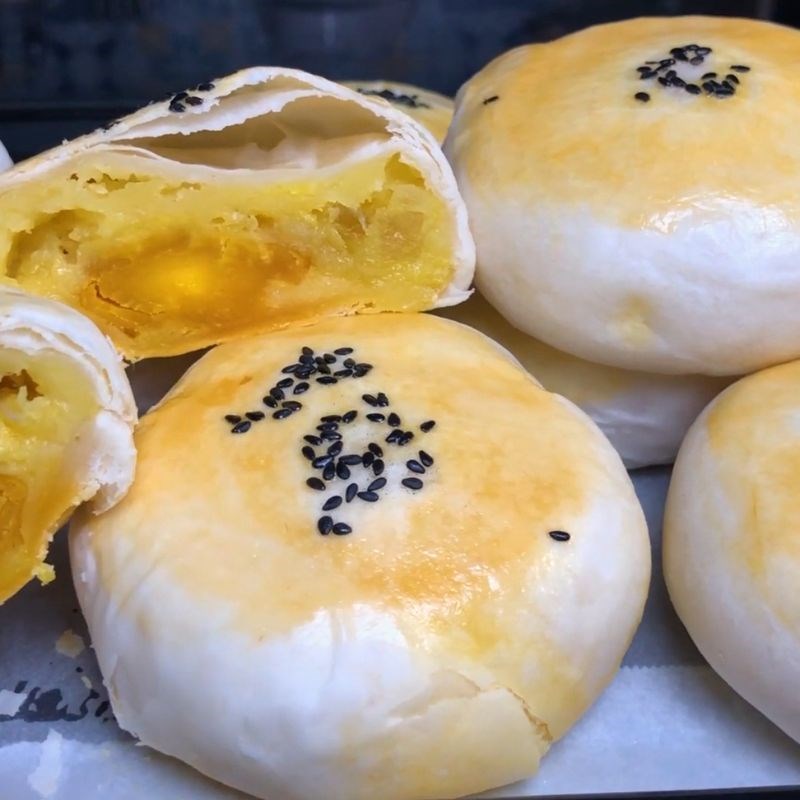
    Step 18 Soften the cake Salted egg pie
  • Store the cake

    If storing the cake in the refrigerator, it can be eaten within 7 days.

    If storing the cake in the freezer, the storage time is 1 month.
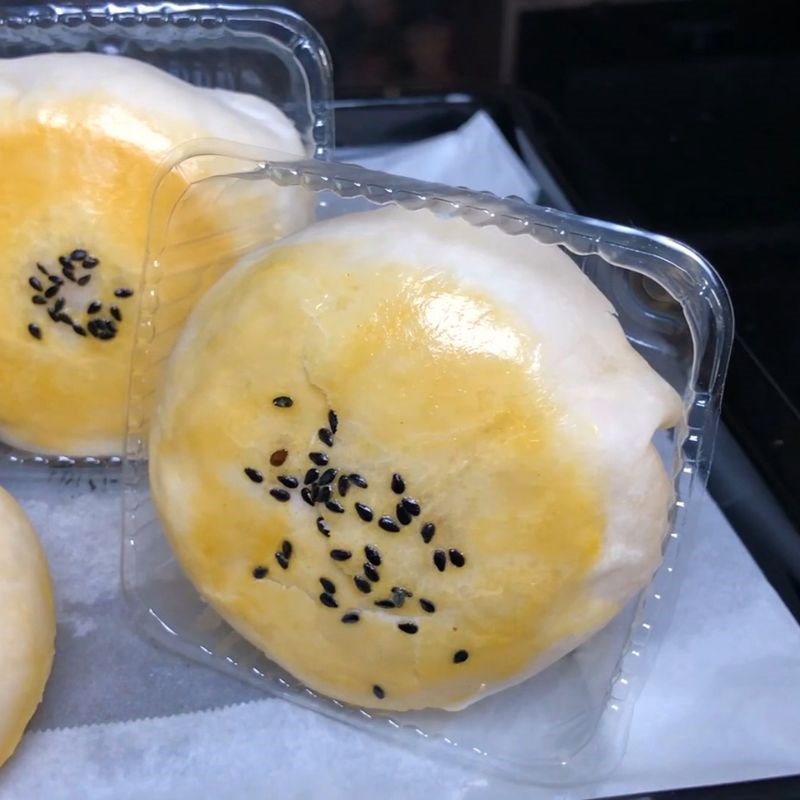
    Step 19 Store the cake Salted egg pie

See more:

  • The simplest and most delicious way to make durian mung bean cake
  • Delicious and simple recipe for mooncake with coconut milk filling
  • Delicious and easy recipe for red bean cake

This Mid-Autumn Festival, if you don’t like eating mooncakes, then try making salted egg pía cake to treat yourself, your family, and friends!
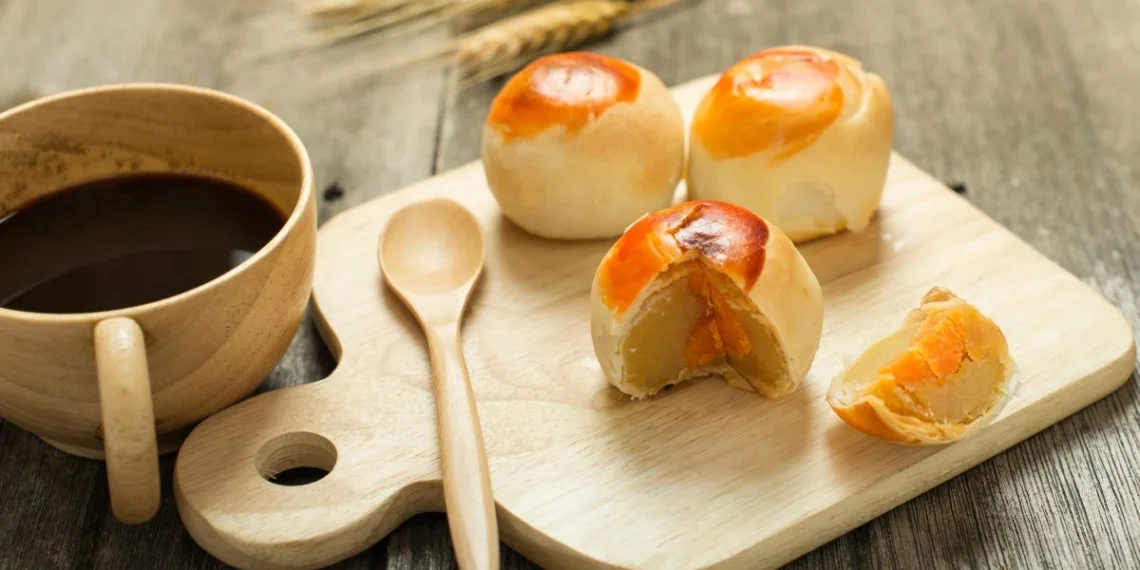
Cooking time: 60 minutes
Level: Medium
Tags: pía cakesalted egg durian mung bean pía cakesalted egg durian pía cakesalted egg filling pía cakesalted egg pía cake
Previous Post

Simple okra juice recipe supports joint health

TasteT

TasteT

I am a food writer specializing in Vietnamese cuisine, sharing traditional recipes, cooking tips, and the culture behind every dish. My goal is to bring the authentic flavors of Vietnam to your kitchen.

Related Posts

No Content Available

Leave a Reply Cancel reply

Your email address will not be published. Required fields are marked *

Navigate

  • About
  • Privacy Policy
  • Contact

Recent Recipes

How to Make Delicious Salted Egg Mooncakes Using a Convection Oven

How to Make Delicious Salted Egg Mooncakes Using a Convection Oven

Simple okra juice recipe supports joint health

Simple okra juice recipe supports joint health

Browse by Category

  • Beef Dishes
  • Beverages
  • Braised Food
  • Cake
  • Chicken Dishes
  • Desserts
  • Dried and Fermented Dishes
  • Festivals & Holidays
  • Fried Food
  • Grilled Food
  • Hot Pot
  • Ice Cream
  • Juices
  • Kitchen Tips
  • Liquid Dishes
  • Milk Tea
  • Porridge
  • Rolls and Salads
  • Salad
  • Smoothies
  • Snacks
  • Soup
  • Steamed Food
  • Stir-fried Dishes
  • Sweet Soup
  • Vegetarian Dishes

Browse by Ingredients

beef beef stew braised fish cake dish dessert fried dish grilled dishes how to cook porridge how to make cake how to make ice cream into the kitchen mixed salad dish noodle soup snacks soup dish sponge cake steamed dish stir-fried dish stir-fried noodles vegetarian dish

© 2024 TasteVN - The ultimate Vietnam food destination for cooking tips, recipes, and more.

Welcome Back!

Login to your account below

Forgotten Password?

Retrieve your password

Please enter your username or email address to reset your password.

Log In
No Result
View All Result
  • Home
  • Main Dishes
    • Beef Dishes
    • Braised Food
    • Fried Food
    • Steamed Food
    • Stir-fried Dishes
    • Soup
    • Grilled Food
    • Hot Pot
    • Liquid Dishes
    • Chicken Dishes
    • Dried and Fermented Dishes
    • Vegetarian Dishes
    • Porridge
  • Desserts
    • Cake
    • Ice Cream
    • Sweet Soup
    • Desserts
  • Beverages
    • Beverages
    • Juices
    • Milk Tea
    • Smoothies
  • Snacks
    • Rolls and Salads
    • Salad
    • Snacks
  • Tips & Holidays
    • Festivals & Holidays
    • Kitchen Tips

© 2024 TasteVN - The ultimate Vietnam food destination for cooking tips, recipes, and more.